Some might remember the definition of pressure from a Physics course. Pressure is a numerical expression of the effect of a body on a square meter of surface, which is expressed in units of "p" (Pa).
The calculation formula is written as follows: p = F/A, where «F» is the force and «A» is the area. The equation can be written a little differently 1 Pa = 1N/m2 (N is the Newton unit).
The meaning of this is that the pressure per unit area increases with increasing force or with decreasing area. You should remember these two things as we will come back to this again.
There are many nuances in sharpening and beginners make mistakes. Excessive pressure is one of the most common ones, along with not spending enough time to sharpen, selection of the wrong angle, selection of a too coarse abrasive, and failing to maintain abrasive hygiene.
Sharpening as a process is a set of steps designed to give a knife the ability to cut if it is untreated or dull.
Image. 1 Dull blade
During profiling with a coarse abrasive and sharpening with a finer abrasive, removing metal can leave scratches and grooves.
Image. 2 The blade after profiling with a coarse abrasive.
You will straighten out and fix all irregularities on the metal surface during the next stage - finishing.
To understand exactly what is happening on the cutting surface when you put pressure during sharpening, you need to pay attention to the way the bevel looks like or check the result with a magnifying glass with a large magnification factor.
During sharpening, the contact of abrasive with steel and mechanical impact causes plastic deformation in the surface layers of the metal due to dynamic loads. Micro-volume structural changes on the surface of solid objects during contact are closely related. You could also say that the abrasive and the blade steel adapt to each other. There is an acceptable range of loads for each of the materials.
You can tell the compatibility of a particular abrasive with a particular type of steel by examining how they work together. Meaning that the abrasive bar removes a certain amount of steel, followed by a certain sound and tactile response that you can feel on the knife blade if you sharpen manually. If you use a sharpener, you will feel this going through the abrasive holder and then into your hand.
Image. 3 Blade after sharpening with a finer abrasive sharpening stone
In the best case scenario, the abrasive should gradually and carefully remove the steel without jolts. This is what proper abrasive compatibility with steel means. This is what they call sharpening. In the future, if the sharpening stone starts to slide, you will need to refresh its surface or change the whole stone.
Image. 4 Blade after finishing
With further finishing, the surface of the steel gets harder and less ductile at the micro level. Excessive hardening can cause particles to separate from the metal surface and with too much pressure this can lead to unwanted scratches and and cause further destruction of the cutting edge.
Image. 5 Uneven scratches
Example: the weight and pressure of the bar at the point of contact per square millimeter on the flat area of the blade is less than that on the belly, so you have to be especially careful during the finishing stage.
Image. 6 Areas of different pressure on the cutting edge: 1 - belly area with high pressure and 2 – blade flat with lower pressure
The fixed angle guided sharpeners have a much lower pressure, compared to hand sharpening, so you only need to hold and move the abrasive holder, while the stone works.
The increased pressure causes metal particles to stick to the surface of the abrasive bar and fill its pores, which leads to clogging and a noticeable loss of efficiency of the sharpening stone.
Image. 7 Clogged sharpening stone
On top of that, abrasive grits can dig into the surface layer of the metal of the blade, which can lead to its destruction.
Excessive pressure, if you use an abrasive that is too coarse for the initial stages, can lead to deep singular scratches or grooves, which are often difficult to remove with a finer abrasive and can lead to chipping or pitting after sharpening. The reason for this is that in some steels the carbides are spaced so far apart that they get worn away by the abrasive grits.
Besides this, you will find a burr raising and due to its removal during the cutting edge preparation stage, the edge may chip.
Even if you have removed the burr, applying too much pressure or increasing the angle can cause the apex of the cutting edge to lean to one side or the other.
When you increase the pressure on the abrasive on a small contact area, the temperature of the blade and the abrasive increases and the abrasive strength of the sharpening stone decreases. Here you can distinguish two types of temperature impacts as a result of such contact:
The worst thing you can do to a knife blade is to sharpen with a belt grinder. Although there is virtually no pressure, there is a prolonged friction that raises the temperature of the knife blade. If you can see sparks, you can be sure that the temperature of these particles is about 10000C or higher. This can cause differential tempering of the steel as heat transfers to a thinner part of the blade at the cutting edge, not critical only for high speed steels. The use of special cooling equipment and setting low speeds will make sharpening with a grinder relatively easy, but will require additional costs and experience on the part of the user.
It is difficult to accurately measure and record these two factors at home. The point of contact with the bevel at the beginning of work is so small that there are no devices that can truly measure this. With any abrasive, tiny sparks can form upon contact with steel and their peak values are quite high.
Theoretically, checking the secondary bevels temperature is more relevant for cyclic sharpening, for example with a kitchen electric sharpener. However, household laser thermometers are not equipped with a highly concentrated beam of light and the blade looses temperature during the time it takes for the laser beam to hit the secondary bevel and does not give an accurate temperature at the cutting edge itself.
We are not talking about the blade staying at the tempering temperature for a long time, or reaching this temperature at all, but high temperatures can assist the abrasive particles in entering the bevel's surface and/or affect the chemical processes on the surface of the steel. Some metals can form carbide oxides at high temperatures, which in turn may result in reduced stability and wear.
For example, the tungsten and cobalt oxide formation can happen at a temperature of about 5000C, and the reaction with acids and alkalis even at a lower temperature of about 900C.
To avoid excessive heating of the blade and to improve the abrasive properties of the sharpening stone, it is necessary to use cooling liquids during sharpening, which you should choose depending on the type of abrasive and steel of the knife blade.
In terms of abrasives, you have to pick the right hardness and porosity of the stone according to your experience.
There are various mechanical and thermal phenomena that seriously affect the quality of the surface of a knife blade during sharpening.
Due to excessive pressure and growing friction forces, especially with a small contact spot, the ductility of the steel may change due to increasing temperature, leading to deformation, chipping and pitting of the cutting edge.
But the key question is how much pressure to apply when sharpening a knife.
The pressure on the cutting edge when sharpening the knife must be adequate, because without pressure there will be no sharpening. .
Regardless of the pressure, the stone should produce results depending on its condition.
Sharpening hides many different aspects and nuances, and therefore you should do your own sharpening experiments to gain experience, which will help you make the right decisions in the future and follow the right sharpening technique.
Pressure is also one of the important nuances of sharpening with guided manual sharpening systems, such as TSPROF Pioneer. This sharpener is milled from a single block of a 7075 T6 aircraft grade aluminum and comes with 5 diamond plates, ready to make your knives razor sharp. Experience professional sharpening with TSPROF.
Nowadays in the knife world, there are many knife sharpening techniques that you can learn about from books or find on the internet. At the same time, each of the methods has its followers and specialists who completely reject one or another of them. Ironically each of them is convinced that they are absolutely right. In turn, we are confident that most sharpeners and advanced users are familiar with the concept of the micro bevel and know how to create it. Now we will analyze why you might need a micro bevel and how to create it.
Micro bevel is a term for a bevel that forms a cutting edge and comes after the secondary bevel. If you consider knife sharpening in general, it seems quite obvious at first glance that the creation of a micro bevel takes off a great deal less steel than a complete sharpening of the bevels. However, everything should be examined step by step, so first we will take a look at the cross-sectional structure of the blade, regardless of the type of bevels.
Bevels are one of the important parts in the blade structure and are directly involved in creation of cutting edges.
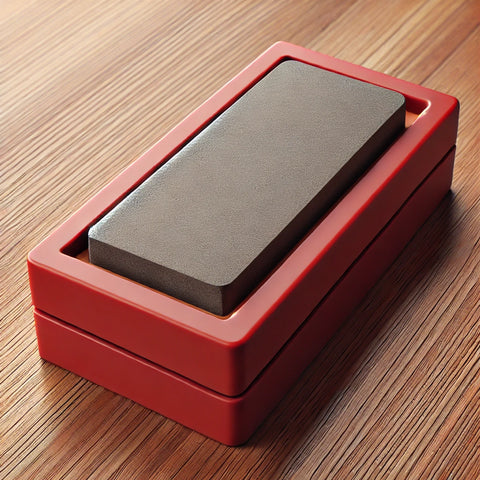
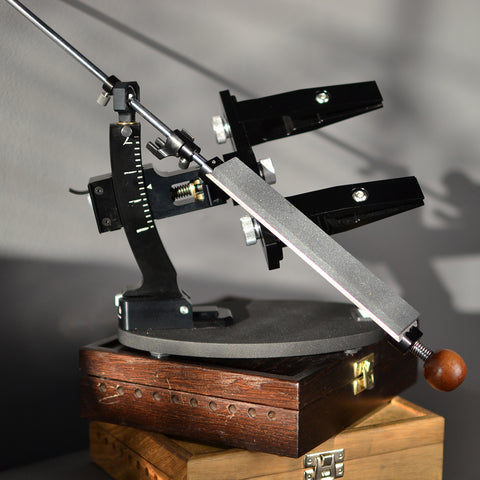
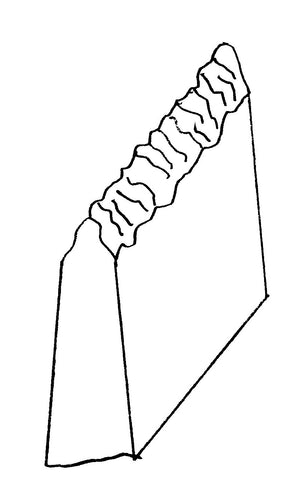
Image 1. The drawing of knife parts - thickness behind the edge and secondary bevels: 1 - blade width, 2 - thickness behind the edge, 3 - cutting edge, 4 - secondary bevels; A - sharpening angle of bevels.
The image 1 illustrates a cross-sectional view of the blade before you sharpen it. It is the bevels angle that determines the thickness behind the edge, which ultimately predetermines the possible angle of the secondary bevels of the blade and as a consequence the suitable micro bevels angle.
Image 2. The cross-section of a blade with micro bevels: 1 – bevel, 2 - secondary bevel, 3 - micro bevel, 4 – cutting edge
A is the bevel angle, which forms the thickness behind the edge in the form of a small trapezoid on the knife blank before you sharpen it, which is often less than 0.4 mm on many good knives.
B - angle of bevels which forms the cutting edge of the blade.
C - the full sharpening angle of the blade with a micro bevel
The main purpose of the micro bevel for this blade structure will be the strengthening of the cutting edge. The reason for the increase in resistance or strength on any steel is pretty clear - the angle of pressure from lateral impact on the bevel at the "B" angle is drastically different from the impact on the bevel at the "C" angle. The consequence of this is a higher level of cutting edge sharpness retention due to the micro-bevel at the "C" angle.
The mechanics of knives cutting involve a sharper, harder object penetrating the material due to high pressure within a very small contact spot. You may get the impression that the micro bevel has a larger angle and makes the blade duller, but that is not true.
There is a pattern here - the smaller the thickness behind the edge, the sharper the angle of secondary bevels can be, and the greater the difference with micro-bevels. With very little thickness behind the edge, and even with a significant difference in angle with a micro-bevel, knives will cut due to the geometry of the knife blade. First of all, this applies to kitchen knives edges.
If you consider the cross-section of knives with micro-bevels, you will notice that in some cases the cross-section partially resembles a multi-bevel compound grind, or even to some extent a variant of a full convex blade grind.
However, there are some significant differences - in the first two cases, as mentioned at the very beginning, we are dealing with different sharpening approaches, and the third case is a manufacturing process which aims at creating a certain type of knives bevels.
In this case, however, we focus specifically on sharpening processes that will allow us to sharpen and create micro bevels on knives.
When you sharpen knives, you want them to stay sharp as long as possible after one sharpening session, so the cornerstone here is the concept of sharpness retention of the cutting edge.
Although each blade's quality and steel hardness is different, you only need to take a look at the following image to see that there will be a significant difference in the amount of removed steel when you sharpen a knife with a micro-bevel, compared to sharpening a knife without one.
Image 3. What happens when you sharpen with and without a micro–bevel: 1 – chisel blade without a micro–bevel, 2 - approximate removal of steel over the entire bevel, 3 - removal of steel with creation of a micro-bevel.
If we look at the cross-section of the blade of a chisel, it becomes clear what a normal bevel looks like after you sharpen it without a micro-bevel (1). The second picture shows the approximate amount of material that gets removed when you sharpen the entire bevel area (2). The third picture shows the approximate amount of steel that gets removed when sharpening with creating a micro bevel (3).
Creating a micro bevel on a fully sharpened blade takes some extra effort and a certain level of precision. However, there will be much less material removal when sharpening the micro bevel again, which saves considerable effort and prolongs blade life.
If we consider the blunting of a cutting edge as a process of rounding of its apex (picture 3.2), then the purpose of sharpening is to remove this rounding by reshaping the bevels planes. Sharpening knives without a micro bevel removes more material and takes much longer time with harder steels.
This technique is used for knives with very small thicknesses behind the edges, on hard steels and steels with large carbides to avoid chipping, and to make the geometry of the blade work when cutting. This is even more relevant and useful for softer and more ductile steels, especially for European-type knives. They often recommend using a honing hand tool, the musat, for this purpose.
You can only get good quality micro bevels with high precision equipment that offers angle consistency.
With a steep angle of bevels and a large thickness behind the edge, the difference between the bevels and the micro bevels angle should be about 5 degrees per side.
It is best to keep the difference in the angles of the bevels and micro bevels within 5-10 degrees, and the width of micro bevels in tenths of a millimeter.
To get the best perspective, you should examine the cross-section of a chisel blade (instead of double sided blades), which is an example of a blade exposed to heavy loads, and which micro bevels continually prove to be effective,
Image 4. Schematic difference in the angles of a chisel with a micro bevel
The use of micro bevel is illustrated in image 4.
If you examine the area near the cutting edge of knives and the way you create a micro bevel on the knife blades, you will understand more about what happens when you sharpen knives.
Image 5. Knife micro bevels area: 1 - bevels angle, 2 - micro bevels angle, 3 - cutting edge without micro bevels, 4 - cutting edge with micro bevels.
The essential ingredient in creating a micro bevel is the use of a sufficiently fine abrasive with a medium to fairly high hardness.
A burr is inevitable when you sharpen knives with back and forth movements. The correct way to remove a burr is with light, only forward movements of the abrasive to avoid breaking the burr and creating a blunt apex with jagged, sharp edges. When you remove the burr this way, you already create a kind of micro bevel. So it makes sense to create a micro bevel the right way.
The reason for mentioning blades with full convex or scandi grind with straight bevels is obvious. There are some industrial knife models, which come with micro bevels from the factory. A common example is MORA 510 with micro bevels, according to the manufacturer's information. This seems to contradict the concept of scandi bevels, but it is just a fact. As an example, there are many Japanese kitchen knives that come with micro bevel edges from the factory.
The creation of micro bevels is the final stage after you sharpen the secondary bevels. If you decide to create a micro bevel, you should use fine-grit abrasives and make forward movements without pressure on the sharpening stone. It is best to use high precision tools and equipment that offer consistency of the angles, as it is not easy to create knife blades with the proper micro bevel and sharp cutting edge with manual hand sharpening. A TSPROF sharpener is the best solution for this task.
To keep a knife blade sharp, you only need to sharpen the cutting edge once or twice a year, depending on how often it is used. The rest of the time it is enough to hone it with special tools. This way, the knife will cut food well and wear out slower.
People use water whetstones or mechanical sharpeners for sharpening. And they hone the blade using a sharpening steel or a honing rod. Let us take a closer look at a honing rod and how to use it in a professional or personal kitchen.
Most craftsmen and professional cooks know this tool as a musat. Musats differ from each other in the material of the abrasive element. As for the honing rod, we are talking about a high-strength carbon alloy. That is why it is also called a "sharpening steel". Musats can be ceramic or diamond-coated.
Given the fact that they are similar in design and purpose, people often confuse musat with a sharpening steel. The key is to understand the purpose of the tool. It is not used for a proper knife blade sharpening. It is used to hone the knife edge to keep it sharp for everyday use.
A sharpening steel is a round metal rod with a length of 20 to 30 cm. It helps to make the knife sharp again by bringing back to alignment the deformed line of the cutting edge. Note that this does not involve sharpening.
Here is the difference between the two processes:
You need to hone a knife as often as possible, especially if it constantly used. It is common to hone a knife every day, and sometimes before each use until the blade is completely dull. Only then you should use a stone to sharpen it.
To understand how a honing rod works, you need to imagine what the blade looks like under very high magnification. The cutting edge is very thin, so it can cut a variety of foods. But because of this, it is vulnerable to deformations that result in the edge folding over on itself.
It happens when you use a knife for:
The cross-section of the edge of a perfectly sharp knife, has the shape of a triangle with a sharp apex. But after use, this aoex will roll over to the side or twist. The knife will start cutting worse.
You can restore sharpness if you fix the mentioned damages. You can do this with the help of a sharpening steel. When you run the rod across the blade, the hard surface of the honing tool brings the cutting edge line back into alignment (pushes the apex back to its place). This is possible due to ductility of carbon steel.
The constant bending back and forth causes the top of the triangle to break off after some time. When it happens, you can not use a sharpening rod to make the blade sharp and you have to do a complete knife sharpening with a water stone or with a mechanical sharpener instead.
Theoretically, any tool or object can be used as a sharpening steel. But it has to be made of a harder alloy than the blade itself.
Blade edge honing tools are usually made of steel. You can often find them included in sets with kitchen knives. The rod can be of two types:
The larger the ridges, the coarser the finishing of the blade surface will be. Therefore, you should not use such tools for regular honing.
A smooth surface works better and is just as good at removing rolled over parts. But it has one drawback - such a tool is not suitable for working with Japanese knives. Manufacturers from Japan use harder steel grades compared to a sharpening rod. Besides, such steel is less ductile and may crack when rubbed against the rod.
The honing rod guide below will help you to properly hone your knife with no risk of injuring yourself. It is very important to hold the tool properly in your hands or rest its end on the table.
The rules are as follows:
The blade should rest on the steel rod with its heel at the top end of the rod. The blade should be at a 15° angle to the rod. You can change it according to the sharpening angle provided by the manufacturer.
The honing process consists of the following steps:
To hone the edge, repeat each step from 5 to 10 times. The number of times that you have to repeat a step depends on the degree of sharpness of the blade. You can hone only one side or two sides alternately.
When you finish honing, rinse the blade and rod with water and wipe the tools dry with a soft cloth. Honing does not remove metal particles from the blade, but it can cause microscopic swarf to come off the blade. So you should not neglect cleaning.
After you finish straightening, you can check the sharpness of the blade with a piece of paper. If the knife is sharp enough, it will cut through without creasing or ripping the paper.
When purchasing a sharpening steel, you should pay attention to the size of the rod. The length of the abrasive part (not including the handle) should be longer than the blade of the largest knife in your collection. We are talking about classic knives. This rule does not apply to bread knives with a serrated edge, as people almost never hone them, and rarely sharpen them at all.
This rod length allows you to run the entire knife blade over the abrasive element of the sharpening steel in one motion. If you use a 25 cm long kitchen knife, you need to get a honing tool that is at least 30 cm long.
The next important thing is to keep the working part of the rod clean. If you do not clean the surface, it gradually becomes contaminated with very fine steel particles. And the honing rod will lose its abrasive properties.
You should clean the honing steel with a clean cloth or a kitchen towel. Once or twice a month, you can wash the honing rod in hot water and detergent with a synthetic fiber brush or a cloth for non-stick frying pans.
Never use a metal sponge or other hard objects to remove contamination. Some people suggest using an abrasive scouring powder, but it is also too coarse for a honing rod surface.
Something to keep in mind is that even the best and strongest sharpening steel wears out with use. The service life depends on the frequency of use of the rod as well as its quality and manufacturer. On average, you need to change the honing rod every 2-3 years.
The sharpening steel is designed for straightening western-made knives. You can hone blades made from European alloys. They are tough, but also have high ductility. But the steel rod is not suitable for Japanese knives.
Knives from factories in Japan should only be honed with ceramic or diamond rods. A steel rod with a smooth or ribbed surface is not suitable for this purpose. Japanese manufacturers use high-strength but brittle steel. When it comes in contact with the steel rod, it wears down quickly and can crack.
If you do not want to damage an expensive professional knife made in Japan, you should only fix edge damage with diamond or ceramic musats.
Before you begin processing your knife, you need to understand the difference between straightening (honing) and sharpening. You only need to remove the rolled over areas of the edge with a sharpening steel on a regular basis. You can only use the water stone or a sharpener to restore the blade's sharpness once or twice a year.
Honing rod is suitable for processing western type knives. If you follow the guide above, you will be able to keep your knives sharp on your own for a long time. However, remember not to use a honing steel rod with Japanese blades. Only ceramic or diamond-coated musats are suited for them.
Sooner or later the honing rod will not be able to cope with the damages and you will have to sharpen the knife with a proper sharpener. It is best to use professional sharpening tools from TSPROF for this purpose. They remove any defects while preserving the same blade sharpening angle.
You can use natural or synthetic stones, grinding discs, special plates, and even sandpaper to sharpen knives. All of these tools have one important specification: grit (mesh, in some sources).
The impact on the steel of the blade depends on this specification. The coarser the grit of the abrasives, the more steel they take off the edge. This treatment is too coarse, and the knife edge surface needs to be polished afterward. Due to this, craftsmen and professionals use a set of multiple stones of different grit.
Let us take a closer look at what the grit is, in what units it is measured, and how to choose a sharpening stone for use in a personal or professional kitchen or workshop.
Using an abrasive whetstone is a manual knife sharpening method that is popular among fans of high-quality products. It can be natural or synthetic.
The blade sharpening process involves using the hard abrasive particles that make up the stone. They are bound together with special materials that determine their hardness, wear resistance, and service life.
You need to pay attention to several factors when shopping:
Let us analyze each of the specifications.
You can find several types of sharpening stones on the market.
Whetstones are made of natural or artificial abrasive materials. The first are made from rocks that are only mined in certain regions of the world. The most popular natural stones are made of rocks extracted in Arkansas, USA, and Japan.
The second ones are made of aluminum, silicon, or chromium oxides. First, they make particles of the required size using a sophisticated technological process, after which they are bound together with a ceramic or bakelite-based binding agent.
The term "water stone" comes from the way the sharpening stone is used. Before use, you have to soak the stone in water until the liquid fills all the pores. During the process of restoring blade sharpness, you have to keep the surface wet all the time. This forms a slurry which consists of abrasive, liquid, and metal particles from the blade. Thanks to the slurry, you get a uniform sharpening of the edge along its entire length.
The impact of the stone on the knife's steel alloy depends on the size of the abrasive particles, and the grit. The coarser it is, the more steel the bar will remove from the blade. This causes the edge to develop defects (e.g. scratches) that need to be removed afterwards.
A diamond sharpening stone can serve as an alternative to a water stone. A special feature of diamond abrasives is their high hardness. They scrape off the material and allow you to shape the edge.
The features of manufacturing diamond-coated stones allow you to make them with different grits. All particles will have 1 grit size, which increases the sharpening quality. Diamonds are sprayed in a thin coating on a solid base for convenient use. These stones are often used with sharpening systems that allow you to adjust the sharpening angle.
Because of their increased hardness, these stones have a very aggressive impact on the steel surface of the blade. Due to this, they allow you to quickly restore the sharpness of the knife blade. However, there is a risk of damaging the steel if you do not handle it properly. Diamond sharpening stones reduce the life of the knife, so it is better to use medium to fine grit diamond stones.
Unlike "water" stones, you do not have to wet the diamond surface with water. Just rinse after use to wash off any remaining metal residue.
It is a type of synthetic sharpening stone that has a soft impact on the edge. This helps you to avoid damaging the blade during sharpening. Thanks to the ease of machining raw materials, manufacturers offer products of various sizes and shapes, which you can use to sharpen knives, scissors, fishing hooks, and other cutting tools.
There is no need to wet the ceramics with water to create a slurry. But you have to wash it after sharpening to avoid the accumulation of steel particles removed from the edge.
After choosing the material of the bar, pay attention to its grit value. It determines the degree of impact on the knife you are going to sharpen.
This specification is regulated by several standards, and different units of measurement are used for its designation: FEPA-F, FEPA-P (sandpaper), microns, and other grit standards. The approximate value conversion and the purpose of the stones are shown in the chart.
If you use a stone with too coarse a grit, it will take off a lot of metal and leave large scratches and grooves on the blade. For most types of knives, this sharpening quality is unacceptable. High-quality work implies a complete absence of defects. Stones of this type are only suitable for coarse work when you need to repair heavy damage.
Fine grit stones allow you to smooth uneven parts of the edge and make the blade razor sharp. But the abrasive particles of fine grit stones only remove tiny bits of steel in one pass, which makes this kind of work time-consuming.
The best way is to use several stones with different grit, 1 grit at a time. The sharpening process should start with the coarsest stones and gradually move to finer stones until you get the best blade finishing.
Grit |
Average |
JIS |
ANSI |
FEPA |
GOST |
GOST 3647-80 | Purpose | |
14 | 0.025 | — | — | 0.1/0 | — | Honing and polishing, super finishing | ||
14 | 0.05 | — | — | — | ||||
13 | 0.07 | 200.000 | — | — | ||||
13 | 0.1 | — | — | — | ||||
12 | 0.15 | 100.000 | — | 0.3/0 | — | |||
12 | 0.25 | 60.000 | 100.000 | — | ||||
11 | 0.49 | 30.000 | 60.000 | 1/0.5 | — | |||
10 | 0.74 | 20.000 | 20.000 | — | ||||
10 | 0.91 | 16.000 | 16.000 | — | ||||
9 | 1 | 15.000 | 14.000 | 1/0 | — | |||
9 | 1.2 | 12.000 | 13.000 | F 2000 | 2/1 | — | ||
9 | 1.5 | 10.000 | 10.000 | — | ||||
9 | 2 | 8.000 | — | F 1500 | — | |||
8 | 2.5 | 6.000 | 9.000 | 3/2 | — | |||
8 | 3 | 5.000 | 8.000 | F 1200 | — | |||
8 | 4 | 4.000 | 5.000 | F 1000 | 5/3 | M5 | ||
7 | 5 | 3.000 | 4.500 | — | ||||
7 | 5.3 | — | — | — | 7/5 | M7 | ||
7 | 6.7 | 2.200 | 3.000 | F 800 | ||||
7 | 7 | — | — | — | ||||
7 | 7.2 | — | — | — | 10/7 | M10 | ||
7 | 8.5 | 1.800 | P 2500 | — | ||||
6 | 10 | 1.500 | — | F 600 | ||||
6 | 10.3 | — | P 2000 | — | 14/10 | M14 | ||
6 | 13 | 1.200 | P 1500 | F 500 | ||||
6 | 14 | — | — | — | ||||
6 | 15 | 1.000 | P 1200 | — | 20/14 | M20 | Removing scratches | |
6 | 18 | 800 | P 1000 | F 400 | ||||
5 | 20 | — | — | — | ||||
5 | 22 | 700 | P 800 | F 360 | 28/20 | M28 | ||
5 | 26 | 600 | P 600 | — | ||||
5 | 28 | — | — | — | ||||
4 | 30 | 500 | P 500 | F 320 | 40/28 | M40 | — | |
4 | 35 | 400 | P 400 | — | — | |||
4 | 40 | — | — | — | 4 | Removing signs of coarse sharpening, sanding | ||
4 | 41 | 360 | P 360 | — | 60/40 | M50 | — | |
4 | 46 | 320 | P 320 | F 240 | — | |||
4 | 50 | — | — | — | 5 | |||
3 | 53 | 280 | P 280 | F 230 | M63 | — | ||
3 | 58 | — | P 240 | F 220 | — | |||
3 | 68 | 240 | P 220 | F 180 | 80/63 | 6 | ||
3 | 77 | 200 | — | — | — | |||
3 | 82 | — | P 180 | F 150 | 8 | |||
2 | 100 | — | P 150 | — | 125/100 | 10 | ||
2 | 125 | — | P 120 | F 100 | 12 | Coarse sharpening, intense metal removal | ||
2 | 136 | 120 | — | — | — | — | ||
2 | 185 | — | — | F 80 | — | 16 = 160 µm | ||
1 | 260 | — | P 60 | F 60 | — | 20 = 200 µm | ||
1 | 310 | — | — | F 54 | — | 25 = 250 µm 32 = 315 µm |
Despite the difference in the designation of abrasive grit in different standards, knife sharpeners, and knife enthusiasts have come to a common agreement and designate this value in grit. The smaller the number, the larger the abrasive particles will be. For example, a 120 grit stone has large abrasive particles and is only used for coarse sharpening. Finishing and polishing work is carried out with 1200-8000 grit stones.
Some of the standards follow the same logic, such as FEPA-P (sandpaper) and FEPA-F, while the others have a different pattern of grit change, such as the micron (GOST) standard. You can see the approximate FEPA-F to micron conversion in the aforementioned chart.
People choose the grit of the abrasive stone depending on the type of knife they are going to sharpen and its purpose. For most knives, experts suggest the following stones grit:
The first two stones will be enough for most kitchen knives. The last one is essential if you want to have the best finishing of the knife blade.
The main point is to use sharpening stones in a strict order from coarse to fine. And you should increase the grit value 1 grit at a time, without skipping even 1 grit step.
That is, you have to first take a 120-150 grit stone to remove large defects and set the angle. After that, use a product with fine abrasive particles that will remove scratches and smooth the edge.
Note, if the markings on the stone are in micron grit standard, you have to gradually increase the value (see the chart for more additional information). However, for some sharpening stones manufacturers use mkm to specify the grit. In this case, you have to do the opposite. That is, 100 / 80 for coarse sharpening, 3 / 2 for sanding or polishing.
The number of sharpening steps depends on the amount of stones with different grit that you have. You can follow the pattern of 150-250-500-1000 … 8000 and so on. Fine grit sharpening stones cannot remove defects left by much coarser grit sharpening stones, which is why it is important not to skip steps. Or the whole sharpening process will take too much time.
It is important to understand that a complete knife sharpening with a whetstone or a sharpening system is something that should be done only rarely. A knife should get a complete sharpening once or twice a year, depending on how often you use it. In the meantime, you should hone the edge. People use musats (honing rods) for this purpose. This is why sharpening stones last a long time, despite the rapid wear of natural and ceramic abrasives.
The important specifications of the stone are the width and length of its surface, as well as its thickness. The first two specifications depend on the dimensions of the blade:
The stone's thickness only determines its convenience of use and service life. As the surface gradually wears away, the larger the stone, the longer it will last.
Choosing sharpening stones, and using and caring for them properly is time-consuming and requires some skills. But some manufacturers offer an equally efficient substitute.
You can sharpen your knives quickly and properly with the diamond coated plates from TSPROF. Hard diamond abrasive particles quickly grind metal off the cutting edge and remove damaged parts of the blade. The set includes five stones with grit from 150 to 1000 (FEPA-F), which is more than enough for household or kitchen purposes. You can continue polishing the knife edge with any additional natural or synthetic stone of 8000 or other grit value (higher than 1000) if needed.
They do not need to be wet or otherwise prepared for use, just rinse with water after use. You can use these diamond stones on a backing plate in combination with sharpening systems that allow you to set and maintain the desired sharpening angle or on their own - for manual sharpening with a whetstone.
Hunting and pocket knife lovers, as well as professional chefs, know that the best way to sharpen a blade is with a sharpening stone. But not everyone has a clear understanding of what this tool is, how to choose it from the available options, what is the difference between "synthetic" and "natural" abrasive materials.
It is a rectangular abrasive element that can be used to sharpen a knife, repair edge defects and restore the blade angle provided by the manufacturer.
Sharpening stones have been used since the invention of the metal knife. They are now a must-have accessory for all admirers of edged weapons as well as a quality kitchen knife. They are also used by chefs or home cooks who love sharp knives and devote much time to caring for them.
The sharpening stones available in stores are divided into two types based on material - natural and synthetic. They have their own features, advantages and disadvantages. Before you buy a sharpening stone, it is best to look into its specifications in detail.
They are made of high-strength rocks. Any minerals with a fine grit structure with abrasive properties are suitable. The most popular stones among knife lovers come from Japan, USA, Belgium, Germany and Turkey.
You should be very careful when purchasing natural sharpening stones. Manufacturers offer high quality minerals and low quality stones. This scatter in specifications is due to two reasons:
Despite certain drawbacks, natural rock sharpening stones remain popular among knife lovers. The key is to get the best option in its range.
There is no universal advice on which sharpening stone to choose. Both synthetic and natural stones can make a knife razor sharp. The end result depends on what steel the blade is made of, what abrasive material is used for making the sharpening stone, and how skilled you are at using these tools.
Arkansas sharpening stones, which are mined and made in the United States, are especially appreciated. It is a natural stone made of quartz, with a purity of almost 100% and an abrasiveness of 1-6 microns.
Japanese stones are also popular. They were used to sharpen the blades of traditional katana swords several hundred years ago.
The main problem with natural bars is that the raw materials used to produce them are not a renewable source. Because of this, the stone extraction from some deposits is now strictly regulated and limited in various countries around the world. This creates shortages of products, which drives up prices in the market.
Best quality natural whetstones are now only used by professionals with extreme care.
This term is a name for stones made of abrasive materials. It is due to the way these sharpening whetstones are used — they are used with water. All whetstones are divided into three types according to the way of use:
That is, "water" refers to abrasive whetstones that require water for use. Water helps to form a protective layer on the surface and also prevents the clogging of surface. The sharpening stone will wear less and retain its properties longer with the use of the cooling liquid (water or something else).
The sharpening stone itself consists of two elements:
After being moistened with water, as the blade moves back and forth, the abrasive particles slowly break away from the matrix, mix with the liquid, and form the working layer. It works on the edge and gradually removes material from it, forming a sharp blade at the desired angle.
Before use, soak the stone in water until it stops releasing air bubbles. Depending on the porosity and grit, this takes up to half an hour. And add water to the surface if it dries out.
The scarcity of natural whetstones and the high cost of such a sharpening whetstone forced manufacturers to look for an alternative solution. Especially since the stock of quartz rock for their production is limited, sooner or later they will become exhausted.
As a substitute, companies that make knives and sharpening equipment came up with synthetic sharpening whetstones. Most often, they are made of:
During the manufacturing process, the manufacturer can choose the grit size, control the uniformity of the mixture, choose hardness and type of the binding agent. This has brought a wide range of sharpening stones to the market for different blade types and finishing quality grades.
Nowadays the buyer can choose a relatively inexpensive sharpening stone with the desired grit, which will last much longer than a natural stone thanks to a high-quality binding agent.
The special feature of diamond knife sharpening stones is high efficiency and easy maintenance. You do not have to use water with diamond stones to prevent wear or follow other rules of use. It is enough to spray the surface for the best blade sliding.
The drawback of these stones is the aggressive impact of diamond grits on the blade. Diamond coating has a high hardness, so it removes too much metal from the edge. You need to use it carefully.
Most often people use diamond stones for coarse straightening (honing) of edges, for coarse sharpening stages and removing serious damage. After that, they sharpen the knife with finer and softer non diamond whetstones.
Ceramic abrasives are the most modern and convenient among all the available stones. They use solid ceramic particles to make the whetstones. They are close to natural quartz in their properties and to diamond in their strength. The buyer gets a tool similar in characteristics to a natural stone, but at a lower price and with a longer service life.
A ceramic surface allows you to sharpen your knife with high quality. But the process will take a long time. Usually they are used for final polishing of the edge and to make it razor sharp.
It is not necessary to moisten the abrasive surface during work. It is enough to rinse off the metal residue after you finish the process.
Due to the simplicity of production, manufacturers make ceramic bars of different shapes, so they can be used to restore the sharpness of various items - scissors, needles, hooks and knives.
The most important characteristic of a sharpening stone, regardless of its material, is its grit. It is indicated by the numbers in the label next to the word grit. The quality of the blade finish depends on it.
Manufacturers offer whetstones with grit ratings from 80 to 10000 grit. They use them for different types of work:
Do note that stores also sell combined synthetic stones. They look like a double-layer stone with each side having a different grit. Each surface is labeled with a marking. Such a purchase allows you to save money, but during work you need to keep a whetstone clean and avoid contaminating the opposite side.
Sharpening usually involves side by side treatment of the blade edge on abrasive surfaces with different grit starting from 200 or 400 (depending on the damage). And the grit value of each next one should be about 2 times larger than the previous one. For example, 400, 1000, 3000, 6000.
When shopping, you need to consider the size of the stone. The wider and longer the stone, the larger knives you can sharpen with this stone. This will also make it easier to maintain the necessary sharpening angle. The thickness only determines the service life. The larger it is, the longer it will wear out.
Abrasive whetstones are one of the most effective but difficult to use sharpening tools. When using them, it is best to follow a few rules:
Follow this guide to choose the best whetstone for yourself.
However, if manual knife sharpening with a whetstone seems too difficult for you, you can use special equipment. For example, a sharpening system with a guide rod from TSPROF. They are sold as kits with different types of stones - usually diamond coated stones. Their best advantage is the ability to securely clamp knives and sharpen the edge at the required angle.
In the process of restoring sharpness, the abrasive element gradually removes some of the metal from the blade of the knife. If you sharpen a knife too often and follow the wrong steps or use the wrong tools, it will quickly wear out and will have to be replaced. Therefore, you need to start with choosing the right sharpening equipment.
It is a rod-shaped tool with an abrasive surface and a convenient handle. It is similar in shape to a classic file with a round cross-section, but it has less coarse grits on the surface. Manufacturers offer different musats:
The main purpose of these tools is edge finishing. You can use it almost every day to fix minor damage of the cutting edge. There are also diamond Honing rods help to keep the blade of the knife sharp and delay the need for a proper sharpening, but it is inevitable, and you will have to do it sooner or later.
You can get a cheap abrasive bar at a hardware store. It is suitable for sharpening a knife blade made of inexpensive and soft low-carbon steel. It will not help you to restore sharpness of expensive knives made of high-strength steel, and what is worse - a coarse abrasive can damage the edge.
The favorite chef's or home cook's knife should only be sharpened with well known branded water stones or sharpening systems. Besides, you have to strictly follow the rules of use and choose the right grit.
The stone is called a water stone because it has to be soaked in water before use, and the sharpening process involves moistening its surface with water. This creates a dispersed layer that mitigates the abrasive effect and prevents metal particles from clogging the stone.
When choosing sharpening stones, you have to take into account the following specifications:
Manufacturers also offer a universal model, which has two opposite sides with different grits.
This type of sharpeners allow you to sharpen the edge quickly and without following the rules concerning the sharpening angle and the choice of the grit. In terms of design, such sharpener consists of abrasive elements in a plastic or metal housing.
There are two types of sharpeners:
As a rule, the chef or home cook's equipment includes all of the above. This allows you to hone and to sharpen any knife regardless of its quality and steel hardness.
Now let us break down how to sharpen a knife using abrasive stones. This process requires a great deal of skill, and it starts with choosing the right stones.
Water stones are the traditional way to sharpen a knife. It is characterized by the high cost of abrasive stones and the need to strictly follow the work order for restoring the sharpness of the edge.
You have to choose the stone according to its grain size, which is expressed in grit or by the # symbol. These options are popular among fans of professional kitchen knives:
The length of the sharpening whetstone should be 1.5-2 times the length of the knife blade. In this case, you can draw the entire edge length at once.
The thickness of the whetstone does not affect the process, but thicker stones remain more stable on the table and are more comfortable to use. There are slim wood-backed versions on sale that cost less but have the same features.
You should pay attention to the hardness of the stone. Soft abrasives are less expensive, but they form a layer of grit on the surface during the sharpening process. It scratches the blade. Besides, such bars have a shorter service life.
Any cutting edge has a certain angle set by the manufacturer. Physical laws say that a small bevel makes the knife sharper. But you have to sharpen it at the same angle provided by the manufacturer. In this case, you will save the geometry of the blade.
At the production stage they choose the angle of the edge depending on the purpose of the knife. If you change it, using your knife will become uncomfortable.
Common chef knife angles depend on the country of manufacture:
The best way to find out the sharpening angle is to check the brand's website or the specifications in the instructions. If this information is not available, you may push the cutting edge into a soft material - paraffin, butter, etc., and then measure the indentation with a suitable tool.
You can use knife sharpening whetstones at home, but there are a few rules to follow if you want to maintain their properties:
Before sharpening an expensive professional knife, it is better to practice with a worn out knife or the one that you are not sorry to ruin due to sloppy or incorrect actions.
Let us break down the knife sharpening process step by step.
1. Preparation for work
You should wash the dull blade and remove any remaining moisture from it. It is strongly recommended not to sharpen the blade if it is covered with grease.
Before use, put the stone into a container filled with water so that the liquid covers the bar. Soaking time depends on the grit and ranges from 3 minutes for coarse to 30 minutes for the finest stone. If the bubbles have stopped coming out of the stone, it means that its pores are filled with water. Soak stones of different grits separately from each other.
After that, you have to prepare the space for sharpening. You can do this on a kitchen table that stands firmly on the floor. You have to place a towel or a wooden board on it, and place the bar on top of it. It is best to use special clamps that hold the stone firmly in place.
2. Setting the sharpening angle.
It is best to buy a sharpening system and set the desired angle using its mechanisms. If you do not have such a tool, experts recommend taking a piece of paper and folding it so that when you put it under the blade, you get the desired angle. You will have to hold it under the blade during sharpening.
3. Edge sharpening.
If your knife has a single-sided grind, you should sharpen the blade on one side only. To do this, you will have to run the knife over the bar 40 to 50 times, depending on the hardness of the steel. As you work, you will notice a small burr appear on the edge that you can feel with your finger. After that, it is sufficient to run the opposite side of the knife over the stone 3 to 5 times to remove the burr.
During work, the sharpener makes two movements:
If your knife has a double sided edge grind, you also have to repeat the same actions for the other side.
Any severe damage to the blade must be removed completely. If the cutting edge line is intact, you may start right away with a second stone with a grit of 1000-3000 grit. You may extend the life of your knife by reducing the amount of metal you remove during sharpening.
1. Finishing.
After sharpening your knife with coarse and medium stones, you can perfect its sharpness and appearance with a polishing stone. The steps in this case will be the same, but no burr will form on the edge in the process.
2. Testing sharpness.
You must not check the sharpness of the blade with your finger or your fingernail. As it goes hand in hand with a high risk of injury. It is best to use a tomato, some soft vegetable or fruit. When cutting even with a little pressure, your knife should cut through the skin without crumbling it and the cut should be smooth.
The second method is to cut a free hanging piece of paper. If your knife is sharp enough, this will not be a problem.
You can make it easier to work with water stones if you use a special precision guided sharpening system, such as the Pioneer from TSPROF. The turning mechanism of the sharpener helps to maintain the same sharpening angle on both sides of your knife. Universal clamps hold the knife securely in position, regardless of its type and size Such a device allows you to sharpen kitchen, folding, tourist and multitool blades.
The process of sharpening knives with water stones is relatively straightforward, but requires sticking to the steps mentioned above. Otherwise, you can ruin both the blade and the expensive sharpening stone.
Most common mistakes when working at home:
Also, if you do not have enough experience, you can spoil the initial sharpening angle or finish sharpening too early, leaving a burr on the edge.
There are different ways to sharpen a knife at home, and you should choose one based on your own skills and abilities. Mastering water stones can be a challenge. We recommend you to use the TSPROF Pioneer sharpening system. TSPROF Pioneer makes it much easier to achieve the same knife sharpness and cutting edge quality.
]]>
Blades of this type can be found in a professional kitchen. These are various narrow-specialized and universal models. They are popular among professionals due to several features:
Also, most Japanese models have a single bevel blade grind. This shape of the cutting edge requires special skills in work. Therefore, to use a Japanese knife for professional purposes one will require a fair amount of experience.
Before beginning you need to understand exactly what steps one must take to restore the sharpness of a knife. There are two ways to make the cutting tool edge sharp:
Due to the high level of hardness of the steel, Japanese knives do not need to be sharpened very often. It is more common to hone the cutting edge of Japanese knives. You do not need to use a sharpening stone or other devices for this purpose. After honing the edge, the knife blade will get sharp.
Please note that honing allows just a temporary restoration of the shape of the cutting edge. Eventually it will lose its sharpness and will require a proper sharpening.
A knifemaker would use a special sharpening stone. A beginner, however, will find it quite difficult to cope with such a task. That is due to the fact that Japanese knives have a shallow sharpening angle.
Sometimes a special water whetstone is used for sharpening. Manufacturers produce such stones in a rectangular shape. A water whetstone can have different grits. Therefore, for high-quality sharpening, you will need several stones. Restoring the sharpness of a Japanese knife on a water stone is done in several steps:
Using stones of different grits helps to repair serious damage and make the blade sharp. However, holding the knife at the required angle is not easy and requires a certain amount of experience. Thus, this method will be difficult for a beginner.
You should wash the blade under running water to remove any steel particles from the surface left after sharpening.
ATTENTION: Do not wash your kitchen knives in a dishwasher. Chemicals and high temperatures can affect the steel quality of the cutting tool and reduce sharpness.
There is a wide range of models on the market that are powered by an electric engine and a rotating abrasive wheel. From the point of view of some users, it may seem that such a sharpener is the best option for knife sharpening. But one should be aware of several electric knife sharpeners' features:
Given these features, it is better not to use an electric sharpener to try to make a Japanese kitchen knife sharp. Doing so may result in blade damage.
Products of this type are extremely widespread. They are used for knifemaking, cutting edge restoration, as well as for sharpening when a cutting tool looses its sharpness. The main advantages of manual sharpening with the help of a special tool:
When using a mechanical sharpener, a person controls the pressure force of the abrasive stone on the knife. And the absence of an electric drive means that there will be no accidental blade damage.
The use of a grinder can cause serious blade damage due to the high rotation speed of the belt, the pressure and strong friction, which heats the blade. This has a negative effect on the hardness of the blade. Therefore, it is better not to use a grinder to work with Japanese knives.
If this is the only possible option, you should only work at a very low speed. This sharpening method involves manual setting of the sharpening angle. The knife gets gradually pressed to the abrasive surface. At the same time you should always monitor the progress. Due to the rotation of the abrasive element, there is a high risk of damaging the blade.
To avoid overheating of the blade, there should be water cooling of the stone. Besides, you should constantly monitor the temperature of the metal. If the temperature goes up, the blade should be cooled down.
Besides, it is not a good idea to use a grinder sanders in a kitchen, it is more suitable for a workshop.
The TSPROF sharpening systems are popular among knife makers, sharpening professionals, beginners, knife lovers and collectors. The TSPROF models are very common due to their simple design. Any person without special skills can cope with the work. In addition, the demand for these sharpening systems is due to a number of advantages:
Other advantages include the surface stability of the sharpeners. Their heavy bases allow them to be placed securely on a table, workbench or other surface.
A Japanese knife can be sharpened on one or both sides. The method of restoring the cutting edge is determined according to the features of a particular cutting tool. The sharpening process is quite simple:
After you complete these steps, you can mount an abrasive with a finer grit. This helps to remove scratches and irregularities on the cutting edge. Repeat the same steps with finer abrasive stones until you get the desired condition of the cutting edge.
Professional kitchen chefs favor Japanese knives for their sharpness and durability. To keep your blade in the best condition, you should sharpen it manually. The best option is to use a manual sharpener. This device works equally well for beginners and professionals and allows you to make a sharp cutting edge in the shortest possible time.
When choosing a sharpener, one should pay attention to its specifications, as well as the sizes of knives that can be sharpened with this or that sharpener. With this approach, you will be able to choose a device that meets your purposes.
]]>The sharpness of the cutting edge of the blade will inevitably decrease while in use. This is due to the contact with hard materials. That is why it is necessary to maintain the sharpness of the knife at all times. This applies to kitchen, hunting, all-purpose and any other knife models. A sharp knife is a key to efficient and safe work.
Knife care involves honing as well as sharpening the cutting edge of the knife blade. Both methods are used to make the blade sharp. But honing is not the same as sharpening. This is something to keep in mind when choosing a method.
Sometimes the cutting edge is exposed to high loads. This causes the thin edge to bend and roll. Honing involves pushing the edge back in alignment and increasing the sharpness of the blade. To fix the damage of the cutting tool you can use:
The method of honing with a second knife is often used at professional kitchens. This is due to the lack of the need to use special devices. However, one should keep in mind that honing of the edge allows you to get the sharpness back only for some time. If the knife is too dull or damaged, you will need to do a full sharpening. This will ensure that the tool is sharp again.
A complete sharpening of the knife is required when it is too dull. Sharpening helps to fix serious damage to the cutting edge. As a result, you get a sharp knife with a properly shaped cutting edge.
You can use stones or special devices for sharpening. They allow you to set the best angle and quickly make the knife sharp. During the process, small metal particles are removed from the surface of the edge. This makes it possible to form a proper shape of the cutting edge.
A good sharpening without the use of special tools requires a certain amount of experience. One needs to hold the proper and consistent angle. It is difficult for a beginner to do without a special sharpening jig.
You can make a knife sharp with a sharpening stone, special tools, sharpening steel rods, etc. When you choose a tool, you have to take the sharpening features into account. This way one can choose the model that meets the specific requirements.
A sharpening whetstone remains popular among professionals and beginners alike. Different grit sizes provide coarse, medium and finish processing of the knife. The abrasive elements remove metal particles from the surface. Therefore, with a sharpening whetstone you can carry out a complete sharpening. Follow each step to do this:
You should repeat each step for each side until you get the proper cutting edge shape. After that, you need to use a whetstone with a finer grit size. This way you can get a straight edge. After these actions it is necessary to wash the blade with water and wipe it dry.
The disadvantage of this method is the challenge of setting the required angle. It will be difficult for beginners to keep the blade in the right position. That is why you can use additional tools.
Unlike the sharpening stone, it is not possible to sharpen a knife with a honing steel rod. This tool is suitable for aligning the curved line of the cutting edge of the knife blade. You should keep this in mind when choosing a tool.
The sharpening steel rod has become common in the kitchen. With the help of a sharpening steel rod you can quickly get a sharp knife without any special skills. It is enough to make several sharp reciprocating motions and the cutting edge of the blade will be straight.
You can find steel and ceramic sharpening rods available on the market. This allows you to choose a tool according to the operating conditions and the wishes of the user. Yet it is important to bear in mind that a sharpening rod can bring the sharpness back only for a short period of time.
How to do honing? Follow each step:
It is recommended to perform honing several times on each side. After that you will need to check the sharpness of the knife. If needed, you can repeat each step to achieve the maximum effect.
After honing, the blade should be washed with water and wiped dry. This removes the smallest metal particles from the surface.
This type of device provides a high-precision sharpening. The possibility of setting the angle, as well as interchangeable abrasive stones with different grit sizes make it possible to make the knife sharp in a relatively short period of time.
TSPROF models are common among beginners and professionals. A TSPROF knife sharpener is the best for knives designed for different purposes. Adjustable sharpening angle, guide rod and easy change of an abrasive whetstone allow you to get a sharp knife with the proper shape of the knife blade cutting edge.
Electric knife sharpener is sometimes used to speed up the sharpening process. The abrasive element of these devices is driven via an electric motor.
Despite the high speed, an electric knife sharpener has one significant disadvantage. During the sharpening process, the knife sharpener removes quite a lot of metal from the surface. This leads to quick wear of the blade and its end of life.
In most cases, straightening (honing) is enough to restore the sharpness of the knife. However, this method does not always help to make the blade sharp. Unlike honing, sharpening involves removing some of the metal. Therefore, you should not sharpen too often. You need to use sharpeners when honing does not provide the desired result. Besides, knife sharpening will be required if:
To test the sharpness of the blade, you can try cutting vegetables or bakery products. The blade should cut the object, but not crush.
Over time, any knife (actively used) loses its sharpness. This is due to continuous contact with soft and hard surfaces. Decrease in the sharpness of the blade also happens due to improper use. You should follow a few simple rules to avoid frequent sharpening:
If you follow a few simple rules, you can avoid early wear of the cutting edge. This way, you will have to sharpen your knives less often, which will increase the service life of your knives.
Ceramic knives are designed to work with soft materials. They can be used to cut vegetables and fruits, bakery products, etc. For hard objects, it is better to use steel blades. This will help avoid damage to the ceramic blade.
When sharpening such cutting tools, please keep in mind that ceramic is not good at bending loads. Therefore, you should not set a small angle. Failure to do so may result in chipping and other damage.
Special diamond-coated stones are used to sharpen ceramic knives. Besides, the strict rule of maintaining the angle makes it essential to use special jigs.
A mechanical knife sharpener is the best way to restore the sharpness of ceramic knives. It allows you to control the sharpening angle. You need to maintain the pressure when clamping the blade. Too much pressure will cause damage to the blade. You also need to control the pressure when you run the diamond sharpening stone over the blade. Following this helps to avoid damage to ceramic knives.
Sometimes there are no sharpeners and no special sharpening tools at hand. In this case, you will need to hone the edge with whatever is at hand. Note that this will only temporarily restore the sharpness of the blade. Honing the cutting edge at fishing, hunting or any other outdoor activities is possible in a number of ways:
Be aware that using improvised means can damage the edge. You may find small chips and burrs on the blade. Therefore it is crucial to sharpen and polish the blade with sharpeners after returning from the outdoors. With this approach it will be possible to remove all the damages and restore the sharpness of the cutting tool.
For keeping your knives sharp, you need to sharpen and hone them at the right time and follow a few simple rules of use and storage. Thanks to this you can avoid early blade wear and increase service life.
TSPROF Kadet Pro has a convenient folding system and low weight (2.1 kg) which allows you to carry it in your backpack and sharpen anywhere you will need it.
Sometimes you need to hone the cutting edge of your knife and you do not have a sharpening rod or a knife sharpener at hand. It happens with work in the kitchen, camping, fishing, and in other cases. Below is a way of honing the cutting edge using spine of other knives.
This sharpening method is suitable for any knife blade edge made of carbon or stainless steel. Keep in mind that this method allows you to restore some sharpness of the knife, but it will not help if:
In the above mentioned cases it is not possible to sharpen the knife blade edge with another knife. You will need a special sharpener or a whetstone for knives. Using these tools you can fix such defects.
To sharpen your knife, you will need a second cutting tool. It is better to choose a model made of solid steel. One can use such a tool as a sharpening rod. While working, the knives should be held away with the blade's back facing you. This is necessary to comply with safety rules. Failure to do so can lead to injury.
With sharp movements, move the cutting edge of the knife along the spine of the second knife. Such translational movements are done on one side and on the other. Repeat the procedure 15 to 20 times. After that, check the sharpness of the knife blade edge.
In this situation, the knife blade spine side acts as a sharpening rod. Despite its smooth surface, it allows you to remove small burrs and slightly straigthen the shape of the thin edge. This improves the cutting qualities of knives.
Using a second knife for honing the knife edge allows you to make your knife blade sharp just for a little while. This method is useful in a number of situations:
This is not the end of the list of situations in which you may need to hone the knife blade edge. This method is used in everyday kitchen, household life, in the garage, at a picnic, etc.
Although the blade spine is smooth, it allows you to make the cutting tool edge sharp. How? When cutting different materials, burrs appear on the blade and the shape of the edge changes.
When the blade goes over the spine, the mechanical impact helps to straighten the shape of the edge and remove any uneven spots. In addition, the friction removes burrs. This makes the cutting tool sharp.
This method has become popular because of several reasons. First of all, it saves time. It is enough to make several honing movements to make the edge relatively sharp. This takes very little time. Some other advantages:
The drawbacks of this method include the only temporary sharpness recovery of the knife blade edge. Sharpening with another knife works only for a short period of time. It will not help you to keep the blade edge sharp all the time.
The second drawback of this method is that there is no way to repair any damage of the blade. The blade damages will need to be fixed with a sharpening whetstone or a special tool. There is no way to remove chips or serrations with sharpening the knife with spine of another knife.
Another drawback is that it is not possible to change the angle of the bevels with this method. You can only push the edge back in alignment. Changing the angle must be done with a special tool.
This method is suitable for restoring the sharpness of the cutting edge on a variety of knives. These are folding, automatic and simple models. The material can also be very different. These are blades of carbon steel and stainless steel.
The main rule is to do it properly. How to do it properly? The translational movements should be carried out only with a slight pressure. The movements should be sharp and confident.
After 10-15 movements you should check the sharpness of the cutting edge. If the cutting quality of the edge was not improved, you have to repeat each step a few more times.
Using this method does not ensure that you will improve the sharpness all knives. Sometimes the straightness of the cutting edge cannot be aligned with this method. For example, for the following reasons:
In such cases, a special tool or sharpening stone is needed. The best option for beginners and professionals is to use a TSPROF knife sharpener with a guide. This equipment allows you to restore the sharpness of the cutting edge and fix any type of damage. With this knife sharpener, even beginners can cope with knife sharpening. The reason for this is the straightforward design.
No special skills are required to work with the device. Anyone can cope with the task. To sharpen your knife blade read and follow each step:
In contrast to the method of sharpening with another knife spine, using sharpeners allows you to sharpen the blade over and over again. And the cutting edge will retain its shape for a long time.
After sharpening the knife with the sharpening system, you can use the method of honing the knife blade edge with spine of another cutting tool again. The reason for this is that the cutting edge will get its proper shape back. Using a second knife spine you can remove burrs and push the edge back in alignment.
The shape of the cutting edge can be honed with more than just the spine of a knife. How to choose the honing tool? Any other metal object will do. The main rule is the strength of the metal that will be used for honing blades of knives. Products made of tool steel will work best. Tool steel has high strength and wear resistance.
Using the method of honing with the spine of another cutting tool can get the blade some sharpness in a very short amount of time. Yet it is not enough to qualify for a good sharpening. You will eventually need to get your blade a proper sharpening with the use of professional sharpening equipment.
Most people use classic abrasive whetstones for sharpening knives, which can be bought at the nearest hardware store. Although this tool can restore the sharpness of the blade, it is poorly suited for the care of expensive tools of a home or professional chef. Some manufacturers of kitchen accessories offer more capable options, among which the most popular is a pull-through knife sharpener.
Let us take a closer look at what you can use to sharpen knives these days and what makes the pull-through type sharpener stand out from the rest.
All sharpening tools available on the market can be broken down into several groups:
All of the above knife sharpeners can bring back the sharpness of the knife edge and fix the edge damage caused during use. But their use requires the chef to have different levels of skill in sharpening. For example, even the most inexperienced user can use a pull-through sharpener without a manual, but inexperienced handling of stones or professional systems can break the tool and cause injury.
You should choose the right sharpening tool depending on the number and type of knives in use, your skills and your desire to care for chef knives and other blades. Now let us focus on the features, pros and cons of each option.
This tool is especially popular among experienced chefs and people who love to gather knife collections and take the time to care for them. Every self-respecting chef who uses expensive knives made of high-quality steel has several stones of different grits. They are used to sharpen the knife cutting edge in stages.
You can purchase the stones individually or as a set. The minimum set consists of two stones:
As an optional addition, you can purchase a third bar with a grit value of 3 to 5 thousand grit. It is used for the most careful finishing of the knife edge.
To avoid injuries, you should place the stone on a special holder or lay it on a towel to avoid slipping. They should be soaked in water prior to use to prevent metal residue from clogging the pores. During the sharpening process, the blade should be held at a certain angle to maintain the edge angle designed by the manufacturer. You also have to change knife sides and put chamfers on sharp edges of the stone.
With the help of sharpening stones, you can make any knife sharp, but you will have to take into account some features:
The advantages of manual whetstone sharpening include:
The disadvantage is that it takes a lot of experience and knowledge to use the stone properly, and the process itself is time-consuming.
Abrasive stones should not be considered as a tool for everyday use. They are only suitable for professional chefs or people who restore the sharpness of knives in workshops.
This term refers to sophisticated professional devices designed specifically for sharpening blades of various knives. They are most often used by collectors and people for whom caring for blades is one of their favorite occupations.
The sharpening system is a sophisticated device that includes clamps, heigh adjuster mechanism, abrasive holder and other units. All this is designed for a chef or a craftsman to be able to securely clamp the knife and set the desired blade sharpening angle. The entire work process is manual.
Thanks to this tool you can properly and safely make your knife sharp. But it takes at least 10-20 minutes to set up the whole thing ready for use and clamp the blade. The process of sharpening the edge takes even more time. Besides, all the equipment takes up a lot of space both in use and in storage.
Advantages of such a sharpener:
A drawback is that restoring the sharpness of the cutting edge is complicated and time-consuming.
If a craftsman has skills with locksmith tools and a talent for engineering, he can design a sharpening system on his own. Thanks to numerous settings, the device is easy to adjust to work with any kind of knives - table knives, hunting knives, carpentry knives, etc. However, it is not possible to recommend it as a tool for use in the kitchen. Unless we are talking about compact sharpening systems, such as a TSPROF Pioneer.
Sharpening a knife, even with the finest bar, is a process of removing metal from the blade. Therefore, it is only appropriate to restore the sharpness of the cutting edge when it is really needed.
It is best to do straightening (realignment) of the cutting edge line with a honing rod (a musat) between full sharpenings. It does not remove metal particles from the knife edge, but corrects minor defects that occur during the use of the blade. As a result, it restores the sharpness and, as a consequence, the efficiency of the tool and extends its service life.
Professional chefs use a musat all the time. It is used for honing almost every shift or before cooking every dish. And they sharpen the knife no more than 3-4 times a year. However, as long as they use quality knives made of high-strength steel.
You do not need to have any special skills to use a musat. You will need to rest the honing rod on the table perpendicular to the surface and run the blade over it several times on both sides. It is only important to maintain the blade sharpening angle provided by the manufacturer.
It is best to avoid impact loads when using ceramic tools so that they do not crack during use. You should also store musats apart from other cutlery in order to preserve their abrasive properties.
Advantages of a honing rod:
A particular feature and at the same time a disadvantage is that a musat cannot be called a sharpener. It is best suitable for honing (straightening) of the cutting edge. However, in case of chipping and other defects, a musat will not help you to restore the geometry of the cutting edge.
This is the easiest and most convenient way to make knife blades sharp. It does not require special knowledge and skills, and the whole process takes a few seconds. In terms of design, such devices can be different, but consist of two main elements:
The user only needs to position the knife according to the manufacturer's recommendations and move it back and forth on the backing plate until the knife is at the desired sharpness level. With some models, you will not even have to move the blade.
The most advanced and expensive models have multiple slots, where you can change the abrasive material and run multiple sharpening programs. It is controlled by buttons and switches on the handle or front panel.
Manufacturers try to make their tools as versatile as possible. Therefore, they are suitable for sharpening any knives:
The capabilities of knife sharpeners depend on the model, so it is necessary to choose it depending on your purposes.
There are a few things to consider when choosing an electric sharpener:
The advantage of an electric sharpener is the simplicity of the process of restoring the sharpness of the edge and the speed of use. But it greatly reduces the life of the knife. The device itself can be quite costly.
There is no point in using this tool for sharpening expensive professional knives. It is best to use it when you need to quickly restore sharpness to a large number of medium quality knives.
This device is versatile and most popular among home cooks and chefs in professional kitchens. It is also called broach or pull-through knife sharpener.
You can consider them as a replacement for electrical devices. Mechanical models are much cheaper and treat blades more carefully. They are also easy to sharpen the blade at the predetermined sharpening angle. You will only have to put in a minimum amount of force.
The demand for a pull-through knife sharpener is due to high efficiency, sufficient control over sharpening, and increased knife blade life.
The pull-through knife sharpener consists of a metal or plastic housing with two or three V-shaped slots. The sharpener has abrasive elements inside that are involved in the sharpening process. To restore the sharpness of the knife edge, insert the blade into one of the slots and pull the knife toward yourself.
The choice of slot depends on the manufacturer's preset knife edge sharpening angle. This is why it is important to make sure that the knife sharpener is compatible with your kitchen accessories before purchasing it. It is best to purchase a model from the same brand as the knives. Otherwise, you should make sure that the sharpener has slots with the angles suitable for your knives.
The pull-through knife sharpener also removes some of the metal from the knife. But the amount is much less than with an electric knife sharpener. For comfortable use, many sharpeners come with large and wide handles or fixtures that can be used to secure them to the table.
The main advantages of this tool are:
The main disadvantage is that you cannot manually adjust the sharpening angle.
It works when a chef needs to make a knife sharp quickly and carefully, without having to spend time caring for stones or putting together a sharpening system, and without having to use noisy and bulky electric machines. These sharpeners can be considered the best kitchen helpers both at home and in the professional kitchen.
On the outside, mechanical sharpeners are similar to each other. But if you inspect their specifications, you will find that there are differences. The main one is the sharpening angle of the blade. To determine it, you need to read the markings on the body or the abrasive element. Next, you need to find out the angle of the knife edge and purchase compatible accessories.
Some brands offer pull-through sharpeners with variable sharpening angles. They have movable abrasive stones that change position depending on the pressure. The range is 12 to 20 degrees, which covers almost all types of knives.
Besides, variable-angle sharpeners allow you to restore the sharpness of knives with a single-sided grind. Bread knives with a serrated blade often have this type of grind.
Other criteria:
1. Abrasive material: diamond and ceramic abrasive materials.
Kitchen accessory stores sell pull-through sharpeners with ceramic and diamond-coated sharpening elements. Diamond vs ceramic rods:
If speed is important to you, choose a diamond-coated model. If the main focus is on the best quality of the cutting edge, go for ceramic ones.
2. Sharpening steps.
The quality of the blade edge finish depends on the grit size of the abrasive stones. The cheapest models have just one slot, and therefore are only intended for coarse sharpening. More advanced and expensive models come with discs of different grits. For this purpose, the design includes two or three slots to pull the blade through during sharpening.
Price plays an important role in the choice. The simplest and easy to use pull-through sharpeners are very cheap, but you cannot use them for professional knives. Coarse abrasive removes a lot of metal, quickly making the tool useless. Buying a model from a well-known manufacturer will cost more money. But the investment will pay off many times over, as you will not have to buy a new knife after 3-6 months of its use.
3. The possibility of changing stones.
Some brands offer pull-through sharpeners with the option of installing other abrasive elements instead of the standard ones. To replace them, the housing must be disassembled according to the instructions. This allows the user to have the best match of abrasive grit to the wear and steel quality of the knife.
The only drawback of this option is the lack of additional stones in the basic set. You will have to purchase them separately.
Although the process of sharpening with a mechanical manual tool seems simple and easy, it best to follow these rules if you want to get the desired result:
You must store the pull-through mechanical knife sharpener according to the manufacturer's requirements. It should be thoroughly cleaned of dirt and traces of metal and dried after washing. It is best to place the tool so that it avoids contact of foreign objects with the abrasive elements.
There are many ways to restore the sharpness of a kitchen or hunting knife, but the most affordable and easy to use is a pull-through knife sharpener. Even unprepared users will have no trouble using this mechanical manual sharpener. But when buying one, it is important to consider the limitations of this tool and choose the right angle slots to have the best match with the sharpening angle of the knife you are using.
If the blade damage is too great, you can get an electric knife sharpener or go to professionals who sharpen knife blades and work with special equipment and will certainly do the best job. Or you can get a TSPROF Sharpening Kit with a set of diamond stones and experience what it feels like to sharpen like a professional.
Bread knives with a serrated blade retain edge sharpness for a very long time. They can be used for years, especially if you only cut baked goods and not tomatoes, lemons, and other fruits and vegetables.
Bread knives lose their sharpness due to contact with cutting boards and kitchen surfaces. It is possible to restore the original sharpness of the knife blade edge. But it is more difficult to do so with a serrated bread knife than with a regular flat edge blade. You will need special sharpening tools and skills to do this.
The bread slicing tool stands out among other knives in the kitchen. It features a serrated cutting edge. Thanks to the sharp teeth and grooves, home cooks and professional chefs can carefully cut soft pastry or a crispy loaf. This will not deform the pastry and will leave a minimum of crumbs on the cutting board.
Such a knife is easy to use due to the serrations. The notches may have a semicircular or triangular shape. The appearance of the tool resembles a construction saw, which teeth are not set. That is, all the serrations are arranged on the same line.
It also has other features:
Because of these features, the process of sharpening a serrated blade is different from sharpening regular knives.
To restore a serrated knife or wavy kitchen knife edge, you will need a special sharpening tool. It has the shape of a cone-like rod with notches on the surface. The tool is similar to a musat. Different diameter rods are needed to sharpen blades with different serration sizes.
If you take a look at the serrated edge, you will see that it has different shapes. One side is beveled at an angle while the other side remains flat. This feature of the sharpening profile is called "bevel". You will only need to sharpen such knife on one side.
How to do it:
The tool must be set at the desired angle. For bread knives, it ranges from 13 to 17 degrees. The bevel is plain to see, so there will be no problem with proper position of the rod.
For easy tool positioning and angle control, you can color the teeth with a sharpie marker. It is easy to tell by the marker residue on the surface that the rod is not positioned properly and you are not tilting it at the right angle.
2. Select the correct rod diameter depending on the size of the notches in the teeth.
The diameter of the knife sharpness restoration tool decreases in the direction from its base to its tip. You have to position the rod so that the diameter of its part matches the size of the notch or is slightly smaller.
3. Sharpen the first serration.
To do this, make short back and forth movements with the rod along one groove. Turn the tool at the same time so that it removes metal shavings from the blade in a more even way.
Use only the part of the rod with a diameter no larger than the groove of the serrated knife edge. Otherwise, you will increase the size of the groove and the serrated knife will not cut the bread. This will also make your knife look worse.
4. Sharpen other serrations.
The next step is to continue and sharpen the entire blade edge. Keep in mind that some knives have different sized serrated edge grooves. So you need to change the position of the rod of the sharpening tool to match the size of the groove.
5. Check for burrs.
After completing the above steps, you should check for burrs on the back side of the blade edge. Burrs form during knife sharpening. These are small metal flakes or shavings.
The presence of a burr indicates that you have removed a sufficient amount of metal from the groove. You can feel the burr clearly if you carefully run your finger or fingernail across the blade.
It usually takes about 5-7 strokes of the tool to sharpen each groove.
6. Remove the burrs.
Next, you need to get rid of the metal shavings on the back side of the serrated knife. You can use fine grit sandpaper for this purpose. If you do not have one, you can slightly run the same sharpening tool over the back side. But you must not put too much pressure on the rod to avoid ruining the sharpened edge.
7. Sharpen the flat part of the blade.
Some bread knives have teeth only at some part of the knife blade. The tip and the belly may have a flat shape and a regular profile grind. In this case, you can restore its sharpness with a sharpening whetstone.
You should not use a sharpening rod for this purpose. It will mess up the flat cutting edge profile.
We do not recommend using alternative sharpening devices to sharpen a serrated blade edge. They are not built for this kind of work. You could ruin your serrated knife for bread due to lack experience and not having the necessary skills.
Nevertheless, let us consider all the available options.
This is a replacement for a sharpening rod. It is a tool with a triangular cross-section. As with the regular sharpening rod, the size of the triangular sharpener gradually decreases towards the tip.
Triangular sharpeners are designed for knives that have V-shaped serrations on the blade. The steps to restore sharpness will be the same as described above. The only difference is that you do not need to rotate the sharpener in the process. You have to rock it back and forth on the bevel.
If you do not have a suitable tool at hand and can not buy it anywhere, you can make your own sharpening tool. You will need fine sandpaper and a rod. A metal dowel or a wooden stick of suitable diameter will do well as a rod.
You have to wrap the rod with fine-grained sandpaper and proceed to sharpen the blade. The work steps are described above. It is important for the size of the rod to match the serrations on the knife. If it is a serrated blade with V-shaped serrations, you will need a triangular rod.
Use it with caution and only as a last resort. This kind of sharpener is not designed for serrated knives. Therefore, it is easy to damage a serrated blade with such a stone.
How to do it:
If you do not have the necessary skills, it is better to avoid manual sharpening by hand and purchase a special sharpener.
Sometimes owners of bread knives may be tempted to sharpen bread knives using an electric sharpener. You should only use electric sharpeners if they have a special slot for serrated knife blades.
But most electric sharpeners, especially from the inexpensive range, do not allow you to sharpen serrated edges. They are only suitable for regular knives. You can just ruin the edge if you use them for the wrong purpose.
The main problem is that the sharpener removes metal on each side of the blade. The serrated edge has a different shape. At the same time, you cannot change the angle of the disks in the sharpener. This damages the serrated knife and makes it unusable.
Knife sharpening experts suggest following a few rules:
Take care during operation to avoid injury.
Even though a bread knife rarely gets dull, it is still necessary to sharpen it. A sharp blade is safer and more convenient in everyday use. Do not forget about classic chef's knives. If you are looking for a sharpener to sharpen knives at home with blade lengths between 30 and 250 mm, TSPROF Pioneer will do best. The Pioneer will help you safely make the edge sharp again while maintaining the proper sharpening angle.
Manufacturers of quality and expensive kitchen knives made from high-strength alloys assure that their tools retain edge sharpness for many months. But only if the owner treats it properly and takes care of the blade on time. Let us break down in detail the reasons why do razor blades get dull so quickly and what to do to avoid this issue.
For cooks and housekeepers, a knife is a professional tool without which it is impossible to work with food, prepare meals and serve dishes. The sharpness of the blade edge is directly related to how the owner uses it.
If you follow a few simple rules, the knife will not get dull for a long time, even if you use it often.
You should only cut meat, chop vegetables, slice bread or sausages on a kitchen board. Countertops are usually made of hard material and will quickly make dull your blades.
Wooden or plastic cutting boards have minimal impact on the sharpness of the edge. Boards made of glass, metal, ceramic or stone play the role of decorative accessories. They look beautiful in the interior, but cause the cutting edge to wear out quickly.
You should never put a dirty knife in the dish sink, and even more so — leave it in water for a long period of time. Even if you need to clean up any stuck-on food residue.
There are several reasons for this:
Experts recommend to wash the knife immediately after using it. Especially after cutting products containing acids (tomatoes, lemons, apples). Otherwise, the acids will leave stains on the metal. The edge will also slowly lose its original condition.
To remove food residue and juice, rinse the knife with warm running water and use a sponge. You can add some detergent to get rid of grease. Abrasive substances, including baking soda, are not appropriate.
After cleaning, there should be no moisture left on the blade. The blade and handle should be dried thoroughly using a towel or a cloth. This will protect the product from corrosion, which leads to rapid edge dulling.
To keep your blades sharp, it is important not to use the dishwasher to wash the tool. In the dishwasher, the knife can heat up to a high temperature, causing the metal to lose its properties and deform. Besides, in the dishwasher the sharp cutting edge comes in contact with cutlery and dishes, which also makes the edge dull.
It is designed for cutting foods of various softness. Knife manufacturers do not expect the chef in the kitchen or the chef in the restaurant to chop frozen meat or hard bones.
Although steel is strong, it is quite brittle. Contact with frozen foods or hard materials can cause pieces of the blade to chip off the edge and the blade itself can break.
It is not just nasty, it is dangerous. Metal debris along with food particles enter the digestive system and cause harm to people's health.
One of the main reasons for more rapid loss of knife sharpness is improper use while chopping food. Do not make chopping motions and sharply bring the knife down to the surface.
You should gently move the knife back and forth without pulling it completely off the cutting board. This way the cutting edge will slide along it. It is better to use the back (unsharpened) side of the tool to shake off chopped vegetables or fruits.
While cooking, some cooks use blades to assess the readiness of vegetables in boiling water, stir soups and broths. This has a negative effect on the sharpness of knife blades.
In such conditions, the metal undergoes severe temperature fluctuations. They can partially change the properties of the alloy and deform the blade. The only exception is knives made of ceramic.
A chef's armory should include tools for various types of work in the kitchen - peeling and cutting vegetables, cutting meat or fish, slicing bread, etc. Each type of knife is designed for a specific product or group of products.
For example, hard steel blades with tungsten and/or molybdenum additives are the best for cutting meat and separating it from the bones. Such knives are quite strong and retain the edge sharpness for a long time. But it is difficult to restore their sharpness.
Soft steel knives are great for chopping vegetables and slicing food before serving. If you use them for cutting meat, the tool will dull quickly and its cutting edge will lose shape.
The sharpness of blades is directly related to proper sharpening. Specialists recommend sharpening approximately 1-2 times a year. However, between complete sharpenings, you should hone the edge as often as possible using a sharpening rod. Keep in mind that the sharper the tool, the more convenient and safer it is to use it.
During the process of restoring sharpness, it is important to maintain the same angle of the edge. It depends on the purpose of the knife.
The most common mistake home cooks and chefs often make is improper storage of knives. This causes the blade to rust and become dull quickly. You should not put them in drawers with other utensils. The edge loses its sharpness when it comes into contact with hard objects.
You can store sharp knives in the following storage solutions:
It is not recommended to store knives in sheaths or scabbards all the time. These accessories make the knife look pretty, but they cause damage to the blade. The trouble is that the moisture on a knife surface does not evaporate into the air, and causes corrosion of the carbon steel. As a result, the edge gets covered with barely visible rust, which reduces the sharpness.
After washing, the knife should be left to air dry or in a drawer where its blade will get some ventilation.
To prevent the knife from dulling quickly, you should choose a high-quality tool at the purchase stage. The most important thing is to pay attention to the characteristics of the blade cutting edge. A good blade is made of solid steel with additional additives which protect it from corrosion. A steel like that cannot come cheap.
Inexpensive knives from hardware stores are made of stainless steel. It resists oxidation well and has an affordable cost. But the cutting edge of such an alloy is too soft and will deform upon contact with a hard object. This causes the knife to become dull quickly.
High carbon steel is used to make expensive tools. To prevent corrosion, they add vanadium and molybdenum in high carbon steel. Such knives stay sharp much longer.
Damascus steel knives are considered the most expensive. It consists of several alloys of different hardnesses. This results in the right balance, making the blade flexible and durable, yet razor sharp and hard.
A quality high-carbon alloy knife will stay sharp for a long time if you follow the simple rules listed above. But you will have to sharpen it sooner or later. It is important not to ruin the cutting edge with improper sharpening tools. Special stones with different grit are the best way for this purpose, as well as professional sharpeners which allow you to set and control the sharpening angle.
Kitchen knives — are professional tools that remain sharp and reliable only with proper care and storage. Both the professional chef and the amateur must know how to use and sharpen the knife, how to clean it and treat it to prolong its service life.
Here you will find basic rules for using and caring for the most important kitchen tool.
To prevent damage to the blade and keep it in perfect condition, rinse the knife with cool tap water immediately after cutting the food. Or for a more thorough cleaning - wash it in warm water using a sponge with a detergent.
After removing the residue, use a towel or a tissue to get rid of moisture from the blade. You can then place the tool in a stand or on a magnetic holder.
We recommend following these rules when cleaning the knife after slicing food:
Never neglect drying. If you leave water drops on the steel, the chlorine in the water can also start a reaction with the steel. As a result, your blade will look worse. It will get the so-called pitting corrosion, which can happen even with stainless steel.
It will be difficult to remove stains and restore the knife to its original appearance. You will have to polish it with a mild abrasive compound.
Do not use salt, lemon juice or grated onion to remove stains. The substances in these products are aggressive and may also start a reaction with the blade steel. This will only make things worse.
If you are a chef or a home cook and you use high-quality knives made of expensive steel in your kitchen, you should pay attention to their storage. The main rule is that there should be no contact with other utensils or metal objects. It is best to provide a separate storage shelf, vertical or magnetic holder for cutting tools.
If you store knives in drawers, provide a separate compartment for each knife. This is also necessary to prevent injury. While working, a chef can cut themselves trying to pull a product with a sharp blade from a pile of other kitchen accessories.
When choosing a storage, pay attention to models that do not block the air access to the blade and handle.
In the household, it is important to respect safety rules concerning other family members. If you have children in the kitchen, you must ensure that they do not have access to the knives. It is best to store the knives far from the edge of the work surface, suspended above the table or mounted on the wall.
Many knife lovers buy expensive collectible and specialised knives that they use very rarely. Such models should be "preserved" for long-term storage. To avoid corrosion of the blade, the metal should be thoroughly cleaned and dried, then covered with mineral oil. Then the tool should be wrapped in parchment and placed in a cupboard with constant air humidity level and temperature.
Manufacturers offer different tools for specific tasks in the professional or home kitchen. Chefs must use them exclusively for their intended purpose. For example, a fillet knife is not suitable for cutting fruits and vice versa.
There are universal models. But they are actually designed for chopping, peeling or carving. Do not use cutting tools for ice picking, opening cans or cutting bones. This way you will never have to think about how to sharpen a dull blade again.
To maintain the cutting edge condition and sharpness, remember the following rules:
Only special kitchen boards should be used for slicing. If you use a kitchen knife on a plate, on a bowl, on a granite worktop, it will dull more quickly and the edge will be damaged.
Tools with rubber or polymer handles do not require special operating instructions. Food juices and water do not affect plastic and rubber. However, if a chef uses a knife with a wooden handle in the kitchen, they should take special care of the wood.
Expensive blades are usually equipped with handles made of stabilised wood. The natural material is soaked in special resins that reduce its porosity, provide hydrophobic properties and protect it from temperature influences.
Despite this, manufacturers recommend treating the handles with special compounds. This procedure solves several problems:
Cooks use linseed oil for impregnation. It penetrates well into the pores of the wood and fills them, reducing the absorption capacity of the surface. Any other oil used in the kitchen will do fine as well. Do not use chemical protective compounds, which can get into food and dishes during cooking.
To prolong the service life of a knife with a wooden handle, the experts recommend to follow these rules:
Avoid food contact with the handle when using the knife for cooking in the kitchen.
No matter how good and expensive a knife is, sooner or later you will have to think about how to make it sharp. The advertised self-sharpening tools are nothing more than a trick to attract customers.
How to sharpen a knife:
If the blade has lost its shape, or the edge is damaged, it would be best to contact a master who knows how to sharpen it using electric tools with abrasive and polishing wheels or a manual sharpener.
The rules and ways described above are quite simple. If you follow them while cooking at home or in a professional chef kitchen, you can be sure that your knife will retain its appearance and sharpness for a longer period of time. And if you know how to sharpen a blade, you will be able to quickly restore its sharpness and shape without going to a professional for sharpening.
Although the carbon knife steel is subject to corrosion, rust rarely appears on the blade. A rusty patina develops if the knife has been stored in a kitchen drawer for a long time, is used only during hunting or mushroom season, or has been left lying outside since last summer.
How to restore a rusty kitchen knife? If you find rust, you do not have to throw away a good tool, even if it is old. With some effort, you can restore it to its original look. It is not a difficult process, and as a reward for your labour, you will get a sharp knife that will serve for decades to come.
Corrosion of carbon steel, which leads to rust, is the oxidation of iron (Fe) with oxygen from the air. To neutralise this process, you will need to use acids. Therefore, you should give preference to acid-containing substances when choosing a suitable product.
The choice of the cleaning ways depends on how badly the knife is infected. A barely visible red patina can be dealt with an ordinary cloth. However, if a pocket knife has been lying outside all winter or has not been used for several years, you may have to use abrasives or power tools.
Before removing the rust from the blade, you must get rid of other contaminants that may be on the kitchen knife: dust, soil, decayed food particles, oils and lubricants.
How to clean the knife:
Do not apply too much force to get rid of the rust at this stage. Doing so may damage the metal. It is better to use one of the household kitchen products.
The first step is to place the corroded tool in vinegar. It is a 9% solution of acetic acid, which removes traces of corrosion. You need to soak a piece of cloth in vinegar, and then wrap it around the blade. This way, you can avoid damaging the handle.
After the rust is dissolved, rinse the knife with water and dry it with a cloth or a tissue.
Lemon juice is another solvent for iron hydroxide. You can use it pure or together with salt.
How to remove the rust with lemon juice:
Do not leave lemon juice on the blade for a long time. It will leave marks on the surface and damage the tool.
Another way to fight rust is with baking soda. It works less effectively, so it may take a few tries to remove the corrosion. The good thing about this option is that baking soda can be found in every household kitchen.
Before using, add a little water to the baking soda to make a paste. Apply it to the blade and leave the knife for 2-3 hours.
Then you can clean the surface with a metal or plastic sponge (brush). To finish, rinse off any residual soda and rust and wipe the knife with a dry cloth to remove any residual water.
Potatoes contain substances that can help neutralise rust. Sometimes the potato, or to be more precise - the acid in it, helps to achieve the desired result. You just need to stick a knife into the potato body and wait a couple or three hours. After removing the corrosion, you need to rinse it and dry it with a rag.
Note that you should not eat the tubers used for the cleaning. They may contain particles of oxidised iron.
Dishwashing detergents help to solve the problem if they are mixed with vinegar. Both components have to be added in equal parts. Clean the blade using a moistened cloth.
If the corrosion started a long time ago, you can soak the tool for an hour and a half. After that you just need to rinse it and wipe it with a cloth.
In case of severe damage, vegetable acid alone will not be sufficient. You will have to use mechanical methods. The easiest and most accessible is with using a toothbrush. To do this, put a few detergent drops on the brush and rub the damaged area with it. This way you can remove rust that is located in hard-to-reach places. For example, near the handle or in the threads on the blade.
A melamine sponge has a similar effect. The porous polymer scrubs off oxidised iron and returns the knife to its original gloss. It can be used dry.
A sandpaper is a more serious tool. But you should resort to such drastic measures only as a last resort. Yellow stains can be removed from a dry knife or from a knife surface moistened with water.
Electric tools are the most effective method. You can use a screwdriver or a drill with a grinding wheel attached for this purpose.
Follow these tips when using these devices:
Proceed carefully, moving the tool in short strokes. Careless behaviour can damage the steel and make the knife unusable.
Another way to clean a rusty knife is to use a chemical solvent. You can get it in a hardware store.
Small rust spots can be removed with universal compounds like WD-40. Their advantage is that they do not damage the metal and do not stain it. After treatment you can easily remove the residues of these products with water or a rag.
It is best to apply the lubricant in a thin layer and then wipe it off with a cloth. If you apply too much WD-40, dust and dirt will stick to the surface.
How to remove rust with a lubricant:
Be careful to avoid leaving ugly scratches.
Hardware stores also sell non-toxic solutions for iron hydroxide removal. Such products come from AVS, KERRY. They are effective enough to remove rust, but not so strong as to damage the blade or cause harm to health.
To remove rust, you need to place the blade in a jar with such a solvent. It can be kept in the container for up to half an hour, after which the residues of the substance have to be washed off with water. At the end, wipe the tool with a cloth or a paper towel.
You should use them if the rust covers almost the entire knife surface and has penetrated deeply into the metal. They also help to get rid of calcium and lime stains. However, they are toxic and you have to strictly observe the safety precautions specified by the manufacturer when using them.
How to clean the knife with an organic solvent:
It is better to clean the blade outdoors or in a well-ventilated room. Never mix it with other products to avoid a dangerous chemical reaction. Ignoring these rules may result in chemical burns or toxic vapours poisoning.
To avoid rusting of the knife, it is enough to use it frequently for its intended purpose. When you cut something with a knife, its steel surface is constantly cleaned, the knife blade is washed and dried according to the manufacturer's recommendations. There is a risk of corrosion if the tool is just stored in a kitchen drawer or on a shelf.
Lack of attention from the owner will sooner or later lead to oxidation of the blade. Even if the tool is stored in a dry place. This is due to the constant presence of water vapour and oxygen in the air. The water condenses on the blade and causes corrosion.
Applying oil is an excellent option. It forms a protective layer on the blade, which has hydrophobic properties. Therefore, water will not come into contact with the iron and will not cause oxide formation.
However, some owners of expensive knives refuse to use oil because of the possible negative effect of its components on the metal. You can use wax instead of oil. People often use it for expensive hunting or professional chef's knives.
It is also not recommended to store penknives, pocket knives and hunting knives in sheaths or scabbards. The close contact of the surfaces with each other makes the situation worse. Oxidation by moisture occurs even faster. Natural leather has the most negative effect, as it can absorb moisture itself.
The best way to store tools is with using fabric chef rolls or in kitchen drawers with compartments.
Blade condition should be monitored most closely in high humidity areas. This includes tools used on yachts and other vessels. Salt in the air adds to the metal's deterioration. It can even cause oxidation of tools made of stainless steel. If the stainless steel blade becomes dark, you have clean it to prevent corrosion.
A quality knife will not rust during its entire service life if you follow the handling rules. The more expensive the tool, the longer it keeps its properties and initial appearance. Thoroughly choose the knife properties, especially if you need it for professional purposes. However, if the knife gets rusty, do not throw it away, even if it is old, as there are many restoration methods.
Do not forget about the knife sharpening. It is important to choose the right abrasive stones and maintain the same sharpening angle. It is best to use special devices and sharpeners for this purpose.
Even the best quality and most expensive knives will gradually lose sharpness and will need a proper sharpening. It seems to be quite straightforward at the first glance. Anyone can properly sharpen knives, but before trying you need to study some sharpening instructions and make a lot of effort to acquire the necessary skills.
For starters, let us focus on the safety rules designed to prevent injuries when sharpening knives on your own. Following them will help you make your pocket or chef's knife sharp without risking your health.
Some people believe that sharpened blades are more dangerous than blunt blades. However, this is not true. When using sharp kitchen knives, you have to use less effort to cut something. With a blunt blade you will have to use more effort, which increases the risk of the blade travelling off the object you are cutting and wounding you.
The troubles start already when checking the blade before sharpening. Some people start checking the sharpness on their skin, trying to shave the hair, which can cause a cut.
There are easier ways to check the sharpness.
This is the simplest and most accurate method. You need to take a shop receipt, spice packaging, notebook or other paper and try to cut a strip from it. If a knife cuts the paper easily, it was properly sharpened.
The second variant of the paper test - is to roll up a thick magazine or newspaper and try to slice it. If the blade is sharp, the knife will easily do the job. The strips will have the same thickness and an even edge.
A safe way to check the knife sharpness is to try to slice a soft bread. A blunt pocket or kitchen knife will cope with this task. It will break the crust and tear the crumb. You do not need to sharpen a knife, if it does not crumble the crust and cuts the loaf into thin and even slices.
Note that this test is no good for a serrated bread knife. Thanks to the serrations, it cuts any type of bread perfectly regardless of how sharp it is.
One of the most popular tests is cutting tomatoes. This vegetable has a tough peel and soft insides. A dull knife will not cut the fruit neatly into slices. Whereas a sharp one will make thin slices, even if you do not hold the tomato with your hand.
The next stage to a safe work with knives is to choose a sharpening tool. There are different models in shops, ranging from simple mechanical to electric ones. Let us consider the most common options.
This tool is a rod with a rough surface, mounted on a convenient handle. In terms of design, a mousat is similar to a file with a round or oval working element.
Mousats are made of different materials:
If you master the minimum necessary skills to handle this tool, you will find it completely safe to use for sharpening. However, it is more suitable for bringing the edge back in alignment and restoring some sharpness than making a knife sharp. A musat is used to keep the blade in good condition until the point when it requires a proper sharpening.
There are hundreds of abrasive stones available on the market, which are often used to sharpen cheap stainless steel or low-carbon alloy knives. But they are not suitable for professional chef's tools. Hard materials, including Damascus steel, are sharpened with special water stones with the right grit.
These tools allow you to restore the sharpness of any knife. But working with them can be very dangerous. Careless movements can lead to cuts or more serious injuries. It is recommended to thoroughly study the work procedure and watch video instructions before trying manual sharpening on your own.
The most user-friendly and safe option is to use a sharpener. The main working element of this tool are the abrasive inserts placed in a plastic case. To sharpen a knife you need to run the blade through the slot until you get the desired sharpness level.
The downside of such a tool is the fixed angle and the danger of damaging the blade of expensive knvies. On top of that, they are not always able to cope with sharpening hard steels.
You can use a TSPROF sharpening system to make the process user friendly and increase safety. These sharpeners allow you to set the angle with an accuracy of 0.1 degree with one hand and sharpen the blade at exactly the same angle on both sides. TSPROF sharpeners allow you to use any abrasives of an Edge Pro type with a backing plate or any flat end abrasives and securely fix a knife in the clamps, ensuring that you will not cut yourself in the process.
Some manufacturers also offer electric sharpeners, which have an abrasive belt or wheel driven by an electric motor. This is one of the most effective tools used by professional sharpeners. But it is dangerous to use it without the appropriate skills.
To prevent injuries when working with sharpening tools, you must follow a few simple rules.
These basic rules are relevant regardless of what and how you sharpen. There are also YouTube tutorials that describe the proper handling of sharpening tools.
There are two ways of honing the blade, but within this article we will describe the safest and easiest one. It is called Calmly and is suitable for beginners. This method involves resting the tip of the musat on a wooden board or a table top. It is a good idea to put a towel on the surface to avoid slipping of the musat.
The next steps would be as follows:
This method of honing makes it extremely difficult to cut yourself. But it will not work if the cutting edge is too dull or has serious defects. You will have to use another knife sharpening method.
A water stone will help to restore sharpness of a very blunt cutting tool. You have to use two or three bars of different grit. It depends on the type of blade, purpose of the blade and some other parameters.
The next steps would be as follows:
To avoid troubles and to improve the quality of sharpening, you should follow these safety rules:
You should start very slowly and carefully, speeding up only after you have acquired the necessary skills and experience.
Following safety rules for working with knives and sharpening knives make it possible to avoid injuries. For this purpose, you should not only study them, but also follow them during work. If you are not confident in your skills, you can contact a master who will make your knives sharp and will remove any defects of the cutting edge.
A musat for sharpening knives is a manual tool used for honing the cutting edge of a blade. This tool is used both in everyday life and in professional kitchens. Musats differ in several specifications. Below we will analyse the purpose of this tool, its types, and also the ways of use.
To keep the blade sharp, you need to regularly hone and to sharpen it. The purpose of the musat is to restore the cutting edge. This is why professional chefs use this tool several times a day.
To create a cutting edge you need to ground a steel workpiece at a certain angle. Small metal particles are removed from the surface in the process. This results in a sharp cutting edge.
When working with hard materials, the thin line of the cutting edge rolls over to the side. This reduces the sharpness of the blade. A musat allows you to restore the shape of the cutting edge. Thanks to this, the knife gets sharp.
You should keep in mind that, unlike a sharpening stone, this type of tool is not used for sharpening. It is impossible to repair a badly damaged blade, remove chips, or change the angle of sharpening with a musat. You need to use a stone or a special sharpener for this purpose.
Musats can have different characteristics. Therefore, before buying, you should find out which musat is suitable for a particular knife. They can differ in the following specifications:
Consider the above criteria to find the most suitable one. The right musat will last a long time both in the professional kitchen and at home.
To hone the cutting edge of knives, you need a material that is harder than the blade. Breaking this rule will cause the tool to wear out quickly. There are different types of musats depending on the material:
However, it is important to keep in mind that the diamond musat removes large steel particles from the blade. This causes it to wear out more quickly. This is why chefs do not use a diamond musat too often.
The tool's surface roughness determines the final sharpening result. Therefore, you should pay special attention to this parameter before making a purchase. Musats with a coarse grit allow you to quickly remove metal particles from the blade edge. However, you should keep in mind that the coarser the musat is, the faster the knife wears out. Depending on the size of abrasive particles, you can divide honing tools into three types:
Some models have a completely smooth surface. This is due to the fact that such a rod is used for bringing the cutting edge back in alignment and not for sharpening. You can hone the cutting edge even with a smooth metal or ceramic surface.
Some manufacturers offer their customers musats with different grits. One side of the rod has a medium-grit and the other side has a fine grit abrasive surface.
This criterion determines the time it takes to hone the cutting edge of the blade, as well as how convenient it is to use it. The main parameter you should consider before buying is the length of the rod. It should be the same size as or larger than the blade.
If you keep this in mind, you will easily choose a model suitable for your purposes. A musat with a length of about 30 cm is best for domestic use. This is essential for having the possibility to lead the the entire blade edge over the abrasive surface.
Some manufacturers produce small musats designed for the outdoors. They can be carried in a pocket or a bag. Small mousats have a short length. As a rule, no more than 10 cm.
There are musats with a different cross sectional profile of the rod. You must take this into account when deciding which one to get. The mousat's shape does not affect its performance. However, the cross-sectional profile affects the size of the contact area between the knife edge and the abrasive surface. In terms of shape, there are:
As a rule, ceramic musats are supplied as rods with a round or oval cross-section. This is due to the characteristics of the material and the conditions of use.
No special knowledge is required to use a musat. Any person can cope with the task. There are two ways to restore the shape of the cutting edge. It is up to you to choose the method that is most convenient for you. How to use a musat:
It is important to keep a correct sharpening angle. For most western knives, it is around 40 degrees. Therefore you have to keep an angle of 20 degrees for each side.
Japanese knives are different. You have to set a total angle of about 30° for sharpening of such knives, which means that you have to set an angle of 15° degrees for each side.
Improper use may shorten the service life of an edge honing tool. This is why you must take proper care. Small metal particles have a negative effect. They clog the grooves on the rough surface and prevent the tool from properly honing the cutting edge.
After each knife sharpening, you will need to clean the surface of the mousat with a dry rag. This will remove small steel particles. Besides, sometimes you have to wash the rod under running water. You can use a detergent or soap solution for proper cleaning the surface from clogging. After washing, you should also wipe the rod with a dry rag. This is necessary to remove any metal particles residue and moisture.
Washing intervals depend on how often the musat is used. For example, a professional kitchen chef may hone the cutting edge several times a day. In this case, washing is required at the end of the working shift. A household musat requires a less frequent washing. This is due to a less frequent use.
Despite the product's durability, you should not store it together with spoons and other kitchen items. Metal, ceramics and other hard objects can damage the surface. This will make the device less efficient in fulfilling its intended purpose.
Always store the musat in a hanging position. There is a hole in the handle for this purpose. This hole is used for attaching a ring, cord or any other element used for hanging the tool.
When choosing a honing tool, you follow your own purposes and the specifications of the musat. This approach allows you to buy the model that meets your needs. So, when you are making a choice of a honing tool, you need to pay attention to:
Rod material. Ceramic models are best for knives made of soft steels, while diamond-coated rods are best for knives made of hard steels.
A special, small-sized musat is a perfect choice for an outdoors trip. With a length of only 10 cm, it is convenient to carry. But you do not always have such a compact tool at hand. In situations like this, you can use other objects. But keep in mind that the material for blade honing has to be strong enough. When camping, fishing or hunting, for blade honing you can use:
Be aware that improvised materials are suitable in cases when there is no specialized equipment at hand. This often happens in outdoor activities. For professional purposes, it is better to use a specially designed musat. Using professional equipment ensures the best possible sharpening quality.
A musat is a must for professional kitchens, households, hunting and fishing, and for many other cases. A musat allows you to to restore the sharpness of the cutting edge. With the right choice and proper care, the musat will serve you for a long time.
Water or oil is used with a special whetstone for blade sharpening. The liquid is applied to the sharpening stone or bar before sharpening. Below we will analyze the purpose of the cooling liquid, the order of actions during sharpening and how to choose the material.
During sharpening, the stone removes tine metal particles from the blade. Pressing the blade against the rough surface results in increased friction. Due to this the metal surface temperature goes up. The knife sharpening oil allows:
Besides, during sharpening, the stone surface produces a slurry that consists of a liquid and an abrasive residue. The slurry provides the best possible sharpening results.
There is a wide range of oils available. Therefore, it is quite difficult for a beginner to make up his mind about the choice of a cooling liquid. Here is a list of oils that can be used to work with a blade:
Special sharpening cooling liquids are the best option. They ensure maximum sharpening quality of the cutting edge, reduce the metal heating and remove fine particles from the contact area between steel and stone.
The sharpening oils work with natural stones, diamond coated bars or aluminium oxide sharpening stones. They can also be used with stones designed for use with a sharpener, such as a TSPROF sharpener. How to work with oil:
After work, you should clean the abrasive stone from any dirt. Remove oil residue and small steel particles that have got into the abrasive stone's surface during the sharpening process. Breaking this rule will lead to rapid clogging of the stone surface.
Given the wide range of cooling liquids, it can be difficult for a beginner to make a choice. This is caused by the fact that the oil must meet several requirements at the same time. Only then can you achieve maximum sharpness. To choose a cooling liquid you need to pay attention to:
Based on the above criteria, the best option is to use oils specifically designed for sharpening. They are safe for health and ensure that the blade will be as sharp as possible.
If there is no specialised sharpening liquid available, you can choose a material that meets the requirements given above. However, you should bear in mind that this would make it difficult to achieve a maximum level of sharpness.
If you choose a machine oil, you better settle on a spindle or hydraulic mineral oil. Such compounds have minimum additives that can be harmful to human health.
You can also use oleic acid. It ensures maximum processing quality. Harmlessness, low viscosity and slow drying speed allow this material to be used as a substitute for special liquids.
Some use castor oil as a substitute. However, keep in mind that this material is highly viscous. Therefore, it can cause clogging of the sharpening stone.
Using sharpening liquids will help you make your knife as sharp as a razor. This prevents the steel from coming into contact with water, which reduces the risk of rusting. With the right oil, the sharpening process will be both convenient and fast. The best option will be the use of specialised liquids. However, if you do not have the necessary compound at hand, you can use other lubricants.
While manual hand sharpening is a universal method, consider using a manual precision sharpener — and sharpening with any oil will seem like a breeze, thanks to the fixed knife position and fixed sharpening angle.
Before asking the most important question: what to use to sharpen a chef's knife, one should understand what is a chef’s knife.
This knife is an all-purpose kitchen tool for chopping and precision cutting. In the majority of cases, a chef's knife is used for cutting meat, slicing and chopping vegetables and herbs. The blade flat can also be used to crush garlic. Thus the name of this type of knife is well deserved, it is like the king of the ball or the boss among knives, which fulfils the most tasks in the kitchen.
The German company Wusthof is considered to be one of the benchmarks or a model of modern knife-making development.
Chef's knives have a number of technical characteristics on the basis of which they are considered to belong to this group of knives.
The main feature of chef's knives is the thickness, length and width of their blades, while the handles within the same series of any trade mark do not show much difference in their dimensions. Besides, the blade has a rounded shape along its entire length which allows to perform the rock chopping technique. The blade has a gradual slope down from the spine to the tip, making it spear-shaped.
For the sake of clarity, it is a good idea to understand some of the technical concepts of the parts of a chef's knife.
1 - tip, 2 - belly, 3 - cutting edge, 4 - spine (back), 5 - handle scale, 6 - pin (riverts), 7 - heel, 8 - bolster, 9 - butt (pommel)
In cross-section, such knives have bevels straight from the spine, with a small thickness behind the edge, which allows the creation of thin secondary bevels and the cutting edge itself. On top of that, these blades cut well even at high values of the total sharpening angle: near 40° and above, because it is not the sharpening angle that does the work here, but the geometry of the blade profle.
The standard length of a chef's knife blade is around 20 cm, but can vary between 15 cm and 30 cm depending on the amount of work, the skills of the user and affects performance. Besides, the longer the blade, the wider and thicker it is.
In addition to the size of the blade, an important specification that affects its performance and defines what to use for sharpening a chef's knife and how to sharpen it - is the quality of the steel.
One can draw a simple equation: "The lower the quality of steel and the higher the loads and frequency of use, the more often you will need to sharpen the knife".
And vice versa: "The better the quality of the steel and the better you treat the tool, the longer the knife will remain sharp after one sharpening session."
A couple of conclusions:
Given that we are talking about a very popular type of knife, we will look at the most suitable ways to sharpen it.
Today you can find a lot of devices for sharpening literally any knife, including kitchen knives. All of them can and do fit chef's knives.
The devices that we will cover below will be sorted mostly by ascending cost and from simple to complex. The only exception would be one electrical device that is intended for widespread use.
Mechanical pull-through sharpeners are very popular devices. They are cheap and easy to use. All it takes is a couple of pulls with the knife blade and the knife seems to be sharp and cutting again. All it takes is a couple of pulls with the knife blade and the knife seems to be sharp and cutting again. Almost all pull-through sharpeners create deep longitudinal grooves on the blade bevels, which destroy the cutting edge and damage the blade with regular use.
Only some expensive two and three stage sharpeners do not destroy the blade and produce genuinely decent edges. For this reason, before buying or using a particular sharpener, you should first find out how it works and take advice from experts and user reviews.
Another very common tool for keeping kitchen knives sharp is the musat, which is also used for honing and bringing back into alignment the cutting edge line of knives.
Using a musat will not be difficult for an average user. Using a musat restores the knife's sharpness, but it can not be called sharpening. Using a musat helps to restore the sharpness of a knife, but it can not be called sharpening.
This method is reasonable when a complete sharpening is unnecessary or you do not have enough time for sharpening. For example, some kitchen knives rarely get a complete sharpening because there is no real need for it and the musat does the job just fine.
Some may find it difficult to get to the correct sharpening angle when using a musat. There are a couple of small details to pay attention to:
These two planes can be connected and you will tactilely feel that you have got into the secondary bevel plane.
There is also a little trick using a sharpie marker. It is enough to make a few dots with a marker on each side of the blade and make a few slow honing movements.
After that you have to check the markings. If you remove the paint closer to the cutting edge, this means that the sharpening angle is too large. If you remove the marker closer to the secondary bevel line (shoulder), this means that the angle is too shallow. With experience, you will develop muscle memory and will no longer need to use a marker.
When choosing a musat, there is one general rule - the musat should be as long as the blade of your knife.
Musats can be ceramic, metal or diamond. All mousats are divided into three main groups by grit: coarse - up to 800 grit, medium - about 1000-2000 grit and finishing - 2000 grit and more. The less thickness behind the edge of the knife and the less metal you want to remove during honing, the smoother the surface of the honing rod should be.
In addition to musats, there are sharpening systems that include 4 sharpening rods with different grits. To use it, you need to insert the rod into the hole of the abrasive holder, made at a specific angle. During sharpening, the blade should be kept perpendicular to the base of the system and pulled downwards. This way ensures that the sharpening angle does not change.
Rods, unlike musats, do not need to be held in the mid air and the honing angle is easy to repeat, although they do have drawbacks. Such rods have one particular length, so they are often shorter than chef's knives, and the choice of grits does not allow a complete sharpening. On the other hand, it is a good, convenient, relatively inexpensive and more versatile solution for medium-sized knives, compared to a single mousat.
Sharpening with a water or oil based natural or artificial benchstone is the most common and classic way of knife sharpening. With the relative affordability of abrasive stones, this method is both simple and complex at the same time.
The beauty of this method is that almost any previously sharpened knife blade has secondary bevels, which makes the sharpening process much easier. Secondary bevels that form the cutting edge are a chamfer with a plane, a kind of rails.
It is rare to see anyone manually change the angle with a sharpening stone because it takes too much time, and the whole range of stones for such a task can be very pricey. All in all - it is not worthwhile.
It is common to find combined double sided water and oil abrasives with two grit sides. There are coarse combinations and much finer ones. Thus, you can consider this method relatively inexpensive.
As mentioned above in the subparagraph about musats, it is not as difficult as it seems to put the secondary bevel plane against the surface of the abrasive and keep that angle. Give it a try and you will understand. It may be a little tricky to sharpen the belly area of the blade. However, the belly line of most chef's knives follows a very smooth curve, so maintaining the same angle should not be too difficult. That said, over time you will develop some motor skills and the entire process will get easier.
Sharpening devices designed for a wide range of tasks with a specific set of accessories are considered to be sharpening systems for sharpening different types of knives and other cutting tools.
Certainly not all of them are designed for sharpening knives with large blades. The first option to consider are Apex tabletop sharpeners (a TSPROF Blitz Pro, e.g.), which have a number of similar technical features.
These features include a guide rod with abrasive holder, sharpening angle adjustment mechanism as well as a semi-automatic turning mechanism. Together they provide a fast and accurate repetition of the required sharpening angle.
To use such devices you should have a certain amount of knowledge and experience. Such systems are in a higher price range than the usual sharpening tools. Many manufacturers have compact models that work well as household sharpeners and are quite easy to handle.
The top of the line models of these devices are mostly used by professional sharpeners.
The advantage of this type of device is its versatility and availability of many different water and oil abrasives that you can match to the steel grade of your knife.
Electric sharpeners are easy to use. However, do not forget to read the instructions before using them.
A good quality sharpening rod is a nice addition to an electric sharpener for removing burr.
Electric sharpeners can be cheap, versatile and quite convenient to sharpen kitchen knives with wide and thin blades. Electric sharpeners for larger kitchen knives will have a far different cost.
Expensive devices are often used by professional sharpeners for commercial knife sharpening.
There are a range of kitchen knives and they are often sold in sets - chef's triplets. Each manufacturer can have a similar or slightly different chef's knife blade and handle design. These knives can have blades made from a large number of different steels. Purchasing a really low-quality product is definitely not the idea.
It is best to have a medium or higher quality chef's knife. What to use for sharpening and how often you intend to care for the blade should be based on the quality of the steel, the level of stress on the blade and how often you use it.
The cost of using a knife does not stop at its purchase, it also includes the cost of its maintenance.
Any good Japanese knife, even a Western-made one, deserves to be sharpened with a precision sharpener.
Grinding creates a narrowing (bevel) on both sides of the blade and forms the thickness behind the edge (shoulders). In turn, during the sharpening you create secondary bevels in front of the thickness behind the cutting edge.
Bevels of the blade, along with the steel are one of the main criteria for evaluation of the cutting performance of a knife. A blade without bevels is just a piece of steel that cannot fulfil its intended purpose.
There are several basic types of knife blade grind profiles and several variations depending on the ingenuity of the designer or the knife maker.
Blade grind with the shape of hollow bevels is a very common technique for creating knife blades and we will discuss it further. Knives with these grind of bevels have excellent cutting abilities, better than a flat bevelled blade and in some respects they are more flexible than others.
Knives with such bevels are very often used for hunting and hiking. In some cases, they produce high-end kitchen knives with this type of bevels and knives get a scary sharp cutting edge.
Due to their design, hollow bevels are very often associated with the most familiar household item - a dangerous razor, which appeared according to some sources in England, in the city of Sheffield in about 1680 and from there it got a worldwide distribution. Hollow grind bevels are often referred to as razor bevels.
The classic design of many dangerous razors has hollow grind bevels running almost from the spine of the blade. There is a special sharpening method that is used to create hollow grind bevels.
The essence of this method is that the grinding starts from the back of the blade at about 1/3 of the blade width, and then with a smooth rounding descends towards the cutting edge. The thickness behind the edge of the blade depends on the diameter of the grinding wheel or abrasive disc. As a result, you get a rather small thickness behind the edge and as a consequence a blade with a cutting edge that is much thinner and sharper than all other types of bevels.
Nowadays, due to the development of steel production technology and developments in metalworking equipment, it is possible to produce not only classic bevel types, but also to create new ones.
Below you will find the structure of a classic blade with hollow ground bevels.
1 - blade width, 2 – spine, 3 – blade flat, 4 – bevels, 5 – secondary bevels, 6 - thickness behind the edge
1 - spine, 2 – sharpening angle, 3 – bevels, 4 – secondary bevel, 5 – cutting edge
As mentioned above, there are classic hollow grind bevels that have a 2/3 of the width of the knife blade. Such knives have the widest distribution and are used for various household purposes. Due to this you can call them the classic type of hollow grind bevels.
The advantage of knives with classic hollow grind bevels is that such blades combine sharpness and stability thanks to the presence of the blade flat, i.e. due to the 1/3 flat area of the blade from the spine and the hollow grind bevels. As a consequence, such knives have a sharper cutting edge compared to blades with flat bevels or blades with flat bevels that take 2/3 of the blade width. Knives with hollow grind bevels and a thin cutting edge are best for cutting thin objects and soft foods.
Another advantage is that hollow ground bevel blades retain their geometry for a longer period of time, and thus have a longer service life until their secondary bevels become too thick.
However, this blade type still has disadvantages, e.g. when cutting through thick and dense foods, such as carrots, in which it has a great possibility of stucking. Due to the small steel thickness behind the edge, the blade is also vulnerable to chipping and rolled over parts due to the high lateral loads. Such a blade is inferior in strength and reliability to blades with flat and convex grind bevels and convex grind secondary bevels.
They often make blades of hunting knives, camping knives and various folding pocket knives with this type of bevels, if they have sufficient width and thickness of the blade.
Buck folding knives and their like are classics of this genre.
Knives with this version of this type of bevels are not very common. Technically it is very difficult to start removing steel right from the spine of the blade, so usually the removal starts in the vicinity of the blade spine. This removes most of the steel from the blade. The whole point of using this approach is to make a blade with the smallest thickness behind the edge and a sharp cutting edge.
The use of this geometry is appropriate for narrow, thin blades that are designed specifically for cutting. That said, these knives can be either folding or fixed. Even the small radius of hollowness gives the blade a much higher cutting ability, compared to the same blade with flat bevels.
Hollow ground geometry is seriously inferior to a blade with convex bevels and convex secondary bevels, i.e. full convex, in terms of strength of bevels.
The most obvious areas of use for such bevels are hunting knives and carving knives. The knife with a fixed flat blade and hollow grind bevels almost from the spine, with a comfortable handle is the best solution for processing large quantities of meat.
Blades with combined bevels is a product of the modern era, although there are some national knives with combined bevels. You probably encountered knives that had different geometry on both sides of the blade.
They often combine flat grind bevels with convex bevels and hollow grind bevels with flat bevels. This allows you to create a blade with different zones of strength and different sharpness.
They create hollow grind bevels on the flat part of the blade and they often take most of the blade area, while flat or convex bevels are used to strengthen the tip and the point. Such a knife blade has an area that can be quite sharp, and a strong tip able to withstand considerable stress.
This kind of grind can be found on the blades of modern folding tactical knives produced by Benchmade, Borka Blades, Olamic Cutlery. There are different opinions regarding utility of such knives and blades.
To understand the nature of blades with hollow grind bevels you need to get a little insight into some of the details of their geometry:
If you do this, you will end up with areas of different thicknesses behind the edge.
The idea behind creating a hollow grind blade is to have the abrasive follow a curved line at the cutting edge area. The curved movements should come from the belly area smoothly transitioning from the horizontal to the vertical plane. If you look at some of the blades with hollow grind bevels, you will see straight away how much quality was involved in the production of this or that knife.
All of these circumstances directly affect the cutting quality of the knife and the possibility of sharpening it using this or that method.
The sharpening of hollow grind razor bevels can be compared to sharpening the edges of a Japanese chisel. The main point of sharpening such a chisel is to grind the bevelled plane. A razor can be sharpened using the same method during the classic manual sharpening.
However, sharpening a knife with classic hollow grind bevels is somewhat different from this method. In general, it's all about finding the right angle. Even though the thickness behind the edge is less than on all other blades, you need to find an angle that suits the knife's intended purpose.
If you use a pocket knife as an every day knife, you may want to set a greater sharpening angle to increase the cutting edge retention. If the knife is a kitchen or a carving one and is used carefully and for its intended purpose, you can set a shallow sharpening angle for the edge. Such a knife can cut well simply because of its grind.
If the knife was manufactured properly, it will have a consistent thickness behind the edge and uniform identical secondary bevels and vice versa if the bevels were not profiled properly.
Sometimes it can be a problem to sharpen combined bevels. A blade with hollow grind bevels may, among other things, have a recurve shape, which makes it all the more difficult to transition from a small thickness behind the edge to a larger thickness behind the edge at the tip. Keeping the same angle is often too difficult and just does not make practical sense.
Some types of knives have a rather narrow purpose and knives with classic hollow grind bevels are no exception. If you use them well and properly, without side loads and not for hard objects, like bones, they can last a very long time.
On the other hand, more advanced knives with combined grind bevels and thicker blades are more durable, although they serve completely different purposes.
The choice of steel and type of bevels must be made by each individual on their own, depending on the purpose for which their knife will be used.
Knives became a part of the human household quite a long time ago, but their different types intended for different purposes began to become widespread only with the development of industry and new technologies. Despite the fact that in its structure the knife has just two main parts - the blade and the handle, nowadays it became a fairly advanced technological product.
Following the rapid development and emergence of a wide variety of knife types, a whole list of terms was created to describe the specific parts of each knife type. Of course, it is not always necessary to know absolutely all the terms, but if you face a purchase or a service related question, it would not hurt to know some basic things.
All knives fall into two large categories: with fixed blades and folding blades. In turn, both categories can be divided into separate subgroups, within which a number of technical terms describing individual parts of the knife will match, and in some other cases will differ.
Among the many fixed knives, which differ largely due to size and shape, two main subgroups can be distinguished: kitchen knives and all other fixed-blade knives.
When describing a knife, one most often speaks of a blade that starts at the point and ends at the handle. Although the blade is the main part of the knife, it is still only a part. An equally important part is the handle of a kitchen knife, which is often made in the same style when there is a whole series of knives in production. Some brands have made their name recognisable using this detail as well.
1 – Point. The point of a kitchen knife, as with all knives, is the point of convergence of its spine and cutting edge. The point is mainly used for piercing foodstuff. The point of small kitchen knives is used for removing pits or for making holes.
2 – Belly. The belly of the blade is the part that can have a different radius and shape depending on the purpose of the knife. Large kitchen knives do not have a clear bevel transition towards the blade point.
3 – Cutting edge. It is the sharp part of the blade, which forms at the convergence of the blade bevels through sharpening and is used for the primary purpose of the knife.
4 – Spine. The spine is the upper part of the blade. Kitchen knives mostly have a fairly thin spine and often have a wedge shape running from the handle or bolster to the point. With the spine of the blade, you can swipe food off the cutting board. Since the spine of the blade is usually left unsharpened, you can use it for hand pressure when cutting dense or large foods like a cabbage or a pineapple.
5 – Handle pads (scales). The shape and material of the scales should be picked individually, as they affect the convenience of using the knife. Scales can be made from a range of man-made or natural materials.
6 – Pins. The pins attach the scales to the blade tang if the knife blank has a full tang design. Knives with a hidden tang can also have pins.
7 – Heel. It is the area of the blade near the handle, ricasso, bolster or choil. It does not have any real purpose. It may include a steel grade mark and a brand logo.
8 – Bolster. It is the transition point between the knife blade and the handle. On kitchen knives, the bolster protects and prevents fingers from getting on the cutting edge. A number of Japanese and European manufacturers do not have the bolster overlapping the thin area of the blade at the heel.
9 – You can find a metal tip on the end of the handle of a large kitchen knife, or a pommel as found on hunting knives. However, this is rather an exception than a rule. The weighting of the handle end is used for proper weight distribution of the knife with the point of control in the palm of the hand rather than on the blade.
Other fixed knives can include all fixed knives that are radically different from kitchen knives. No matter the size, this group can include hunting knives, hiking knives, bushcraft and survival knives and the like.
1 – Point. The point of these knives is used for the same purpose - to pierce, but may have a slightly different configuration.
2 – Tip. The tip of the blade is connected to the structure of the knife according to its purpose and converges to the point as a wedge.
3 – Spine. The spine of this type of knives depending on the structure of the blade can be thin - thin blades are used for cutting, or thick - thick knives are designed for heavy work.
4 – Heel. The heel of the blade can have additional functional holes. It can also be labeled with the steel grade.
5 – The end of the handle can have a butt cap or a glass breaker.
6 – Belly. The belly of the knife blade can be wide or narrow depending on the purpose of the blade.
7 – Bevel. It is the area of the blade that runs from the blade flat towards the secondary bevel and the cutting edge.
8 – Cutting edge. Edge of any blade is formed during the sharpening process at the convergence of the blade bevels.
9 – Sharpening choil. It is a special recess at the point of contact between the bevels and the heel of the blade, it makes it easier to make the knife sharp during sharpening and makes it more precise.
10 – Ricasso. It is a transition area between the blade and its tang, not sharp.
11 – Finger choil. It serves to provide a comfortable and firm grip closer to the blade for more precise work.
12 – Finger guard. It protects fingers and palm from slipping on the cutting edge.
13 – Lanyard hole
14 - Fuller. It serves to both stiffen the blade and reduce its weight.
15 – Blade flat. It is the flat area of the blade running from the spine to the bevels. It is the most noticeable element on the scandi blades.
16 – Bevels line. It is the border between the blade flat and the bevels themselves.
17 – Scales (if the blade has a full tang design).
18 – Jimping on the spine, on the handle or on the butt can make the grip more confident or work as a glass breaker. This will only work on a full-metal knife design with a proper tang.
19 – Sub hilt. It provides a firm grip on the handle of the knife.
20 – Screws or pins for attaching the scales to the knife tang.
With the evolution of technology, several different models of folding knives came along. Whether a knife has a blade lock or not there are a number of mechanical elements and accessories that are similar in all designs in one way or another.
1 – Tip. Pocket knives have a very thin tip.
2 – Belly. Due to the small width of the blade may be small, or vice versa.
3 – Bevels. Usually straight and run from the spine of the blade.
4 – Spine. Folding knives usually have a small spine thickness.
5 – There may be a small sharpening choil or a finger choil on the blade, depending on the model.
6 – Pivot screw
7 – Rivet screw for holding entire structure and scales in place.
8 – Lanyard hole.
This group of folding knives has become quite popular in recent times and often these knives have significant differences in terms of the use of different materials, accessories, design, blade locking mechanisms and other things.
There are a number of differences in the construction of this these knives: they have no longitudinal symmetry; and their scales and locking mechanisms can be made of completely different materials.
The left side of all right-handed knives is considered to be the face side as shown in the diagram above:
1 – Tip. The point of convergence of the spine and the cutting edge.
2 – Swedge. Removing steel thickness of the spine near the tip increases its piercing ability.
3 – Spine. It can be parallel to the cutting edge or converge at an angle.
4 – Blade flat. One hand opening knives sometime have this in their design.
5 – Thumb hole. Can be combined with a flipper.
6 – Jimpings. They serve as a finger stop.
7 – Screws. They fix the scales to the knife and allow the mechanism to work coaxially.
8 – Handle. It can can have scales or be without them.
9 – Lanyard hole. Usually at the end of the handle.
10 – Pivot screw. It is the central element that holds and allows the movement of the blade.
11 – Flipper. This element allows quick opening of the blade.
12 – Sharpening choil. The choil allows convenient and proper sharpening of the cutting edge.
13 – Ricasso. Sometimes here you will find a steel grade designation or a manufacturer's logo.
14 – Knife blade bevels.
15 – Cutting edge.
16 – Tip. This part of the blade is used for fine work.
The right or reverse side of a right-handed knife can show several other elements that are different from the face side of the knife:
1 – Lanyard hole.
2 – Jimping. A jimping in the area of the butt of the handle.
3 – Titanium part of the handle without a scale.
4 – Carrying clip.
5 – Jimping on the handle.
6 – Jimping on the spine of the blade.
7 – Blade opening hole.
8 – Tip.
9 – Cutting edge.
10 – Sharpening choil.
11 – Flipper.
12 – Pivot screw.
13 – The blade lock can have a different design.
14 – Handle butt.
If you look at the knife from above, you will also see additional details:
1 – Point with a wedge-shaped convergence to the tip.
2 – The plane of the spine.
3 – Jimping top view.
4 – Pivot screw.
5 – Spacers.
6 – Handle scale.
7 – Jimping on the butt of the handle, top view.
8 – Carry pocket clip.
9 – Frame lock.
If you look at the knife from the bottom or cutting edge side, you will see the point (1), the wedge of the cutting edge (2) and the frame lock (3).
Automatic knives are not much different in design but often aim for the speed of use, however this is a controversial point.
1 – Swedge (spine bevel). It makes the tip more aggressive, especially if there is a false blade on this bevel.
2 – Belly. Usually small, due to the purpose of the blade.
3 – Spine. It can also have a bevel in the direction of the tip.
4 – Sharpening choil. It is unusual for this type of blade.
5 – Button for automatic blade release. This is the most distinctive detail of this group of mechanisms.
7 – Scale screws.
8 – Lanyard hole. Lanyard provides easy removal from the pocket.
9 – Pivot screw. Together with the rest ensures the operation of the mechanism.
Out-the-front knives are a pretty special product that have their own distinctive features, almost like automatic switchblades. A special feature of this knife is the «Out The Front Knife» technology. The blade "shoots" out of the handle not from the side, but exactly from the front. The mechanism is triggered with a button. The return of the blade is triggered in the same way, with a button.
The parts of a knife like an OTF knife inlcude the following elements:
1 – Cutting edge of the blade. The blade can be double-edged and partly serrated.
2 – Bevels of such a blade are usually very narrow.
3 – Fuller is a common element for dagger-like blades.
4 – There can be a sharpening choil or a finger choil.
5 – Trigger button.
6 – Handle body, which covers the mechanism.
7 – Jimping on the body provides a confident grip.
8 – Glass breaker. Sometimes there can be a lanyard hole and a pocket clip on the other side.
The butterfly knife is a rather unusual folding knife that many people like, but which often falls under various restrictions. You can easily recognise such a knife by its distinctive handle, which splits into halves and conceals the blade.
1 – Cutting edge of the blade is quite thin and narrow.
2 – Blade bevels can be both dagger-like and classic straight or with a blade flat.
3 – Sharpening choil. Makes it easier to make a knife sharp. Not a usual element for a butterfly knife.
4 – Pivot screws. They provide rotation and hold the structure.
5 – Tang pins. Only allowed in some countries. They are used to stabilise the knife structure against the pivot screws.
6 – Handle. The most prominent element of this knife type.
7 – Latch. It keeps the handle closed.
It is not easy to make a manual guide for all cases in today's rapidly evolving technological environment. Due to this, this article only covers the basic terms of the most common types of knives and their parts. This guide should be sufficient for even a fairly advanced user.
]]>In the history of knife manufacturing, blade polishing has been used for a long time. It is safe to say that all knife lovers have seen and held various types of knives in their lives with polished blades of different kinds and quality.
Properly polishing not only gives the blade a rich and beautiful look, but is first and foremost a way to protect the steel from corrosion. The rule of thumb for any metal surface is that the cleaner you follow all the steps during polishing, the higher the finish quality of the surface and the less chance for tiny moisture particles to cling to the surface and cause it to corrode.
In ancient times, polishing was perhaps the only way to protect blades from corrosion, as all cutting tools were made of carbon steel. The highest skill of polishing from those times to this day is mastered by the polishing professionals in Japan. They have elevated their skill to a form of true art and the work on a single blade can take several days or more, depending on the size, given that it is exclusively manual work.
As of today, hardly anything has changed and no one is in a position to come up with something radically new.
To get a really high-quality and decent result even with using various modern devices, a polishing wheel and compounds, you also need to spend a lot of effort and have a certain amount of experience.
If you intend to give your blade a mirror finish by using the polishing method, or if you need to restore a blade edge after damage and to remove scratches from the bevels, then there are some technical aspects you need to understand first.
First of all, blade finishing is a very time and labor consuming process. Besides, not all steels, especially those hardened to high HRC values, have the same polishing properties.
The polishing process itself is the final step after the blade has gone through the entire manufacturing process and grinding.
Grinding is one of the most common ways of processing metal surfaces, both at manufacturing facilities, various workshops, and at home. The goal of this process is to get an even and smooth surface with a matte or mirror finish. To accomplish this goal, you have to follow certain steps.
The grinding process is divided into coarse, medium and fine steps. Grinding is a process that follows the forging and/or hardening of a knife blank in order to remove uneven areas and scales from the surface. During grinding, the workpiece receives the required dimensions and the desired shape of the bevels. All the necessary steps are carried out using a number of different electrical devices to speed up the production process.
Grinding is a roughing stage of knife making and has many peculiarities of its own, which are difficult to describe within the framework of this article.
The basic principle of this process is quite simple - the coarser the abrasive stone grain at the beginning of the process, the more time you will need to spend using a stone with a subsequent grain size to remove all of the scratches.
The key to a quality grinding is the proper choice of the grit size of the grinding materials. An example would be grinding on a belt with the following sequence of grit sizes of belts: P24/36/40/60/80/120/180/180/240/280/400. After using this sequence, the transition to fine polishing will be much easier and you will get a quality result much faster.
Often polishing is used in those areas where you need the best quality finishing of the metal surface, for decorative and aesthetic purposes, or if you need to protect the surface from corrosion and various weather conditions. In such a case, the metal surface gets polished to a mirror like finish.
Polishing is a process that follows grinding and gives the metal surface a higher quality structural state, which in the industry is expressed as a roughness degree. Depending on the abrasive products, there is very little metal removal and no deformation of the workpiece.
Our focus, however, is on carbon and conventionally stainless knife steels, which can get a mirror finishing to increase their protection from moisture and corrosion. A mirror finish on the balde, is not only useful, but also gives a certain aesthetic look to the knife blade edge.
Mirror finishing helps to protect the blade from moisture in the natural environment and from exposure to various acids during cooking. This is where a really good quality knife blade polishing makes a big difference.
The polishing can be done in two different ways. If we consider the results achieved with machine polishing and hand polishing, it becomes clear that these ways offer completely different results.
Along with the speed of processing as the main advantage, machine polishing has a number of disadvantages.
Any electric equipment has a corresponding cost and also requires additional operating costs and the need for accessories and consumables that are much more expensive than manual polishing consumables.
Besides, the physical characteristics of different steels do not promise the same surface hardness over the entire blade area. Even at fairly low speeds, electric equipment equipped with a polishing wheel can "eat out" material in the softer areas of the steel structure. This finish will result in a very unpleasant and uneven shine on the surface of the blade.
On top of that, if the blade has distinct edges at the transition between the bevel and the blade flat, it is hardly possible to protect these areas with a duct tape. There is a good chance to remove or round off these edges and permanently ruin the appearance of the knife blade.
If someone who has little experience were to look at a knife with the naked eye, they would find this circumstance insignificant or unnoticeable, but if you look at a knife under a microscope, you will immediately grasp the point.
You will face the same problem when polishing the bevel area at the heel of the blade, which is the most difficult to polish due to the difficult geometry and size of the polishing wheel. You can polish this area, If you use a small polishing wheel and attachments with mini motor powered hand polishers, but you may still get a quite noticeable difference in the surface finish quality.
To follow the abrasive hygiene during machine polishing, you will also need to change the polishing wheel when you change the paste, which involves additional expenses.
In general, with machine polishing, even with variable speed control, you can easily make a mistake, because it is easy to remove the material quickly and not always where and how you want it to.
Only use this way when you are really confident in what you are doing.
Of all the ways to polish the surface of a blade, hand polishing is the most difficult and time-consuming and will require you to spend a significant amount of time if you have some knowledge. Consider everything described below as a guide, but the result will ultimately depend on your experience gained through practice.
The most important difference between hand polishing and machine polishing is not the method itself, but the materials that are recommended to use.
Regardless of the abrasives you choose, hand polishing involves using lapping tools of various configurations and materials. The main specification of a lapping tool is its hardness and the flatness of its surface. A lapping tool can be made of steel, glass or any other material.
It is also worth mentioning what was and is still used by Japanese masters polishers. A polishing stone is their main material and tool. The lapping stone can be a small bar made of natural or artificial sharpening stone of a size and grit matching your purposes.
The process consists of slow back-and-forth movements of a sharpening stone or a lapping stone with sandpaper in combination with a cooling liquid. Once you have removed the scratches left by the previous abrasive, you can take a fine abrasive.
A hard lapping stone or a bar made of a sharpening stone will give you a flat surface with a quality of finish many times better than that of a machine. If your knife blade has convex or concave bevels, you can use a lapping tool of a rounded shape. However, it is worth giving some thought to whether such a thing is worth doing at all.
The first thing to do as preparation is to separate the handle from the blade if possible, regardless of whether you are using machine or hand polishing. If this is undesirable or impossible, wrap the handle in cloth and/or seal with painter's tape or insulation tape. This protects the handle scales or the folding knife mechanism from dirt and abrasive dust.
For the polishing process, we recommend choosing sandpaper from about 600 grit and finer: 800/1000/1500 etc. That is, as long as it takes for the scratches from the previous sandpaper grit to lessen. You have to make forward and backward translational strokes.
You have to choose a suitable polishing compound depending on the grit size of your abrasives. You can make a polishing compound yourself from polishing pastes and special oils. It can be difficult to create a paste on your own, which is why there are ready-made solutions available.
You should change the abrasive material and the polishing compound as you proceed. Most often, a small amount of polishing compound will be enough to achieve a good result. For example, a quantity of paste equal to the size of a regular matchstick will be sufficient, but if necessary, it can be increased. Keep in mind that you are working on a loose abrasive stone that crumbles with every movement of your hands or rotation of the polishing wheel.
You must also remember that when moving to the next fine abrasive and polishing compound or paste, you must change the polishing wheel to a new one and to remove dust and dirt left by the previous abrasive and waste polishing compound. Otherwise you may get some very unexpected negative results and may have to repeat some steps.
You can end the whole polishing process the moment you get a visual proof after cleaning the blade and you are satisfied with the result.
Example of the polishing effect: When polishing M390 MICROCLEAN - BÖHLER steel, already after processing with 600-800 grit sandpaper it gets very difficult to oxidise the steel for the application of a protective chemical layer, e.g. with an etching solution containing iron oxide and nitric acid, even when heated to 60-70°C.
Therefore, if you polish your blade made of similar or less corrosion-resistant grades with abrasives up to FEPA 2000 - 3000 grit and get a mirror-like finish, you can be confident that you got a very good result.
The process of polishing a knife blade to a mirror finish, and in particular hand polishing as the highest quality polishing method, comes down to the use of a range of abrasives with a step-by-step grit change. You can choose between the machine polishing or hand polishing depending on your skill or vision.
To avoid unwanted outcomes, first try to polish a knife you do not mind messing up. At least you will find out exactly what you are good at and what still needs some more practice. Do not feel bad if you do not succeed right away - this is not an easy process.
As a word of advice - remember that there are a number of steel grades that are easy to polish, but they are also very easy to scratch. Only a really hard steel is difficult to scratch.
There are many different types of mirror finish and therefore the final result depends a lot on the steel itself, the methods and tools you choose, and your experience.
Scratches on the blade always ruin the appearance of any knife, regardless of its price. On the other hand, there will be no scratches on a knife if you do not use it. Scratches are not always the result of a knife being used. Often, a large number of scratches indicates a lack of proper care of the knife blade or a lack of understanding of the intended purpose of the knife.
Example. If you sandblast a knife and then give its surface a polish, it will be well protected from external influences. However if the knife blade was dropped on a rock or someone has carelessly run an abrasive stone over the blade surface, then depending on the depth of the scratch, it may eventually corrode over time, especially if the knife blade is made of carbon steel.
One of the reasons for scratches on a knife blade is careless handling of the knife or improper use of the knife. For example, when the knife is simply left lying on the ground after use, or the knife is used to cut on hard materials.
It is very common to find knives with a black DLC coating and many of them start to look awful after a certain time of service, even though they have been used for their intended purpose. But we are not talking about coatings or methods of processing secondary bevel planes and blade flats per se right now.
Scratches can occur on the blade with very light careless use of even very fine abrasives and slurries during sharpening or the knife blade honing. In this case it is improper abrasive hygiene.
The undeniable fact of the appearance of scratches on the blade of a knife, is the impact of particles much harder than the surface of the blade itself.
Before we move on to how to remove a scratch on the plane of the blade, it is good to remember exactly what made the scratches on the blade. If it was an abrasive, then you know its grit and you can find out how deep the scratch may be.
Even so, it does not mean that the depth of the entire scratch is the same along its entire length. Often it is a matter of many scratches. In both cases, you will still have to remove the full layer of metal over the entire plane.
Removing scratches is actually very similar to how the knife makers manually or with different devices deal with secondary bevels planes' scratches after the blade was sharpened with a grinder.
Given that, in some cases the cross marks left by the endless grinder belt on the surface of the steel prove to be much more practical to use, as it is more difficult to leave a scratch with them. Even if it does happen, it will not be as noticeable as it would be on an evenly finished surface.
The products with abrasive properties for removing scratches include:
Some often use mini grinders for the best results in removing scratches from the surface of the knife blade. They also use different flexible rolls together with drills and motors for the same purpose. There are many different solutions in this area, but what is more important is the right choice of consumables for a particular power tool model. Since the selection is huge we will not cover it in this article, because in each individual case you have to deal with the catalog of each manufacturer separately.
Sometimes a small angle grinder with a clean polishing wheel and diamond paste works just fine. This is a shortcut solution for blades with even fairly hard steel.
The second group of products are abrasives for manual use, in the form of abrasive bars and sandpaper.
Regarding the use of abrasive stones, there is one very important thing to note. If you do a little digging into the history of blade weapon production and bevels surface processing, you will find out that back in the old days and even today, high quality metal surface processing was done by hand.
There are many different polishing pastes of varying grits that are used to treat metal surfaces nowadays. They are the ones that are great for treating and removing scratches from the blade. The main thing is to choose the right grit. You can only find the grit by experimenting.
In addition to pastes, there are liquid polishing emulsions that are suitable for this purpose as well.
Cooling liquids play an important role in the very process of sharpening with abrasive materials. They bind the abrasive grains and form a fine grinding emulsion. A well-known product is WD40 or any similar. No matter which method and abrasive you choose, you should always work with a coolant.
Manual auxiliary tools include all sorts of lapping blocks, which are often DIY made by the knife makers for themselves. Most often they come in rectangular-shaped plates of various widths and lengths, and made of steel, glass or textolite. The main thing to remember is that the surface of these plates should be absolutely flat when you glue the sandpaper on it.
As a description of the technique, we can give two examples using abrasive bars and sandpaper, for general understanding.
There are various silicon carbide based abrasive stones available on the market around 1200 grit, that said, it is worth starting with a finer one, or around 1000 grit, as the coarser ones can be quite rough. Their main advantage is a good renewal of the abrasive grit as they work. This method is akin to the way Japanese masters polish a katana.
Eventually such stones need to be leveled like a regular sharpening whetstone. The key is to make sure it is flat before you use it. The main advantage over sandpaper is that the grit of a stone is constantly renewed and does not get clogged like sandpaper.
You can take a bar of suitable grit at your choice, then add WD 40 to the surface of the blade and work on removing the metal layer with the scratch with smooth strokes, checking the result from time to time. It does not have to be done strictly by hand. There are various vises and clamps. All you need to do is fix the blade for convenient work. Of course, there is simply no off-the-shelf best solution. It all depends on your technical resources and circumstances.
You can also do this using a WD40 or a similar liquid. In the process, the oil forms an emulsion on the surface with fine crumbled abrasive grit and treats the surface. There is a constant renewal of the grain, which levels the surface and gradually removes the scratch.
If scratches remain across the entire bevel area or in some spots, you should work in those spots with the same abrasive. For this you can use the same bar, but use the end of the bar instead, which also needs to be prepared and leveled.
This is a very good way of removing cross grooves, such as those left behind by a grinder's tape number 320.
For a fine satin finishing or polishing, you can use a fine sandpaper from Bosch or 3M with 600 - 800 grit for a fast result. Then, to polish the surface and achieve a finer result, you can choose a 1000 and/or 1200 grit abrasive.
This is one of the most highly effective and truly working ways and therefore the best of the known.
Along with sandpaper, many professionals also use different diamond pastes to polish the blades. This fits well after grinding with a 320 grinder belt. You can choose 60/40 micron grit diamond paste and take a 320 grit sandpaper. Once you have a good result you can move on to the next step. Diamond paste with 20/14 micron and 800 grit sandpaper work well together with WD40. Then, to polish after a finer finishing, you can apply a 60/40 micron paste and continue with a lapping tool with 800 grit sandpaper.
This is not a step backwards at all. It covers the longitudinal grooves along the entire blade and creates a good longitudinal satin finish on blades of about 60 HRC hardness.
If you only sharpen with sandpaper, the scratches can become patchy afterwards and it will be noticeable and bad-looking. In terms of time, such work can take an hour or so. The main disadvantage of this method is rapid wear of the sandpaper and a sufficient amount of abrasive dirt that comes from the diamond paste.
If you are interested in this issue, you can search for videos and other tips on the Internet on this and you will immediately realize that it is not as complicated as it seems, and the above guide will really work. To cope with such a task on your own, you just need to have some tools. You do not have to have an entire workshop for this.
If you feel that you cannot do it on your own, you should reach out to a professional. If you decide to remove the scratches, you must be aware that no technical approach will bring the blade back to its original condition. No knife maker will be able to restore your blade to its factory surface high quality. The surface quality of the knife blade and its look will not be worse at all, they will just be different.
In the knife making the steel represents the soul of the knife, which is determined by such factors as edge retention of sharpness, corrosion resistance, ductility (strength) and ease of sharpening. Among all the parameters, the cornerstone in creating a knife blade is hardness and geometry. Not every steel is capable of keeping any sharpening angle chosen by the knife maker. One should choose the steel based on the conditions in which they will use the knife.
First you need to know the purpose of the knife and, depending on this, choose the right size and geometry. Then comes the selection of the appropriate steel for the knife and proper heat treatment. Before hardening, steel is just steel, and only after receiving the correct hardness level, the blade turns into a knife.
Therefore, there is simply no knife steel that could best for all purposes. There is only one or another steel, which, according to the sum of specifications, is the best for certain types of tasks.
In order to choose the steel for a knife for a specific purpose, you have to understand the essence of factors that together determine the properties of the blade, which include:
The sharpness retention of any blade is determined by the hardness level according to the Rockwell scale in HRC units, as well as the number, size and hardness of carbides. The higher the HRC number and the harder and coarser the iron carbides, the less wear occurs in contact with the material being cut.
An example. Blades with a fairly high hardness level can serve for a very long time if used properly. That is, you should only make linear cuts, without lateral loads. A Rockstead knife made of ZDP steel can cut cardboard, but the blade will not survive hitting a hard bone.
On the Internet, you can find a lot of information on the Catra system for comparison of number of cuts that can be made with different steels at a certain hardness level at specified angles for the same material. In a way, such statistics can give an idea of the steel capabilities, but in reality everything is somewhat different, considering that the blade will work on different materials and the degree of dullness of a knife made of the same steel will definitely be different for each user.
In addition, there are other methods of checking the edge retention of sharpness, such as the rope cutting test. However, there may be a different methodology for each individual case, and only after collecting a fairly huge amount of data, you can draw certain conclusions. Collecting data on your own does not guarantee an understanding of your knife's behavior.
If you are interested in the details, you can always search the Internet for this test data if you search for: "CATRA's TCC".
The ductility of steel is a physical property that prevents chipping, cracks, and often also damage of the knife blade tip.
The ductility is influenced by: steel hardness, oxygen or sulfur impurities, grain size, number and size of carbides, as well as the distance between the carbides themselves. The formula for this parameter is simple – the more aggressive the knife cuts, the higher its sharpness and the less ductility its blade has. To put it another way, the greater the hardness value, the less ductile the steel is.
An example. ZDP-189, Maxamet or Rex121 steels will be very sharp at high hardness levels, but they will have a very low ductility. On the contrary, steels with lower hardness and less carbon will be more ductile and can withstand lateral loads without consequences.
Let us take a look at a hacksaw blade for an example. The saw blades are made of bimetallic compound, have high flexibility and at the same time high cutting performance.
Among knife manufacturers, Cold Steel is known for testing and demonstrating the properties of their knives in which blades undergo significant stresses but do not lose their mechanical properties.
Among other things, the concept of strength or ductility as such does not have any recognized scale of measurement.
Corrosion resistance or the ability to resist rust. Often, when it comes to corrosion resistance, many believe that knife blades do not rust on their own, but it is wrong. Any steel that can be tempered cannot be absolutely stainless by design. The corrosion resistance ability depends on the combination of properties that ensure the sharpness edge retention and ductility.
Alloying elements such as chromium, molybdenum and tungsten play an important role in this.
It is generally believed that a steel with a 13% chromium content can be considered stainless. However, the presence of a high amount of carbon makes any steel dependent on the carbon-chromium bond.
In other words there is a combination of boundary carbon content and alloying additives that can provide corrosion resistance below the level of which the steel will rust one way or another. The threshold value is the presence of less than 10 % chromium in the compound.
You can also refer to a number of publicly available tests and descriptions, but not all statistics are in the same units of measurement. Various well-known websites and manufacturers publish data in units of Longitudinal Toughness or in units of Transverse Toughness.
Other statistics do not specify the exact testing methodology and therefore it is difficult to rely entirely on such data.
Based on statistics, it is possible to understand only the general behavior of one or another steel.
One of the most important qualities of the blade is its wear resistance. This property, along with chemical composition and hardness, is provided by the density of grain and iron carbides bond, as well as their size and number. The tighter the structural connection and the greater the steel hardness, the more wear-resistant the blade. A highly-wear resistant knife blade is more difficult to sharpen.
The concept of cutting edge retention as one of the knife blade properties is directly related to knives’ geometry types and sharpening angle. For each steel grade with its specific properties, you should choose a sharpening angle suitable for your purposes. The wrong angle will affect the cutting quality or will significantly reduce the time period before a new sharpening is needed.
In a broad sense, steel is metal compounds with alloying additives, the basis of which is iron and carbon.
All the described physical properties of steels are due to the combination of all the chemical elements in the steel alloy. That is, from a chemical point of view, steel is a ligature of iron and iron carbides. The addition of carbon and other alloying elements to the alloy, combined with thermomechanical processing, gives the steel the necessary parameters for a particular purpose. Very often, or almost always, the steel has several chemical elements in the alloy, not just one.
Carbon is found in nature (in its pure form) in the form of diamonds or graphite, as well as combined with natural oil, gas, coal and hydrocarbon, and has been known to mankind since ancient times.
Carbon is the most important alloying element in steel and is represented by the cementite compound - Fe3C. The importance of carbon in steel is due to its effect on steel properties and phase shift. The higher the carbon content, the harder but more brittle the steel is.
Mechanically speaking, the more carbon in steel, the lower the melting point, but it forms cementite and increases hardness and ductility.
A metal alloyed compound based on iron is also considered to be steel if carbon is present within the range of 0.002% to 2.06%. Steel hardening, however, is only possible with carbon content starting at 0.3 %.
If there is more carbon in a steel alloy, it can lead to brittleness and lower forgeability, lower weldability and lower impact toughness.
If the steel lacks carbon, it can be enriched with carbon with the help of coal in the crucible.
Chromium as an iron alloying element lowers ultra-fast critical cooling, increases wear resistance and heat resistance. Chromium increases strength and serves as a carbide-forming element. About 13% of chromium in the alloy drastically increase the corrosion resistance, that is why they use it for the production of stainless steels or to be more accurate conditionally stainless steels. In addition, chromium stabilizes ferrite chemical compounds and phase shifts.
However, chromium also has some negative effects - it may reduce impact strength, forgeability and weldability. On the other hand chromium lowers thermal conductivity, which in turn shifts the temperature treatment chart to another level.
If the alloy contains chromium, the steel can be quenched in open air or in oil. Chromium carbides increase sharpness edge retention, wear and heat resistance.
The presence of manganese in steel improves forgeability, weldability, strength and wear resistance. Besides, manganese in iron has a positive effect on reducing the tendency to fracture during eutectoid transformation and has a ferrite-stabilizing effect in high-alloy steels.
Manganese increases the hardness and strength of ferrite and improves mechanical properties. In terms of heat treatment, it increases hardenability and removes excessive oxygen and sulfur, thereby resisting the formation of sulfides. The effect of this kind on steel also depends on the carbon content in the steel.
Molybdenum is a transition metal and was often confused with lead in the past for its silvery white gloss. Today it is an important alloying element in the steel industry and is used in combination with other alloying elements.
Molybdenum increases hardness, tensile strength and weldability of steel alloys. On the other hand, it reduces forgeability and ductility.
Molybdenum improves the tempering process of steel after quenching and enhances the effect of other alloying elements and is therefore used in combination. Molybdenum, like some other alloying elements binds to carbon and forms carbides, which in turn increase steel hardness and corrosion resistance.
In nature, cobalt is a rare metal that can only be found in conjunction with other elements. Cobalt is most often extracted from copper or nickel-containing ores. In the past, it was used to create coloring pigments.
Cobalt is one of the alloying elements that resists the formation of coarse grains at high temperatures and improves heat resistance. Because of this, cobalt is very commonly used for making tool steels. The presence of this element makes the steel more fine-grained and denser in its structure, which in turn greatly increases the wear resistance of the blade.
Nickel is also a transition metal and has been known to mankind for about 5,000 years. Nickel was mined with other ores and used for bronze alloying.
Nickel as an alloying additive increases tensile strength and elastic limit. Corrosion resistance increases with the presence of 8% of nickel and more. Nickel also lowers the melting point and stabilizes ferrite compounds. Unlike chromium and carbon compounds, nickel increases hardness and durability without sacrificing strength properties. Quite often they use this alloying element in stainless steels.
Vanadium is a heavy metal. It is quite common and is present in various minerals and ores. It is used mainly in the steel production industry.
When bonded with carbon, vanadium forms its own carbides, which increase strength, wear resistance and hardness. A small amount of vanadium can prevent the formation of large grains. After quenching and tempering, subsequent heat treatment becomes very difficult.
Tungsten is considered a heavy metal and is not present in nature in its pure form, but is mined from minerals and ore. For this reason, it was only discovered in 1783 by the Spanish chemist Fausto and Juan José Elhuyar.
The most common use for tungsten is in the manufacture of light bulbs in the form of a metal thread that emits light. This metal has a high melting point.
Tungsten, as well as some of the alloying elements described above, contributes to the formation of tungsten carbides and thus increases tensile strength and wear resistance. Tungsten in the steel composition provides better shaping at high temperatures. For this reason, this element is used in tool, high speed and heat resistant steels. Tungsten has no effect on the elasticity of steel.
Silicon is a non-metal, but it is a semiconductor and the second most commonly found element on the planet.
Silicon is often used together with tungsten, as their combination increases wear resistance. Silicon itself increases tensile strength. During steel melting, it resists the formation of carbides but makes the alloy more fluid, removes oxides and stabilizes ferrites.
Sometimes niobium and tantalum, both of which exist in nature as heavy metals, can be found in steel alloys. In steel making, they contribute to and form carbides and make the steel immune to chemical influence and almost stainless. Even in small amounts, these elements increase strength.
These are only the main types of alloying elements, and there are many more of them. Steel with certain alloying elements, which the knife manufacturer has chosen, reflect the purpose of the knife blade. To put it plainly - before you decide to choose a steel, just think about what exactly you want to do with the knife.
Knives and other cutting tools blades made of rust-prone carbon steels have been used by mankind for a very long time. This kind of steel is known and still popular today due to its cutting characteristics.
The higher the carbon content of the alloy, the higher hardness level the knife blade can reach through hardening. Carbon steel blades are usually hardened to 58 — 61.5 HRC.
The most important aspect is the lower corrosion resistance and reaction to moisture and various acids. Such steel may change its coloring and become stained, but this does not affect the performance characteristics.
If you put carbon steel under a microscope, you will see a coarser structure due to grain size and structural bonds comparing to other steels. On the one hand this provides a more aggressive cutting performance, but on the other hand it exposes the steel surface to external influences.
To avoid rusting after use, such blades should be rinsed under the tap and then thoroughly dried and, if necessary, oiled.
Carbon steels can be divided into three groups according to their content: up to 0.25%, from 0.25% to <0.55%, and above 0.55%.
The main feature of carbon steels are high cutting aggression, but they are prone to oxidation and corrosion.
The main similarity between carbon and alloy steels lies in the presence of the main component in the alloy - iron. Many properties and characteristics of both steels are very similar, including the hardness, which is determined by the amount of carbon in the alloy.
Alloy steels are a generalized term that can be used to describe a fairly wide range of different steel grades. In fact, the industry distinguishes between several major subgroups.
In the knife world, alloy steels are the industrial steels used to make knives. These steels are usually created with chromium, molybdenum, nickel, cobalt and other alloying elements. Such steels are much easier to handle than carbon steels as their corrosion resistance is several times higher.
It is a common belief that alloy steels are less hard than carbon steels and a little more difficult to sharpen. However, one must understand that if you choose the appropriate heat treatment, you can achieve comparable hardness levels. In terms of sharpening, it all depends on choosing the right abrasives. Very prominent examples of alloy steels are VG-10, 440C und AUS-8.
Damascus are steels created based on the combination of carbon and alloy steels. During forging and bending, the steel grades form a single bar. The purpose of creating such steel is not only to receive a knife with a beautiful and unique pattern, but also to give the blade the properties of several steel grades. A knife blade can have a very sharp cutting edge, and the entire blade can be quite tough to break. Some blades may have a higher level of flexibility in the spine, compared to their cutting edge, in case of differential hardening.
The main issue, as with carbon steels, is the low corrosion resistance of the carbon steel layers. For this reason damascus knives’ blades can have special layers where the sharper carbon steel is protected by layers of alloy steel according to the sanmai principle. Japanese kitchen knives’ blades with VG-10 steel are the best example.
Due to its properties, Damascus steel can withstand heavy loads and can be used outdoors as a camping or survival knife if properly maintained. Just like other steels, Damascus steel blades can be sharpened without any difficulty. The only drawback is the much higher price of damascus knives, which is significantly different from the others due to the complex manufacturing process.
Powder steels gained much fame and development in the 21st century. Due to the development of the chemical industry, steel manufacturers have learned to combine the properties of known steels with alloying elements to create steels of higher quality than before.
This new stage in the development of knife steels is based on a fundamentally new manufacturing approach compared to other steels. Powder steel is made from metal powder and alloying elements, which results in a very fine-grained steel structure with a very good strength properties.
Steels of this type have helped to fuel the sharp rise of the knife industry around the world.
Powder steels, while having a high cost, are largely superior to all others due to their physical and chemical parameters. In the knife industry, knife blades made from such steel grades are very common due to the low defect rate. Knife blades made of this steel stand out mainly for their high hardness, durability and very high corrosion resistance. The microstructure of such steels provides high sharpness at a small thickness behind the cutting edge and good edge retention of sharpness.
In other words, a knife blade made of powdered steel retains its sharpness much longer than other steels.
The structure of powder steels includes martensite, carbides and various non-metallic compounds. Although the martensitic structure of powder steel is very hard and brittle, the finer grain size, high density and even distribution of carbides ensures very high performance.
Strictly speaking, when considering the characteristics of individual groups of steels, it will become clear that there are many similarities within one group. At times, some properties are even very difficult to distinguish in practice.
In this article we will consider only a number of the best known steels, which are also financially useful.
ZDP-189 is a steel with a particularly high carbon and chromium content, which makes a knife blade made of this steel very hard. According to knife manufacturers, blades made of ZDP -189 can have a sharpness of about 64 HRC and sometimes even 67 HRC. The hardness of the blade, combined with other properties, ensures a long lasting cutting edge retention of sharpness. On the other hand, you have to accept the fact that sharpening such steel is not exactly easy.
Elmax steel is a chrome-molybdenum-vanadium alloyed powder steel hardened to about 62 HRC. The high wear resistance of the steel is combined with a sufficiently high corrosion resistance and a very high level of cutting edge retention of sharpness. This steel is much more expensive to produce than, for example, 12C27 or D2.
In terms of its characteristics, the steel is very strong, can withstand heavy loads and is fairly easy to sharpen. At the same time, this steel is almost stainless.
CPM 20CV is a premium steel developed by Crucible USA that has a high level of wear resistance, corrosion resistance and strength. Combination of vanadium and chromium increases the steel capability of keeping any cutting edge profile types very well. The characteristics of this steel are very similar to Böhler M390 or Carpenter CTS-204P.
They use this steel in the production of knives and blades that need above all high hardness, sharpness and corrosion resistance. This steel will always be a good choice.
Böhler M390 Microclean steel is a premium, powder stainless and a very popular and relatively young steel, which appeared after S60V but before Elmax, S90V, ZDP-189 or S30V were invented. However, they started to use this steel for knives manufacturing somewhat later.
This steel contains, among other alloying elements, a large amount of chromium and molybdenum, which provide high corrosion resistance. The carbon and vanadium content guarantees a very high level of cutting edge retention of sharpness.
Compared to Elmax steel, all parameters are slightly better. Equivalents from other manufacturers include steels such as CPM-20CV and CTS-204P.
If you need a knife with a blade that has a very high level of hardness, cutting performance and corrosion resistance, the M390 will be the best choice.
When it comes to CPM-S90V steel, it is a stainless steel with vanadium and carbon as the main alloying elements which improve wear resistance and cutting edge retention of sharpness. CPM-S90V is one of the steels that are really difficult to sharpen, but once sharpened the blade edge will maintain the same sharpness level for quite some time.
SGP2 steel is a product of the Japanese company Takefu. The hardness of this steel ranges from 62-65 HRC, it has a high carbon content, but is still a stainless steel. This steel has a much higher cutting performance than, for example, VG-10 b and they use it for high-end kitchen knives. However, strangely enough some manufacturers, despite its cost, use this steel for folding pocket knives and fixed outdoors knives.
Carpenter's CTS-XHP steel is a high-alloy powder steel with a high carbon and chromium content. Despite its rather simple composition, it has a rather high potential sharpness due to its very fine-grained structure. They use this steel for many purposes such as the production of kitchen knives or surgical instruments. The steel has pretty good corrosion resistance, cutting edge sharpness retention, and is easy to sharpen and polish, which makes it an excellent choice for EDC everyday knives.
CPM-S30V steel was developed in 2001 and today they use it also for the production of premium cutlery. This steel is a martensitic compound of alloy steels with a very good combination of wear and corrosion resistance. This steel is significantly superior in its performance to such steels as 440C and D2 when hardened to a certain hardness level. In reality, it is quite hard, but it is also quite easy to sharpen.
The 14C28N steel from Swedish manufacturer Sandvik is considered to be a successor to the 13C26 grade. Here we can talk not only about a specific steel, but the whole family of steels. This steel grade is very often used for Kershaw pocket folding knives. It has a high corrosion resistance thanks to the addition of nitrogen to the alloy. This steel is also very sharp and easy to sharpen and hone. It is a very common and affordable steel.
N690Co steel is a stainless chromium steel that contains cobalt, molybdenum and vanadium. This main areas of application of this steel are those that require high cutting properties and corrosion resistance. Knife blades made from such steel are very strong and durable. Due to the high chromium content, the knife blades are practically rust-proof even when exposed to moisture for a very long period of time. With all these properties, blades made from N690Co steel are quite easy to sharpen.
Knives made of this steel are well suited for tourism, survival, bushcraft, as well as kitchen, pocket and EDC knives.
Basically, VG-10 steel has one distinguishing feature that has nothing to do directly with the steel itself. If you consider knives with this steel made by different Japanese manufacturers, you can always count on good or even very good blade quality.
On top of that, this steel is quite good at sharpening with Japanese water stones. Compared to N690, VG-10 has less corrosion resistance. Knives made by a Japanese manufacturer from this steel will always be a very good choice.
440C steel can be called one of the most common knife steels of the late last century, but even now many knives are still made from this steel. The main properties of this steel are high corrosion resistance, strength and wear resistance. Despite all its qualities and relative affordability, this alloy can rust if exposed to moisture for long periods of time. Due to the fact that there is no vanadium in the steel, it is less wear resistant than the others.
This one is used on low-cost pocket knives as well as entry-level EDC knives.
AUS-8 steel is a Japanese stainless alloy steel with chromium and high carbon content. This steel has a fairly good balance of corrosion resistance, sharpness and cutting edge sharpness retention. This steel exceeds the quality parameters of 440B and 440C steels. This steel is easy to sharpen and the cutting edge can be almost razor sharp, which makes it easy to handle for beginners.
Like 440C steel, this steel is often used for pocket, gentleman's and EDC knives.
At the beginning of this article, we mentioned that before choosing a steel, you should properly understand the purpose of your knife and then select a steel that matches the purpose. You should also decide what profile among all existing profile types you want for your knife blade, for not every steel can retain the shape of the cutting edge at a certain angle.
If you expect to encounter significant side-impact loads and frequent use, it is better to use more ductile types of steel. For home use in the kitchen with mostly straight cuts and without hitting hard materials, you can use harder steel types with a high sharpness level.
If you still find it difficult to make a choice on your own, it will be better to seek advice from a master knife maker or a qualified specialist in a knife store. Otherwise, the quality of the steel depends on your willingness to pay the price for the knife.
In addition to all the physical and chemical properties of steels and a variety of knife prices, try to focus your attention on local steel and knife manufacturers, as they will have maximum experience with locally produced steel grades and will be able to guide you or provide you with the best choices.
The knife steel is a very important part of the knife, however, it is still just a part. Any knife is an individual decision and it is wise to hold it in your hand before making a purchase. In this article, we have mentioned steels that have proved to be useful in one way or another.
Modern stainless steels offer high levels of sharpness and performance and are more comfortable to use than high-speed and other carbon steels.
You just have to choose between high sharpness and possible corrosion and just expensive steels that end up with a higher performance rate. On the other hand you will have a steel that has both high hardness and rust resistance, but will probably be slightly less productive, but also more affordable and practical. The main thing to remember is that choosing the best steel for a blade, or choosing a knife with a certain steel, is far from enough. The reason for this is quite obvious - the blade is just a part of the knife, but the right thing to do is to choose a knife with a certain steel suitable for your purposes.
This chart is based on the information from different open access statistical tests and manufacturers' data and does not claim to be exclusively accurate, but displays only some average reference data, which can be treated as a kind of manual or guide to modern knife steels:
Steel |
Wear |
Toughness |
Corrosion |
Ease |
14C28N |
5 |
6 |
4 |
5 |
440C |
4 |
5 |
4 |
6 |
AUS-8 |
3 |
4 |
4 |
8 |
CPM-20CV |
9 |
6 |
7 |
2 |
CPM-S30V |
8 |
5 |
7 |
5 |
CPM-S90V |
9 |
3 |
5 |
1 |
CTS-XHP |
9 |
6 |
6 |
5 |
M390 |
9 |
6 |
7 |
3 |
N690 |
5 |
4 |
7 |
6 |
VG-10 |
5 |
4 |
7 |
6 |
ZDP-189 |
9 |
5 |
5 |
2 |
ELMAX |
9 |
6 |
5 |
4 |
SGP2 / 3G |
9 |
7 |
7 |
6 |
Steel |
Country |
C |
Cr |
MO |
V |
Co |
Ni |
Mn |
SI |
HRC |
14C28N |
Sweden |
0,62 |
14,00 |
- |
- |
- |
- |
0,60 |
0,20 |
55-62 |
440C |
USA |
0,95-1,20 |
16,0-18,0 |
0,75 |
- |
- |
- |
1,00 |
1,00 |
57-59 |
AUS-8 |
Japan |
0,70-0,75 |
13,0-14,5 |
0,10-0,30 |
0,10-0,26 |
- |
0,49 |
0,50 |
1,00 |
57-59 |
CPM-20CV |
USA |
1,90 |
20,00 |
1,00 |
4,00 |
- |
- |
0,30 |
0,30 |
59-62 |
CPM-S30V |
USA |
1,00 |
14,00 |
2,00 |
4,00 |
- |
- |
— |
0,50 |
59-61 |
CPM-S90V |
USA |
1,35 |
14,00 |
1,00 |
9,00 |
- |
- |
0,50 |
0,50 |
56-58 |
CTS-XHP |
USA |
16,00 |
16,00 |
0,80 |
0,45 |
- |
0,35 |
0,50 |
0,40 |
60-64 |
M390 |
Austria |
1,90 |
20,00 |
1,00 |
4,00 |
- |
- |
0,30 |
0,70 |
60-62 |
N690 |
Austria |
1,07 |
17,30 |
1,10 |
0,10 |
1,50 |
- |
- |
0,40 |
58-60 |
VG-10 |
Japan |
0,95-1,05 |
14,5-15,5 |
0,90-1,20 |
0,10-0,30 |
1,30-1,50 |
- |
0,50 |
- |
59-61 |
ZDP-189 |
Japan |
3,00 |
20,00 |
1,40 |
0,10 |
- |
- |
0,50 |
0,40 |
64-67 |
ELMAX |
Austria |
1,70 |
18.0 |
1.00 |
3.00 |
- |
- |
0.30 |
0.80 |
58-62 |
SGP2 / 3G |
Japan |
1,40 |
15,00 |
2,8 |
2,00 |
- | - |
0,40 |
0,50 |
62.00 |
Damascus steel is shrouded in a lot of myths and legends. According to stories, Damascus steel was born in the Middle East and was a weapon with flexible yet strong blades with a high degree of sharpness.
According to sources, it is believed that Europeans were introduced to this kind of weapon during the Holy Crusades to the Middle East. Since that time, stories about such a weapon began to spread around the world and inspired many people's desire to own this kind of cold weapon.
It was later that some metallurgical scientists tried to understand the creation process and the components of Damascus steel. As a consequence of these developments, some scientists managed to discover how to change the properties of steel by adding certain additives to their composition. This eventually influenced the development of the production of alloy steels. Alloy steels are nowadays an integral part of our lives, as they are used to produce a large number of everyday items.
In a nutshell, Damascus steel consists of a large number of metal layers with different carbon levels. Steel with a low carbon level makes the blade flexible and resistant to corrosion, while steel with a high carbon level makes the blade hard and provides a high cutting performance.
The individual re-forging and subsequent etching methods leave a regular or chaotic pattern on the blade.
Among knife lovers, knives with blades made entirely of carbon or damascus steel are popular for their high cutting properties. However, with all the positive properties there is one important feature - any steel with a high carbon content is subject to corrosion. Only Damascus steel, created on the basis of stainless or conditionally stainless steels, is an exception to this rule.
The proper maintenance of a Damascus steel knife involves using it for its intended purpose, as well as taking best care of it in order to keep it from rusting.
Previously, most Damascus steel blades were associated with bladed weapons and hunting knives. Nowadays, these knives are no longer exclusively expensive objects of art and almost all types of knives that work in various environments are made of Damascus steel.
For their long-term and high-quality service, it is enough to follow a number of rules.
We already know that there are various carbon steels in the composition of the blade, so corrosion is the worst enemy of a damascus blade. For this reason, after each use, you must always wash and clean the knife. This step ensures that the main contamination is removed. Just rinse your Damascus steel knife with warm water. If the knife gets very dirty, you can use a non-aggressive dishwashing soap emulsion and a soft flannel or a rag. To avoid damaging and scratching the blade, do not use an abrasive kitchen sponge or a steel sponge.
To ensure that all dirt and bacteria are removed, you can disinfect the knife blade by wiping it with alcohol on a cotton cosmetic pad. Depending on the alcohol compound, it is a good idea to rinse the blade under warm water after wiping. You should do this because of the contact of the knife blade with the foodstuffs.
There are a number of special cleaning products that can be used at home for metal surfaces. Besides, there are special cleaning agents with a rather coarse grit. Do not use such products, because they can significantly damage the surface of the blade.
Damage can take the form of scratches or grooves if you leave any cleaning agent residue on the blade. This kind of damage is very difficult to repair.
It can also be dangerous for later use for food and for personal safety and health reasons.
After you wash your Damascus steel knife you should dry it. To do this, you can use a clean soft towel or a kitchen paper towel to remove the majority of the water. Then you can let the knife dry a little more on its own before putting it back in its place.
Be aware that if you keep your damascus steel knife in a knife block in special compartments or even on a magnetic strip, moisture can penetrate the wood and then affect the condition of the knife blade. It is also worth wiping the handle of the knife dry, as water can penetrate into hard-to-reach places at the base of the knife.
The external environment of the room also affects the condition of the blade. If there is a high level of humidity, moisture will affect the blade whether you want it to or not. For this reason, we recommend to store knives in a dry, ventilated area and avoid any places with moisture and dampness. A cupboard or a drawer with good ventilation can be a good place for storing knives.
For even greater safety of both the blade and the knife in general, in case of long-term storage, you can apply a protective coating, which prevents the blade from getting wet. There are quite a few ways to do this.
There are plenty of natural oils, such as Japanese chamomile oil or mineral oil, which do not solidify and are acceptable for contact with foodstuffs. You can apply the oil to the surface of the blade and the handle with a spray gun or with a soft cloth.
You can use a wax-like lubricant that preserves the blade.
The development of rust is still possible, despite all efforts in following the above mentioned instructions. To prevent this from happening, you should visually inspect the knife in storage on a regular basis. During this inspection, you can renew the protective oil or wax coating if necessary. All protective products should be used in a limited amount to avoid excessive moistening, which could lead to sheath damage, if there is one.
If it is your favourite item - you will certainly take it in your hand to check its condition.
For storing knives, especially Damascus steel knives, you should use wooden blocks and separate sheaths. Some expensive gyuto style Japanese chef knives made of damascus steel can also have scabbards made of wood.
The sheaths of hunting knives are traditionally made of leather, which may also have a layer of wax on the inside.
If you have a sheath, you should also keep it clean and dry, so that it can properly protect the knife blade from external mechanical influence.
Even if you have a sheath, the knife should not be stored with other foreign objects. Every knife, even if it is sheathed, should have its own storage place.
If you store your Damascus steel kitchen knives in a block or in a stand with compartments, you should also follow some rules. The block should not be made of hard wood, and this also applies to wooden cutting boards.
With the block, you must remember that no moisture should accumulate inside and you can only insert the knife into the slot if it is perfectly dry.
The compartments in the unit or stand should also be checked, cleaned and dried regularly. If you wish, you can apply a thin layer of oil (see above).
All of the listed tips can be considered as a guide. If you follow all the points, your knife will serve you for a very long time without any need for restoration.
If you are not careful enough or if the environment is quite aggressive and causes rust, you will need to do a manual restoration to prevent the rust from damaging the blade even more. But first of all, you must identify the cause of the rust to prevent it from happening again.
Then, you should assess the extent of the damage in order to choose a treatment for it.
The choice of materials for restoring a damascus steel blade is perhaps one of the most controversial issues. Many say what should and can be used, but at the same time there are contradictory statements indicating that exactly such means should not be used.
In most cases, it all comes down to the use of ordinary, but rather fine sandpaper. The question is how to use it right.
It is a good idea to use 600 FEPA sandpaper or finer. Depending on the severity of the damage, you will spend less or more time removing the rust, but you will definitely not do more damage to the blade.
Also, depending on the type of bevels, you can wrap the sandpaper around a thick sealing foam to ensure that the sandpaper fits closely to the blade surface.
If your blade has a structured surface, this method may not prove useful. In other words, the sandpaper will not fit into the individual grooves.
To solve this, you will need a chemical rust remover and possibly a polishing emulsion.
WD-40, Ballistol oil, are widely available as good rust removers and as coolants for sandpaper. Spray it on the blade and let it work for a while. Besides, the oil layer will slow down the initial aggression of the sandpaper a bit, if you make a mistake with the grit.
Polishing emulsion will help you to clean microscopic grooves, if there are any in the pattern after the original etching. This emulsion also has its own grit and should be matched to the damage level. It can be used with a soft cloth to work on the blade.
After each step or change of grit of sandpaper and emulsion, you should wash the blade and check the result. It is very likely that you will not be able to achieve the original factory finish at first. However, it is much more important to remove rust.
You can also use warm water and baking soda to make a paste. Then you should apply the paste to the rust spots on the already cleaned and washed blade. You will see the result in about 5-30 minutes. Then you should wipe, wash and dry the blade. The result may be different and may take more time, depending on the steel grade.
If this is not enough for you and you want to improve the appearance of the blade, you can etch the blade in vinegar, lemon juice, or if you know how to do it, you can also etch it in a solution of ferric chloride. This process is not too complicated, but it has a number of conditions and it is not entirely possible to carry out at home without sufficient experience and resources. Knife makers use this method, but it will not work for every blade and it is better to leave it to a specialist.
If you have a custom knife, just contact the master who made your knife. There may be problems with expensive or less expensive knives, as the knife masters often agree to restore only their own blades. Most likely, they will agree to restore your knife, but you may not be satisfied with the result of their work, so you should first to communicate on the forum or talk to a knife maker to explain in details what you would like to do and see if they can fulfill your request.
In any case, it is worth paying more attention to the conditions of storage and use of damascus blades than engaging in the more complicated restoration process.
It is not only an aesthetic pleasure to own a knife made of beautiful and high-quality damascus steel - the cutting qualities of such a knife exceed the characteristics of stainless steel blades in many ways, and with a good and proper sharpening its cutting becomes very aggressive. The main thing is to take care for your blade and prevent the appearance of brown patina and rust according to the tips given in this article.
With electronic level sensors and angle finders you can measure angles, inclinations and slopes quickly and precisely, save and sometimes transmit measurement values even wirelessly. The electronic display shows the measured values to a decimal or hundredth digit accuracy. Some instruments are equipped with an audible signal, and for measurements overhead or in hard-to-reach places, the values on the screen flip automatically.
Digital angle finders and level sensors can be extremely useful when setting up and leveling almost all types of equipment, such as platforms for leveling machines, foundations, various building slabs, etc.
They can also be used to check the straightness of surfaces, flatness and matching for parallelism.
The ability to check the parallel alignment is very important in the process of sharpening knives using a state of the art electronic device, which many people call an electronic angle finder.
The way a level sensor or angle finder works is based on a special electro-mechanical sensor that measures the deviation from the center position. With this method it is possible to determine dynamic acceleration as well as static acceleration - that is, inclination or rotation.
In fact, some of the devices are purely angle finders, while others are also level sensors. Besides, there are devices of various level of complexity and accuracy. There are devices that are called inclinometers, but they are the same as level sensors.
Most commonly used devices are bi-axial angle finders, with an accuracy of 0.050. If the device is capable of measuring in three dimensions and the error is about 0.010 or even 0.0010 , then the measurement accuracy and thus the price can be significantly different. As an addition, some of the advanced models have a calibration option, and the more expensive professional devices come calibrated from the manufacturer's factory.
Quite often a higher priced tool may actually be of higher quality. When in doubt, it is worthwhile reading the specifications of the tool or contacting the seller and/or manufacturer to clarify the specifications.
Scientifically, all angles are determined by comparison with reference measures, which can be angle ruler squares, cone gauges and angle gauges.
With a digital angle finder you can measure absolute and relative angles. Absolute angles are determined by first measuring on one fixed plane, e.g. the surface of the workbench, and then another plane in relation to the first. Relative angles in sharpening are seen as a measuring process, which has a number of fluctuating variables. All parameters depend on the particular design of each sharpener individually.
The most important advantage of using an electronic angle finder for knife sharpening is that you can quickly solve two basic tasks, such as setting the required sharpening angle, as well as controlling the angle when changing abrasives.
The first step in sharpening a blade is to position the blade properly on the base of the sharpener or in the clamps, so that the center of the blade is centered in relation to the axis of the abrasive holder guide. In turn, the guide must be as strictly perpendicular as possible to the line of the cutting edge of the knife blade.
The second step is to choose and set the angle which you want for your knife. To do this, you have to find a flat surface on your sharpener, relative to which you will determine the desired angle.
For various sharpening tools, this can be any flat area on which the angle gauge can be placed. The correct way to place the angle gauge is to have the center of the body coincide with, or at least parallel to, the perpendicular line of the abrasive holder. This is the point where the value is reset.
The third step is to put the angle finder on a flat surface on the abrasive holder. You will see the actual position relative to the horizon line of the blade on the display. Then, use the vertical adjustment of the abrasive holder guide until you get the desired value on the angle finder display.
While the sharpening of blades with a blade flat is simple, you may find it difficult to sharpen blades with bevels from the spine. You can find different technical solutions on different devices. However, if you are using an Apex type sharpening system that has no clamps, only a working surface, this is not a problem at all.
You need, as before in step 2, to find a flat plane and re-zero the gauge on the surface of the sharpener. Then you need to fix the knife on the same working surface and measure the angle on the plane of the knife's bevel.
Then you have to divide the measured data by two and sum up with the required angle per side.
There is another little trick. In order to get the best possible result on the blade secondary bevel, it is best to put the middle of the abrasive surface on the cutting edge. If you do that, you are more likely to get the same result with both the top and the bottom end of the abrasive touching the bevel of the blade.
General Instructions. Whether using a mechanical or a digital angle finder, the fact about the sum of the angles of a right triangle, which is practically what all relatively professional sharpener designs are designed upon, is fundamental.
If we take as an example some design of a sharpener with specifications close to the practical dimensions, we get the following:
b, mm |
c, mm |
Angle α degrees |
Angle β degrees |
315 |
340 |
22.1° |
67.89° |
335 |
350 |
16° |
73° |
Measurements taken from the same tool indicate that as soon as the position of the abrasive holder guide shifts from the central axis of the sharpener, the so-called orthogonal plane, the angular value changes at the point of contact of the abrasive with the cutting edge. In practice, the further the contact point is from the center of the sharpener, the smaller the angle will be.
Despite the fact that digital angle finders are groundbreaking solutions in the field of knife sharpening and have a number of advantages compared to mechanical ones, they also have a number of technical drawbacks, which should be considered separately.
At the moment we can distinguish two groups of devices by size and weight:
Some manufacturers produce inclinometers, like TSPROF, but they are much larger and sometimes more expensive. Some compete with each other in terms of measurement accuracy.
If you think about the building angle finders, because of their size the manufacturers of sharpeners need to come up with a design and location of the reference platform and a special platform on the abrasive holder.
Some also consider it inconvenient to try to view the readings from large devices, because the reading is only possible from the side. However, almost all angle finders have a "HOLD" button, which solves this issue.
The main problem with using the building angle finders is that they can only give correct values in an orthogonal plane. When used properly, these angle finders do exactly that, because that is what they are designed to do. Level sensors, may show the angular value of the plane deviation, but this has nothing to do with the sharpening. This is due to the design of the sharpener and the geometry laws.
The advantage of classic devices, as mentioned above, is that you can fit a powerful and accurate sensor into a large body. On top of that, you can integrate a large built-in battery into such a body or make a model with removable batteries.
At the moment, TSPROF offers two models of self-made, unique angle finders. One of them is designed for use on the abrasive holder of their top of the line sharpening system K03 Pro. The other is designed for other sharpeners of the company.
The Axicube-I has an integrated bottom dovetail abrasive stop and works with the K03 sharpener. If you need it, you can remove it from the holder and use it for other purposes, but with limited convenience, because it has no magnets.
If you will need to use water abrasives, however, the possible water contact could affect the performance of this device. This angle finder can be purchased with the new rod (for older model - K03), without the rod (for K03 Lite) and it comes included with the K03 Pro kit.
Being within the field of view of the user, the Axicube-I angle finder shows the current angle of the cutting edge during the sharpening process when it is on. When the angle measurement is not required, the angle finder can be switched off.
TSPROF Axicube One has an inclinometer mode. The concept comes from geology and is associated with drilling technology. In short, inclinometry, in this case, is the process of determining the angle of the abrasive holder guide and its deviation from the absolute vertical line relative to the cutting edge of the blade.
As for the MEMS (Micro Electro Mechanical System) sensor, these systems are used to create more accurate angle and inclination sensors. MEMS sensors consist of mechanical elements as well as special mechanisms and electronics on a common silicon substrate, which make the tool more accurate than ordinary biaxial devices.
The advantage of this model, in addition to everything else, is the presence of 4 modes and with it the possibility to use the tool with all TSPROF sharpeners, as well as an ordinary household angle cube.
Due to the fact that the body of Axicube One is larger, the device has a lithium-polymer battery of higher capacity.
In terms of performance, accuracy and size, this model can be used with all of TSPROF's newest models. Since this knife angle finder can be used with any other household sharpeners and you are probably thinking about buying your first angle finder, the Axicube One is definitely one of the best options if you are looking for the best angle finder for knife sharpening.
When using a device of any class or size, you should follow these rules to ensure that you get the right readings and that the device serves for a long period of time:
If you as a sharpener or advanced user miss the mechanical angle finder (that is present in many advanced sharpeners), or you simply do not have this part on your device, then a digital knife angle finder is a must have.
A quality device can range in price from $100 - $130 and it is definitely worth the money. When you buy a quality device, you get high quality assembly, warranty service and a device that exceeds the technical capabilities of different cheap solutions. What is most important is that you can be sure that it will work properly and you will get accurate readings.
The preparation of natural and synthetic stones for knife blade sharpening is connected with the knife sharpening itself. Obviously, to properly make a knife blade sharp, the surface of the abrasive must be flat and clean.
There are actually a number of reasons why natural stones and bars may not be flat, and wearing out is the main problem with any abrasive. Every whetstone gets a dished out area in the center, which makes it impossible to give the proper flat surface to the secondary bevel of the knife blade edge and make it sharp.
One of the reasons to level a knife blade sharpening whetstone or a bar may be the dished out areas caused by the industrial or manual production of the abrasive stone. This applies to Apex type stones used in benchtop household sharpeners with a guide of various levels of complexity and grinders.
Besides, you can change the level of grit of natural stones. Running a little ahead, we should say that if you give some natural sharpening stones an almost mirror-like surface with the intention of using them for a super fine finishing, they may not work. In the future, such natural stones will bring back their working grit level no matter how hard you try to make them finer.
Some aluminum oxide based, diamond and CBN based artificial stones should be broken in before the first use and occasionally refreshed during use.
Breaking in means removing a small layer of material from the abrasive bar. It is most common to do with artificial abrasives. This should be done, for example, with Boride T2 abrasives, because the actual working area of the abrasives is on the sides, not on the plane with the name.
The refreshing is similar to breaking in, in purely mechanical terms, but serves to refresh the abrasive grain structure if the surface side has become too smooth. In the case of diamond and CBN stones, this process also serves to remove the excessive bonding layer, which prevents the abrasive grains from working.
One important knife blade sharpening step is the abrasive care. After each use, it is essential to clean the individual stones or sets of stones from clogging. This is a process in which tiny metal and coolant particles get into the hollows of the abrasive and prevent the grit from working and renewing properly.
Lapping is also one of the processes used to preapare abrasive stones. Lapping is a fine finishing process for the finest abrasive stones. It is usually done with diamond stones on a steel plate using diamond pastes. Afterwards, such stones are used to create micro secondary bevels on the knife blade edge.
Natural stones can be lapped using their own slurry, when water is added to the working surface of the stone and several strokes are made with a fine whetstone with a closed structure, in order to "knock out" the grit from the stone. Due to the lapping on the clean glass, the whetstone gets its natural grit level.
The two following points are extremely important when working with abrasive during preparation and in knife blade sharpening in general.
Most people believe, that when they buy a new sharpning whetstone or bar, they can have confidence that it will be perfectly flat. It is likely to be true only if this is a truly high quality product that comes from a trusted manufacturer. It is better to doubt it than to try to fix mistakes in the knife blade edge sharpening process. This can cause damage or distortion of the secondary bevels surface side, If you do not check the flatness of the abrasive.
In mass production, the manufacturer's quality control department cannot completely rule out some small tolerances in the manufacturing process and the material itself.
For this reason, you should always check the condition of the working surface side of the abrasive before use.
How to do this? You must have some sort of calibration tool, with at least one perfectly leveled plane.
In the best case scenario, such tools would be length gauges that come in sets with special alignment rulers. However, this is an exception to the rule, because such tools are very expensive and it makes sense to buy them only if you really need them.
A good and much cheaper tool for checking the flatness can be a caliper or at the very least a metal ruler.
You can check the flatness of the tool itself by placing a caliper or ruler against glass or against each other. If this test does not show significant deviations, then your tool is straight and you can use it to check your sharpening stones.
Abrasive hygiene is a very important aspect of the abrasive whetstone preparation process. It is very important to remember that abrasives of different material removal rate are used to preapare the stones. For this reason, when switching to finer abrasive powders, the surface of the whetstone itself and the plane on which the whetstone is levelled should be as clean as possible to avoid damaging the contacting planes.
A more detailed step by step description of the process is given below.
The mechanism and basic tools used to preapare knife blade sharpening stones, regardless of the reasons described above, are almost the same.
Silicon carbide powder is the main abrasive agent used to prepare the free-grit abrasive stones and grinding bars.
Silicon carbide crystals are usually colorless and shiny. Black silicon carbide powder is the most common, but there is also green powder. The green powder is more pure, more fragile, and crumbles faster, so it has a higher abrasive power.
Such powders are used for industrial finishing of metal surfaces and metalworking tools of high strength.
In knife blade edge sharpening, such powders can be used to prepare almost all sharpening stones and grinding bars. An exception to this would be a high-strength, closed-type bonding agent. For example, Idahoner Fine and Ultra Fine sharpening stones have a closed bonding type.
Sharpening stones are processed on the free grain - silicon carbide powder in our case, because it is the refreshing and crushing of the abrasive grain that provides the necessary material removal of the sharpening whetstone.
To level out various bumps and different materials, you need the silicon carbide powder of various grit sizes. The best one for roughing and quick removal can be used starting from 80 FEPA units. Further you can use 220, 360, 600 and 800.
Powder change step is approximately a factor of 1.5 to 2, but this is just an advice.
For powders with a FEPA value above 800, many experts have different opinions. The reason is quite simple. There is no point it trying to level out a sharpening whetstone or bar to an almost mirror-like surface. After the first knife blade edge sharpening use the surface side will get more coarse.
Besides, if you still manage to polish a hard whetstone, it will not work as expected. In addition, such fine powders are quite rare.
It is necessary to know one important feature of sharpning stones and bars - there are a number of stones with an open structure - soft and coarse abrasives and for their leveling and finishing it is recommended to use silicon carbide powder of twice the grit. For example, leveling a small dished out stone of 600 JIS (25 µm) grit aluminum oxide stone can be started with 120 grit powder, continued with 220 grit, and completed with 360 grit, which corresponds to the grit size of the stone itself. The use of finer powders is no good.
The glass should be tempered and have a sufficient size. The size depends on the length of the knife sharpening stone or bar that you want to level. It is not important if the glass is rectangular, square or round. The thickness should be about 8-10 mm and the chamfers should be removed.
The same glass for levelling stones of different grit levels is not appropriate. The reason is - imagine you were leveling coarse abrasive on 80-120 grit powder, it would not be reasonable to work further on 200-300 or even 400 powder grit, because the glass surface side is too rough after 80-120 grit and will not give any further results. But taking into account that the glass has two sides, the use of it on the other side can save you some money.
It is best to use a separate, independent surface side for each grit of silicon carbide powder.
The technique of moving the bar across the glass is quite simple - it can be an infinity sign or a zigzag motion or even a circular motion. It is a good idea to change the position of the bar as you work, so that the material is removed evenly, and you should not put pressure on the bar, just hold it in place.
You need water for the powder to work properly, and a 0.75-liter plastic spray bottle. The bottle for spraying flowers or houseplants is the perfect solution. At the hardware store you are sure to find something. You can also use an empty bottle of household chemicals for cleaning windows.
Having a spray gun is necessary because water in the form of a small cloud covers the fine powder and prevents it from spreading. Be especially careful with powders smaller than 300 grit, because they tend to spread through the air and this is bad for your health to inhale them.
A rubber or silicone mat can be very useful to keep the glass from sliding on the work surface.
During work, the silicon carbide powder crushes and creates a fairly thick slurry and will dry out as it works if it is not washed away.
To keep slurry from leaking from your workplace, place the mat with the glass in a plastic tray and occasionally drain and flush all waste slurry into a separate bucket using a spray bottle.
You should also thoroughly rinse off all waste slurry and powder residue with water after you finish using one of the glass surfaces to avoid damaging the prepared surface of the sharpning stone.
You will need a regular pencil to draw a grid or just oblique lines on the surface of the bar. This is required to see how much material is removed from the bar and whether you are reaching the dished out spot.
When you are approaching the dished out area in the leveling process, it is best to also check the thickness of the abrasive on both ends of the bar. It would be best to do this with an electronic micrometer. That way you will know exactly how flat your stone is over the entire area.
It is necessary to prepare all accessories and consumables and proceed as follows:
If you follow the above instructions, you will have a sharpening stone ready to go. If you want to do it properly all these recommendations will come in very handy.
The more you practice doing this, the better you will get each time you do it.
Remember that after you finish levelling the surface of the sharpening stone, there will be a sharp edge on each side of the stone. If you leave the edges as they are, they will come in contact with the knife blade secondary bevel and can cause considerable damage that will be difficult to repair. It is extremely important to remove each edge by chamfering them. To do this, you can use a 400-600 grit powder.
You need to take the stone in your hand and put it to the glass at a 45 degree angle and without pressure run a few times over the thin water slurry of silicon carbide. You will immediately notice a thin chamfer on the edge.
Sharpening rods are one of the most widespread tools for honing the knife blades that are used mainly in the kitchen. First of all, it should be noted that when using a sharpening rod, strictly speaking, you are not sharpening the knife, you are honing it just to make it sharp at a certain level. The line of the cutting edge is restored during honing and thus the knife becomes sharp again. Secondly, sharpening rods are used for knife blades made of relatively soft steel, which do not need a complete sharpening cycle to become sharp, or when you just need to make something sharp quickly. Some sharpening rods can be so coarse that the process gets very close to sharpening.
A sharpening rod as a tool for honing various knife blades in comparison with all sharpeners and other tools for honing is used almost everywhere. In addition, kitchen knives and sharpening rods are made for each other, even if there is a sharpening device - it is a classic.
The basic rule for choosing a sharpening rod is length. The length of the sharpening rod should be at least the same length as the blade of the knife or slightly longer. Most often there are sharpening rods with a circular cross-section, but there are also oval-shaped ones. Increasing the radius of the sharpening rod allows a larger contact zone during the honing of the cutting edge which speeds up the process.
Hunting and tourist knives can also be honed with a pocket-sized ceramic or diamond sharpening rod, when a fine honing is enough to continue the task. Sharpening rods for this class of knives are shorter in length and can have combined surfaces.
Among all the sharpening rods there are basically three main groups depending on the material from which the sharpening rod is made:
Carbon steel sharpening rods are often very expensive and have almost no abrasive effect. They are only used for honing and to straighten the cutting edge line.
Sharpening rods of this category are made of tool steel with a sufficiently high hardness level of up to 65 HRC, with the addition of chromium for high wear resistance. Some knife brands offer two different grit sizes in their program. Sometimes there can be up to three pieces in a set. Most often, however, two - a medium and a fine sharpening rod.
A medium-grit sharpening rod is most often used for kitchen and utility knives. Fine-grit metal sharpening rods are the best solution for honing butcher knives and other knife blades to the desired level of sharpness. Another suitable case is when knives have already been pre-sharpened on a sharpener and all that is left is to remove the burr from the cutting edge.
Ceramics as a material for sharpening rods have a fairly straight surface and are quite affordable. Most ceramic sharpening rods are pretty coarse, are suitable for honing knives of any hardness, and they are cost-effective. There are different manufacturers with different grit levels, so it is worth finding out more info about the grit level before you buy. Experience shows that an 800 grit ceramic sharpening rod is probably one of the most popular and effective tools in the kitchen for most knives, including chef's knives.
Tungsten carbide or chrome oxide coated sharpening rods are more durable than ceramic ones and you can be sure that the sharpening rod will not shatter if dropped onto a hard surface. These materials are also safe for cooking.
Diamond sharpening steels are made with electroplating, and a chromium based coating is often used as a bonding agent to bind the diamond grains. This kind of coating gives the sharpening rod a high wear resistance and a high level of abrasiveness. Such sharpening steels can be used for sharpening and you may not even notice how quickly a good burr rises. Such sharpening rods are used mainly for removing a large amount of metal, as a quick sharpening tool. You have to handle such tools with care and understanding, because it is quite easy to overdo it. In some cases, the price of a diamond sharpening rod can be an indicator of its quality.
According to the grit size, sharpening rods are divided into three main groups:
The smaller the thickness behind the blade edge of the knife and the less metal is supposed to be removed during honing, the thinner the honing rod surface grit should be.
Regardless of the material of the sharpening rod, the way to use it remains the same.
For convenience, the top of the sharpening rod should be placed against the surface of the cutting board vertically and you should make a translational motion from the heel of the blade to the tip at an angle of about 15 - 20° with respect to the sharpening rod. Repeat these steps on each side of the blade in turn. More advanced users or professional chefs hold the honing rod in their hand and hit the right angle with ease. Besides, sometimes someone's speed of work with a sharpening rod can be surprising, but that is why they are called professionals.
It is enough to follow a few basic rules in order to do the proper honing and achieve the right result. With following these rules even a beginner will not find honing difficult:
Real professionals have a trick with the usual full-size sharpening stones. On large natural or artificial stones with a dense structure, one of the corners is rounded, and this edge of the stone can be used as a sharpening rod for honing.
In the past, when sharpeners were not yet common in everyday life and professional kitchens, chefs used a special metal strip of hard steel as a sharpening rod for honing their knives.
This may sound complicated, but it is not. To hit the right angle, it is enough to properly align the plane of your knife's secondary bevel and the abrasive surface of the sharpening rod. You just need a little practice and you will feel how the shoulders of the edge rest on the abrasive. To control what you do, you can use a black marker to draw a few dots on the secondary bevel, align the plane of the secondary bevel to the abrasive and slowly make a few honing movements with the blade.
Then you need to check the condition of the marks you made earlier and you will immediately see if you got the sharpening angle or not. If the marker paint is removed closer to the cutting edge, it is likely that the angle is too great. If the marker paint is removed closer to the shoulder, it is likely that the angle is too small.
Over time, you will definitely get a sense of how to properly contact the secondary bevel with the sharpening rod and you will develop muscle memory. Then you will be able to get the angle without a marker. You can remove the remains of the marks with regular alcohol, clean the blade with water and your sharp blade is ready for use without the complicated process of sharpening.
There are also some auxiliary Angle Guides for Sharpening Steels, which are mounted on the sharpening rod and can be purchased in kits. It is enough to put the blade of the knife to the guide and run the blade in this position from the heel to the tip of the blade on the surface of the sharpening rod, while trying to maintain the angle, without applying too much pressure.
There are many modern types of sharpening rods on the market. Ceramic and metal rods with different grit and cross-sectional shapes are mounted in a wood or plastic base for easy angle control.
Systems with a series of sharpening rods are basically the same in technical terms compared to a common sharpening rod. Because the rods are placed in the base at a certain angle, the user only needs to hold the knife blade vertically and slide the blade along the rod with the desired grit down and towards themselves.
Systems with rods have a number of advantages over common sharpening rods:
These systems are much better than the usual sharpening stick, and they are even better than the most advanced pocket or field sharpeners because of the length of the rods and their variability. Some people may find the significantly larger size and weight to be a slight disadvantage.
We already clarified that the essence of using a sharpening rod is not just to run the blade along the sharpening rod at a recommended angle, but also to get into one plane with the blade secondary bevel. It would not hurt to know exactly what is the angle of your knife blade edge and what kind of steel it is made of. And even now the question may come up, "Why do I need to know that when I can just use a sharpening rod?"
This is where the problem lies - we know that the sharpening stick can hone, but not sharpen the knife, and that when the angle is not maintained properly, the sharpening rod can create a kind of micro-bevel on the blade and basically straighten the cutting edge. At this point, we would like to ask a counter question to the readers. What will you do if you spoil the angle of the edge with a large sharpening rod? And what if the secondary bevels are no longer straight and become convex due to frequent honing and the sharpening rod is no longer able to cope with the task?
Only a household or more advanced professional knife sharpener can do the job. The advantage of the sharpener is that it creates straight secondary bevels with a properly shaped secondary bevel plane and a good cutting edge. The sharpener does not preclude the use of a sharpening rod, because it is quick and easy. If you do not have time for a sharpener, use a sharpening stick. If you have the desire and time to use a sharpener, go ahead and use it to sharpen the blade.
It is common to find kitchen knives in the household that have never been sharpened on a sharpener, simply because resharpening or significant removal of metal is unnecessary. Just a quick use of a sharpening rod is enough. And there are knives that one would never hone with a sharpening rod because that would be sheer blasphemy.
It is quite difficult to give an exclusively unambiguous answer to the main question of whether to use only a sharpening rod or only a sharpener, or to use both sharpening rod and sharpener in combination.
As one intelligent person said, "You can ride a horse all your life and never switch to a car, but that does not preclude the existence of a car". It is all about the personal perception of the right thing to do and the specific need at a particular point in time, if you understand what you are doing.
Today, belt sanders and grinders are quite often used for sharpening to quickly remove metal off the blade. The question of whether the belt grinder is some kind of additional unit in a complex with a professional knife sharpener is left open for the moment.
Due to the fact that all belt sanders and grinders are very powerful and complex devices, their use requires a certain theoretical knowledge and experience, without which it will be easy to spoil the blade of the knife.
Many knife masters use belt grinding machines and similar equipment for making knives and shaping secondary bevels, but sharpening knives is associated with a number of technical issues, which to a certain extent look similar, but have a completely different class of precision and a different principle of surface treatment.
The clearest example of a belt sander usage is the removal of metal from a knife blade to fix significant damage. This is practically creating a new knife and no device will be faster. We are not talking about 10 x 1/2 inch belt devices, which can be classified as household sharpeners, we are talking about real professional devices.
Indeed, all belt grinding equipment of various sizes and capacities, including grinders among all devices with electric drives are the most effective tools, both in knife-making and sharpening. Considering the fact that there is a very large range of grinding belts on the market today, this expands the range of their use. The differences in material and grain size of endless belts allow a wide variety of metal processing tasks: from aggressive metal removal all the way to profiling and polishing.
At first sight it may seem that polishing the surface of metal is not much different from grinding and polishing the secondary bevels of the knife blade. However, this is not correct and for a better understanding we need to dig a little deeper into the way the various devices work.
In endless belt grinding, the repetition of standard sharpening angles is possible with the additional attachments and accessories for the device.
The belt sander can be used to sharpen various knives, chisels and other cutting tools, deburring and grinding with reverse rotation due to the frequency converter.
When sharpening inexpensive kitchen, household and carving knives with a small thickness behind the edge or when there are no high requirements for the condition of the secondary bevel, two abrasive belts followed by a polishing step are acceptable if a high level of accuracy is not required.
Sharpening more expensive kitchen and chef's knives, hiking, hunting and fishing knives with bigger thickness behind the edge or with high requirements to the condition of the blade tips requires a different approach. In such cases, it is necessary to use up to 5-6 different belts. The change of belts and partial readjustments also add time to the entire process.
In general, sharpening with such a device can take from 2-3 minutes to 5-7 minutes, depending on the condition of the blade and the need to bring the blade to a specific condition.
Even with the use of a frequency converter to control speed, it is quite possible to overheat the blade and the cutting edge without a coolant supply and proper experience in both cases. A much better but more expensive choice would be a grinder.
The use of the grinder and all kinds of accessories expands the range of possible applications many times over the belt sanding machine and is designed for mass production or commercial knife sharpening.
The main problem when choosing a grinder for a workshop is the lack of a ready-made solution. On the other hand, the complexity of the choice is balanced by the fact that each user can create a convenient kit for their own purposes.
However, even if you get exceptional quality equipment, there will still be some other problems: vibration, heating of the belt and blade cooling, the size and arrangement of the unit on a work bench, storage of accessories, and so on. You need space for all this, but even this is not as important as what you want to use the machine for.
The second rather significant point of using a grinder will be the level of knowledge and experience, which is different from the more basic use of a belt sander.
Little by little it becomes clear that both the belt sander and the grinder have positive aspects, and there are aspects that summarize a number of features that somehow remain in question and affect, whether we like it or not, the final result.
Let us list the most important ones:
The most important and perhaps most decisive factor will be the blade heating.
Many knife masters, when making knives, dip the heated blade into water during roughing and profiling of the secondary bevels. During roughing, the blade is being processed on the belt, when it gets hot it should be dipped into water. Then the process starts again. If you do the same with the blade, which has a small thickness behind the edge, during the processing due to short-term heating and cooling the steel undergoes micro-destruction, which is not obvious to everyone.
There are opinions that, when re-profiling a high-speed steel carpentry tool, short-term heating to 350-400°C will not result in damage (blade turns blue). If this is the case, you really should not dip the tool in water.
However, if air cooling is taken into account, the process is somewhat similar to thermal cycling, which can lead to deep low temperature heating.
Besides, this level of heating is quite significant. If you look at the temperature used in the manufacturing process of the blade, 350-400°C is twice as high as the tempering temperature, which is about 200 ° C.
Despite the fact that a belt sander or grinder can indeed be used to quickly fix the geometry, and the equipment has a certain level of variability, such machines are suitable primarily for roughing, removing chips, correcting significant damage, complex reprofiling or, at most, for budget sharpening.
This equipment is primarily designed for initial machining and first roughing of bevels on blades with large thicknesses behind the blade edge and on blades that do not require high cleanliness and homogeneity of the plane of the secondary bevels. Further sharpening should be manual and performed on a more precise device.
At the maximum precision of a belt sander and a grinder it is still not possible to achieve the results of manual sharpening on Apex type sharpeners due to the peculiarities of the use of endless belts. Trying to make too thin bevels without cooling or to finish the cutting edge on a belt is not the best idea for quality steel and expensive knives, as it can affect the knife maker's reputation.
The cost of the device and consumables for the purchase of belt sanders and grinders is quite high and significantly exceeds the cost of having a manual sharpening system.
The most sophisticated and most technologically advanced sharpeners are the mechanical manual sharpening systems of the apex type, of various sizes and different complexity levels. Each of the three groups of devices: compact, medium-sized, and full-size benchtop systems are designed for tasks of different levels of challenge and volume.
All truly professional sharpening systems from the world's leading manufacturers are the same in their concept. In terms of design, many will look slightly different, but they perform the same function. It's like comparing expensive track bikes or Formula 1 cars.
The fundamental parts of professional sharpening systems are:
A turning mechanism and a rack or lifting mechanism that resembles a microscope adjustment are mounted on the base. In this unit for adjusting the sharpening angle, there is a place to mount a guide rod with an abrasive holder. The position of the angle is adjusted by this unit.
This sophisticated unit is designed to control the stroke of the abrasive installed in the holder in relation to the secondary bevel of the blade, which is fixed in the clamps of the turning mechanism.
Such systems can be complex devices with a number of additional units that can be used to make additional adjustments and achieve non-standard tasks:
Besides, there are sharpening systems that can be upgraded and combined with different components of different models of the same manufacturer so that you can create a knife sharpener for your needs or for sharpening a knife of a certain size or shape of the blade.
The obvious advantages of using such systems are:
All of the above is just a glimpse of the technical parameters, but the most important and decisive thing is not the knife sharpener itself, but the user's understanding of how to use this or that artificial or natural abrasive for sharpening a particular steel. If you have a quality abrasive and the skill of manual sharpening, you can achieve great results even without the knife sharpener. The device gives you control over the angle, and the sharpening is provided by a proper high-quality abrasive.
The natural and artificial abrasives used in hand sharpening and the method of their use are the most important ingredients and the real reason why a belt sander can never be compared with manual sharpening. The abrasives of this class often affect the steel differently due to a much lower pressure, a completely different chemical composition, shape and size of the abrasive particles.
The class of finishing of the secondary bevels surface affects the line of the cutting edge and with that the life and quality of the blade of a certain steel after one sharpening session. However, belt sanding machines and grinders can be used for certain tasks such as grinding, reprofiling or roughing of blades. All of the further and finer steps should be performed with more precise equipment, such as a manual sharpening system.
If you get a chance to try sharpening with professional equipment, you will never willingly give up on a sharp knife that was properly sharpened.
User friendly or as one might put it, easy sharpening of knife blade edge may seem to be an important point for beginners, but in reality this is not exactly the case. The very convenience of sharpening can be understood as the convenience of the work process, and this may actually be true in some aspects.
One should also understand that the concept of convenience and simplicity may be quite different for a beginner and for an advanced user or a professional. Of course, a lot will depend on the knowledge of theory and experience with different tools and equipment. The measure of experience will be determined not only by quantitative, but also by qualitative indicators.
For example, it would be quite clear and best for an amateur chef to run the blade edge of kitchen knives over an ordinary hand-held pull-through sharpener for knives to make the cutting edge of knives sharp. An amateur chef may not even know what the cutting edge is, what matters most is that the knives are sharp and the sharpener is easy to use. On the other hand, a professional sharpening master can sharpen the same knife in several steps, but much better and with significant costs on a more sophisticated equipment. It is as easy for a sharpener as for an amateur chef, but whether it is always convenient is a somewhat different question.
User friendly or simple sharpening can also be described as a familiar and understandable process for a user or a beginner. The only thing is that habits and needs may also be different.
Among the common devices that serve for user friendly and at the same time easy sharpening of knife blade edge we will go on a scale from the most affordable to the most expensive. At the same time we can also consider them in terms of efficiency, from the common, to the quickest solutions. It is also worth saying that, for example, a sharpening steel as a tool is not related to sharpening, as some people might think, it is a tool for honing. Some of the devices have a limited focus, while others are more versatile in their use.
The most classic, widespread, and most accessible method of sharpening, but also the most difficult, is manual sharpening on full-size natural stones or synthetic bench stones. It is believed that if someone has this skill, he or she will be able to use literally any tool or device for sharpening the knife blade edge. The classic method has a number of challenges and requirements, but curious minds have figured out a solution to keep things simple.
The main thing in this method is to be able to maintain or control the secondary bevel angle that forms the cutting edge of the blade. It is extremely difficult to reprofile a knife with manual sharpening, but it is much easier to maintain an existing angle of the blade edge.
Since most kitchen knife blade edge types have a very thin thickness behind the blade edge, reprofiling them is easy, but reprofiling the knives of hunting or camping knives is much more difficult.
Craftsmen often recommend putting a certain number of coins to control and set the angle, and then guide the blade edge over the abrasive stone. This method has the right to exist, but there is an even easier and better way.
To solve this issue, people created special sharpening angle guides, which remind office clips, and are attached to the blade's spine.
Such guides are sold in kits and can be designed for different spine thicknesses and different sharpening angles. You just have to clamp the spine of the blade at about the middle of the blade length and you are free to start sharpening according to the instructions for use of your natural stones or synthetic abrasive stones.
These guides are suitable for the blades of kitchen knives, chef knives and various other knives. To use them or not, it is up to you to decide.
One of the most common kithen tools for honing a blade edge is a sharpening steel rod. First of all, the sharpening steel is used for honing, not sharpening. Honing is used to make the cutting edge blade sharp at some level. The benefit of honing is that if the blade edge is only slightly dull, it is unnecessary to perform a full sharpening.
The main parameter of a sharpening steel is the length - it should match the length of your knife blade edge. The most common sharpening steels are those with a circular cross-section, yet sometimes they can have an oval shape. An oval shaped sharpening rod has an increased contact spot due to the increased radius.
Sharpening steel rods can be used for hunting and hiking knives, or, in other words, whenever a fine honing is enough to get back to work.
All made sharpening rods are mainly divided into three groups according to their material: ceramic, metal and diamond. Sharpening steels are also divided by grit size: rough (up to 800 grit), medium (about 1000-2000 grit) and finishing (2000 grit+). The smaller the thickness behind the edge of the knife blade and the less metal you intend to remove during honing, the finer the grit the sharpening steel should have.
Ceramic sharpening rods have a very smooth and even surface. Such sharpening steels are suitable for honing knives of any hardness. Different manufacturers have different levels of grit, so you should ask about it before buying. It is proven that the 800-grit ceramic sharpening steel is one of the most effective and best knife sharpening tools for making a knife sharp in the kitchen, suitable for most knives, including chef knives.
Steel sharpening rods are made of a tool steel with a hardness up to 65 HRC with the addition of chromium for high wear resistance. Some knife brands offer two different grit sizes: medium and fine. A medium-grit sharpening rod is mostly used to make kitchen and household knife types sharp. Fine-grit steel sharpening rods are the best knife honing solution for making butcher and other knives sharp at the desired level. The sharpening rod should be used for honing knives that have previously been sharpened on a sharpener and require only deburring of the cutting edge or making sharp .
Diamond sharpening rods are more aggressive and are used for large metal removal as a quick sharpening tool. Therefore, one should handle such tools with care and understanding. In some cases, the price of a sharpening rod may be an indicator of its quality.
When using a sharpening rod to make a knife sharp, you need to pay attention to the following moments (this way even a beginner will get it right):
Sometimes, large natural stones or artificial sharpening stones with a dense structure have a round bevel on one of their sides, which can also serve as honing stones.
This may seem complicated to some people, but it is really not. How to get the right angle? Just use a black marker to draw a few dots on the secondary bevel of the blade edge and slowly make a few honing motions with the blade edge on the sharpening rod at the needed angle.
Then you should check the condition of the marks and you will understand if you are getting the needed angle or not. If the paint is removed closer to the cutting edge, it means that you are honing at too great an angle. And if the paint is removed closer to the shoulders of the bevels, it means that the angle is too small.
Over time, you will develop motor skills, and you will be able to get the angle without a marker. Afterwards, you can simply wipe off the marker residue with alcohol, rinse with water, and you can use your sharp knife without sharpening it.
There is one of the varieties of sharpening rods when the rods with different grit and different cross-sectional shapes are mounted in a wooden base for easy control of the angle.
Rod systems are not much different from using a sharpening rod. It involves the user holding the knife as straight as possible and running the blade edge across the rod with the desired grit in a downward and upward direction.
Rod systems have several significant advantages:
These systems are much better than a honing rod, and they are even better than the most advanced pocket sharpener because of the length of the rods and their variability. A small negative point for some may be the significantly larger size and weight than a regular honing rod.
Pocket knife sharpener devices are somewhat similar in function to the usual pull-through kitchen knife sharpener devices. This type of sharpener can have from one to four different stone surfaces, and it can be very useful in everyday life.
Typically, the first work surface is a high-strength tungsten carbide insert with a grit size of about 400 grits. The second surface can be up to 1000 grit. The next option can be ceramic stones with different grit sizes. Some include diamond folding rods for sharpening and honing a serrated blade edge.
This sharpener type is user friendly and quite easy to use even for novices. They are very compact and can be carried in a pocket or worn as a keychain. Sometimes such a sharpener can have a micro compass and some come with a ferrite fire rod. This makes the sharpener useful to a fairly wide range of users in lots of situations.
Anyone who does not want to go into the details of sharpening and just needs to make an inexpensive knife blade edge sharp will find this solution the best.
Sometimes the lack of consistency and quality of the stone surface is more than compensated for by the relatively low price of the sharpener itself.
One way similar to manual knife sharpening with a full size bench stone or a regular water whetstone is often to use various stands and holders of synthetic stones and natural stones. The base of the stand may be rubber-coated or have rubber feet, which keeps it from slipping on the table surface and can level out possible differences.
Besides, the stone plane is raised above the table surface and it becomes much easier to hold the knife by the handle without touching the surface of the work bench.
Such stands are flexible, but there are more technologically advanced solutions, which are designed solely for the use of branded stones.
Some brands equip their devices with special ledges, which are made at certain angles to the surface of the stone and serve as a kind of guides. It is enough to put the knife to the guide and, holding the blade in this position, make sharpening motions. Then turn the blade edge to the other side and repeat the process until you achieve the desired result.
Some models are equipped with a special mechanism with a floating platform, which allows you to avoid having to monitor the position of the blade edge during sharpening the belly part of the blade edge. When the blade edge passes from the middle to the tip, the platform, under constant pressure, tilts itself to the side at a preset angle. This allows a uniform, precise and convenient sharpening of secondary bevels, both at the straight section and at the tip of the blade edge.
Other models are slightly larger in size and even have a special turning unit with three set stones. To change the stone, all you have to do is turn and lock the console and you can continue making the knife sharp on the next finer stone for a finer finishing. This makes it possible to sharpen a wide range of blade edge types.
Thus, so-called stand holders for large stone blocks or natural stones give the user a significant number of advantages:
It is worth mentioning one group of devices suitable for a simple knife sharpening work - these devices are almost sharpening systems, which combine relative compactness, sufficient functionality and ease of use.
System of this kind consist of a special blade clamp with special holes into which the guide and stone holder rod are mounted. Such clamps have several fixed angle positions. Some models may have three angle positions, and some even have four. The more advanced solutions have a sharpening angle adjustment that is nearly equal to a professional sharpening system.
You place the knife blade in the clamp, and the stone holder with the guide rod is mounted in the desired angle position. You can sharpen with holding the device in your hands or place it on a small, flat surface for greater convenience.
These systems are sold in kits with their own branded stones with a good range of grits for work with different steels. These kits are user friendly and easy to use at home or in the work shop. Their parts are quite small, lightweight, easy to carry and are perfect for a small work in the outdoors as well. Many brands offer different types of these devices, but they are all, one way or another, pretty good and easy to handle.
The basic idea of any brand electric sharpener is that anyone without sharpening skills can sharpen knives to the level at which they come from the manufacturer's factory or maybe even sharper. A device with slots at certain angles was created to solve this work task. One of the electric sharpener trading companies has become a household name and a kind of benchmark, like Xerox or Google, and of course it became world famous.
The use of an electric sharpener does not involve deep understanding of the knife sharpening. Such devices are very straightforward. To use them, you do not need to take any courses, just read the instructions. You buy it, read the instructions, turn it on and use it.
In order to understand what is an electric sharpener, it is necessary to consider some of their technological features:
This type of sharpener is commonly used for kitchen knives in home kitchens, and the more expensive and advanced models in restaurant chef kitchens. A restaurant may have one electric sharpener or more in their possession, which is quite acceptable in terms of cost. The reason is quite simple - in a restaurant kitchen, the chef gets paid not for making the knives sharp, but for the speed of cooking. This too requires a quick and user friendly sharpening process.
At home in the kitchen, the use of a more expensive electric sharpener is irrational because the stone life of a medium-level sharpener is long enough for a very long period of use.
It is possible to sharpen hunting or hiking knives with such devices if you have them, but you should check their compatibility with the physical specifications of knives. You should especially take into account the spine thickness, the width of the blade, and the shape of the blade heel.
An electric sharpener, whether cheaper or more expensive will stand at the top of any comparison for speed and efficiency in household sharpening, but they are also most often the most expensive.
All written above should be taken as a kind of recommendation or guide, which you can rely on to choose one or another solution for a sharpening work. While an inexpensive pocket or kitchen knife can be made sharp quickly and easily, the situation with an expensive folding or chef best knife may be entirely different.
The simple way is very tempting and may seem the best - simple devices exist and they are really easy to use. However, not everything can be solved by simple methods alone, sometimes you have to resort to more complex devices. Complex devices require knowledge and experience. You can always get more experience and with knowledge and experience complex processes become simple, straightforward and turn into best knife sharpening techniques.
Just imagine: an experienced sharpener has cooked an excellent steak, he picks up a knife - and oh, dear, it is absolutely dull - and there is a pull through sharpener nearby, the cheapest one with a suction cup. He will just use it to make the knife sharp because he wants to eat the steak right now, not deal with knife sharpening. Now that is what they call convenient, quick and easy.
Leather strop has been used as a material for stropping blades for quite some time. It is most common for hairdressers and barbers to use a special leather strop for honing dangerous razors. Leather, glued on a wooden bar with or without a handle, is more often used for stropping knife blades and other cutting tools. One can use special pastes with this technique.
The subject of the use of leather strop in sharpening is somewhat extensive and, in some points, controversial. The average user is likely to be indifferent to all the terms, as they mainly have two main questions: "Why is my knife blade not as sharp as I want it to be?" and "What should I use to make it sharp?" On a household level, it all comes down to simply making the blade sharper.
Knife sharpening is the process between roughing and finishing. It is a step in which the surface of the secondary bevel and the cutting edge becomes considerably smoother than in the previous step.
From a purely technical point of view, sharpening and grinding differ only in the amount of the removed material. You can use smaller abrasive stones to remove large burrs and to remove significant scratches, this makes the surface of the secondary bevels smooth and the cutting edge becomes more uniform.
The burr is also formed at this stage, but it is much finer. Before moving on to the next finer abrasive or to another step, you only need to make a couple of light pushing and askew strokes with the abrasive.
Because coarse abrasives leave scratches and can leave a small burr on the cutting edge during sharpening, sharpeners often resort to the next step - finishing. Improving the quality of the processed surface of the secondary bevels is ensured by the thickening of some metals when they come into contact with certain natural abrasives. Some abrasives can also have a chemical effect on the secondary bevel surface, protecting them from possible corrosion. There is almost no metal removal during the finishing process.
Knife stropping is used to restore sharpness after some minor wear. The degree of wear on the cutting edge can be different and therefore different tools are used for the honing process.
Classic stropping with fine pastes on a leather strop is associated with dangerous razors. You should be aware that razor blades and knives have significant technological differences in sharpening angles and bevel structure.
The difference in strength between leather and paste has an opposite effect on the cutting edge of the razor and knife. While it is possible to sharpen the razor this way, the cutting edge of the knife can get dull if the strop is not used properly.
Therefore, trying to hone a knife using a method that you usually use to make a razor sharp can lead to the opposite result.
When choosing consumables like a wooden or a leather strop, the quality and density of the leather and the proper flat surface on which the leather is glued are fundamentally important. If the surface of the leather and the base is too soft, it can lead to rolling of the cutting edge and bad cutting qualities.
You can buy a leather strop glued to a wooden blank with a compound with a certain grit already applied or without any compound. The advantage of a blank without any compound is that it has a more flexible use. You can also apply the compound yourself on a clean leather strop if needed.
If you are not sure if you will use it right, you can buy a strop with a layer of a compound already applied. The strop can be one sided or double sided. One side usually has a coarse grit compound and the other side has a finer grit compound, which will provide a finer finishing.
If you want to use a sharpener for stropping, you can use leather glued to an aluminum plate. In that case, you should have a kit of them for different pastes.
Always apply the compound to the strop without melting it or using anything else, and rub it into the leather surface with light motions without too much pressure. If the compound is hard and has no bright color, it is difficult to visually control the process of its spreading. But, after applying it to leather strop, even if you can not see any layer of compound applied, it remains in the pores and works. You can tell by the dark traces with a metallic sheen that appears on the leather after you start polishing.
Any dirt from the leather strop surface (metal dust and compound residues) can be removed mechanically, e.g. with the knife spine. Washing off dirt from the leather with solvents is not a good idea, because it can over-dry the leather and deform its surface, which will make it useless.
If you do not keep the proper angle, even with good quality leather on a wooden strop or an aluminum plate, bad things can happen, especially if there is a compound on the leather strop.
The reason is simple and was proved with the use of a sharpening device. When stropping with pulling motions with a leather strop on an aluminum plate and gradually raising the angle by 0.2 degrees up to 1 degree, you will find a definite degradation in the cutting quality after pre sharpening the 440c steel with a hardness of 58-59 HRC or less. If one does not have enough skill, the chances of ruining the cutting edge increase.
Besides that, there may be scratches on the transition between the planes of the bevels and the secondary bevels, or the transition between the planes may get somewhat over-polished, which is also not good. Thus, the blade may appear slightly different from both sides and may simply lose its neat finishing and aesthetics. These kinds of physical defects are annoying, but they are not significant and will not affect the overall performance of the blade and can be fixed later.
The mechanics of honing with a leather strop with both manual way and with a sharpener are quite simple:
If you also read the work of John D. Verhoeven, "Experiments on Knife Sharpening," we can draw several conclusions from all the experiments:
To avoid bad results during stropping, the leather must have a very high density and the paste should only be applied to the polished smooth grain side, and not to the flesh side.
Remember, stropping is not the same as or a substitute for finishing if finishing is necessary. The effect of even the densest leather is simply no match to the effect of high quality finishing abrasives on the blade's secondary bevel.
You can experiment with leather and various pastes, but you must remember that a poorly sharpened blade cannot be finished with leather and paste.
Many users are under the false impression that there is a way to get the sharpness of a folding or fixed blade knife equivalent to the sharpness of a dangerous razor. For some knives you can get this level with great difficulty, but for most not. The difference in blade geometry will not allow you to achieve comparable results, but there is no need for them. The reason is the purpose of the blades.
If you want to deburr or just hone the cutting edge of the knife, you should hold the blade at a greater angle than the existing one on the blade. This means that the bending property of the leather can simply ruin the cutting edge, or at least make it convex.
Polishing the secondary bevels makes the knife look nice, but it is not a reliable indicator of knife sharpness, it is just an option. Secondary bevels may shine, but the knife will slip and cut poorly, without any biting, or the knife may not cut at all.
Stropping is well suited for kitchen knives with straight and convex zero bevels from the spine or with a very thin thickness behind the edge. Hunting and tourist knives with convex bevels are also often stropped with leather and paste.
If you finished sharpening but feel there is a micro burr or any other minor flaws, you can use clean leather. With a sharpener with a fixable sharpening angle, it is enough to raise the value by 0.20 and you do not risk damaging the cutting edge. Even such insignificant values sometimes make a big difference.
Remember, stropping a knife with leather and deburring after sharpening are very different processes. In any case, you have to be very careful and understand what you are doing.